Page 2 - Contents
3 Introduction ................................................ 3 Welcome to our growing ASKO family! ....... 4 Safety instructions ..................................... 4 Safety of children and vulnerable people ..... 5 General safety .............................................. 5 Installation .....
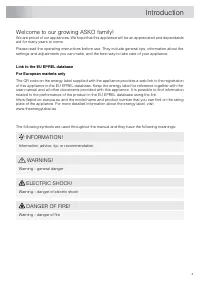
Page 3 - Welcome to our growing ASKO family!; Introduction
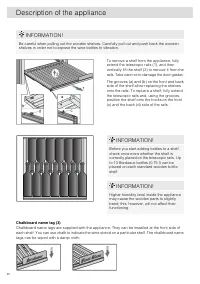
Welcome to our growing ASKO family! We are proud of our appliances. We hope that this appliance will be an appreciated and dependableaid for many years to come. Please read the operating instructions before use. They include general tips, information about thesettings and adjustments you can make, a...
Page 4 - Safety of children and vulnerable people; Keep all packaging away from children.; For European markets only; Children shall not play with the appliance.; Safety instructions
Before the installation and use of the appliance, carefully read thesupplied instructions. The manufacturer is not responsible if anincorrect installation and use causes injuries and damages. Alwayskeep the instructions with the appliance for future reference. WARNING! If the appliance is installed ...
Page 6 - Electrical connection; WARNING! Risk of fire and electrical shock.
• Obey the installation instruction supplied with the appliance. • Always be careful when you move the appliance because it isheavy. Always wear safety gloves. • When tilting the appliance, make sure the door does not touchthe floor. The door glass pane is sensitive, especially to any lateralimpact ...
Page 7 - Use; Do not change the specification of this appliance.
• Make sure that the electrical information on the rating plate agreeswith the power supply. If not, contact an electrician. • Always use a correctly installed shockproof socket. • Do not use multi-plug adapters and extension cables. • Make sure not to cause damage to the electrical components(e.g. ...
Page 8 - Care and cleaning; Risk of injury or damage to the appliance.
• Do not store flammable gas and liquid in the appliance. • Do not put flammable products or items that are wet withflammable products in, near or on the appliance. • Do not touch the compressor or the condenser. They are hot. Care and cleaning WARNING! Risk of injury or damage to the appliance. • B...
Page 9 - Disposal; Risk of injury or suffocation.
Disposal WARNING! Risk of injury or suffocation. • Disconnect the appliance from the mains supply. • Cut off the mains cable and discard it. • Remove the door to prevent children and pets to be closed insideof the appliance. • The refrigerant circuit and the insulation materials of this applianceare...
Page 10 - Selecting the location; Installation and connection
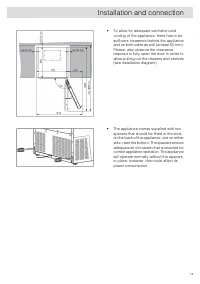
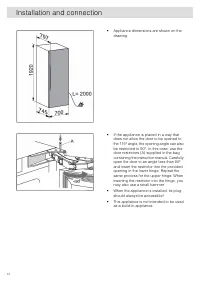
Selecting the location Place the appliance in a dry and well airedroom. The permitted ambient temperaturerange for the appliance depends on theappliance ’ s climate class, which is shown on the type plate. WARNING! Do not place the appliance in a room where the temperature can fall below 5 °C: the a...
Page 11 - Appliance placement
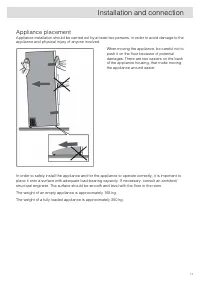
Appliance placement Appliance installation should be carried out by at least two persons, in order to avoid damage to theappliance and physical injury of anyone involved. When moving the appliance, be careful not topush it on the floor because of potentialdamages. There are two casters on the backof...
Page 15 - Connecting the appliance
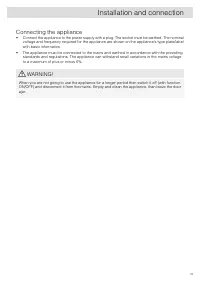
Connecting the appliance • Connect the appliance to the power supply with a plug. The socket must be earthed. The nominalvoltage and frequency required for the appliance are shown on the appliance ’ s type plate/label with basic information. • The appliance must be connected to the mains and earthed...
Page 16 - Before you use the appliance for the first time; Before using the appliance for the first time
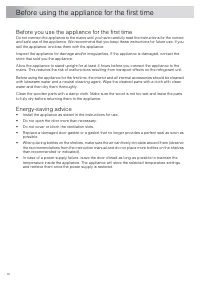
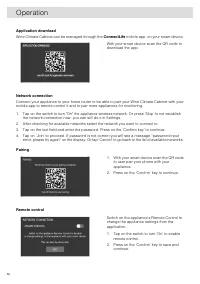
Before you use the appliance for the first time Do not connect the appliance to the mains until you have carefully read the instructions for the correctand safe use of the appliance. We recommend that you keep these instructions for future use. If yousell the appliance, enclose them with the applian...
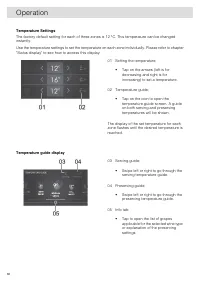
Page 17 - Wine storage tips; Serving temperature; Storing wine
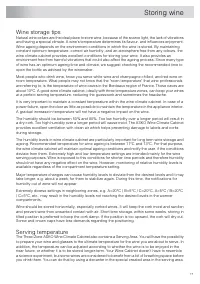
Wine storage tips Natural wine cellars are the ideal place to store wine, because of the scarce light, the lack of vibrationsand having a special climate. A wine ’ s temperature determines its flavour, and influences enjoyment. Wine ageing depends on the environment conditions in which the wine is s...
Page 18 - Storing bottles
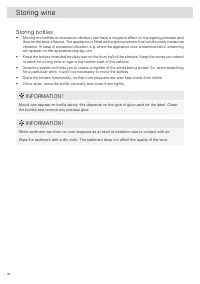
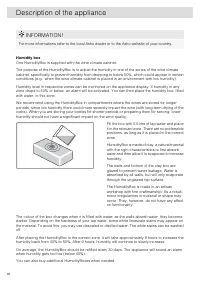
Storing bottles • Moving the bottles or excessive vibration can have a negative effect on the ageing process andthus on the wine ’ s flavour. The appliance is fitted with a special sensor that continuously measures vibration. In case of excessive vibration, e.g. when the appliance door is slammed sh...
Page 19 - Zone A; Description of the appliance
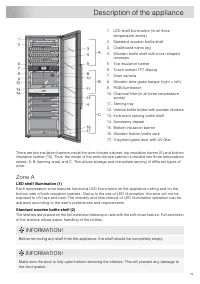
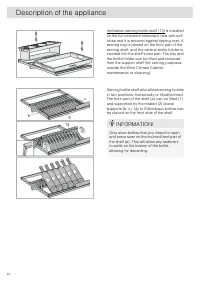
1. LED shelf illumination (in all three temperature zones) 2. Standard wooden bottle shelf 3. Chalkboard name tag 4. Wooden bottle shelf with moon shaped recesses 5. Top insulation barrier 6. Touch screen TFT display 7. Scan camera 8. Wooden wine glass hanger (right + left) 9. RGB illumination 10. C...
Page 23 - Zone B - serving area
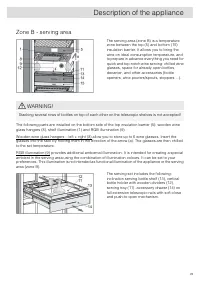
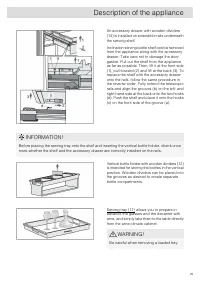
Zone B - serving area The serving area (zone B) is a temperaturezone between the top (5) and bottom (15)insulation barrier. It allows you to bring thewine on ideal consumption temperature, andto prepare in advance everything you need forquick and top-notch wine serving: chilled wineglasses, space fo...
Page 30 - Zone C; Appliance capacity
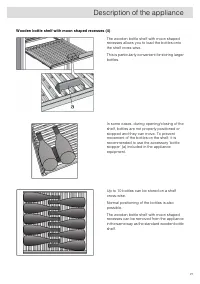
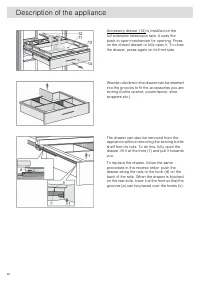
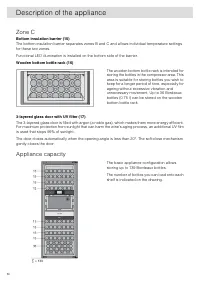
Zone C Bottom insulation barrier (15) The bottom insulation barrier separates zones B and C and allows individual temperature settingsfor these two zones. Functional LED illumination is installed on the bottom side of the barrier. Wooden bottom bottle rack (16) The wooden bottom bottle rack is inten...
Page 32 - Accessory set
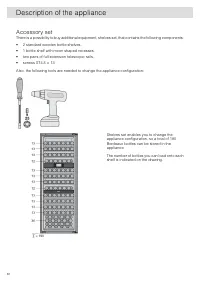
Accessory set There is a possibility to buy additional equipment, shelves set, that contains the following components: • 2 standard wooden bottle shelves, • 1 bottle shelf with moon shaped recesses, • two pairs of full-extension telescopic rails, • screws ST4.8 × 13 Also, the following tools are nee...
Page 33 - Control panel; Operation
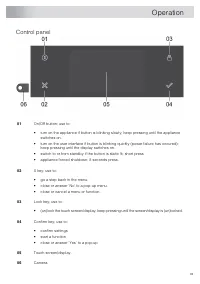
Control panel On/Off button; use to: 01 • turn on the appliance if button is blinking slowly; keep pressing until the applianceswitches on. • turn on the user interface if button is blinking quickly (power failure has occured);keep pressing until the display switches on. • switch to or from standby ...
Page 35 - Initial use
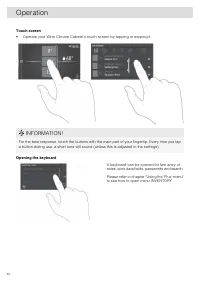
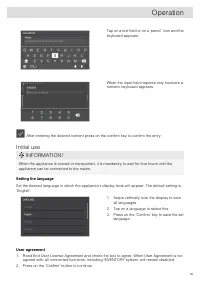
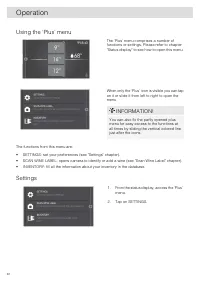
Tap on a text field or on a ‘ pencil ’ icon and the keyboard appears. When the input field requires only numbers anumeric keyboard appears. After entering the desired content press on the confirm key to confirm the entry. Initial use INFORMATION! When the appliance is moved or transported, it is man...
Page 39 - Main displays
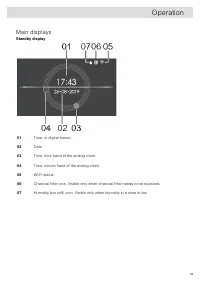
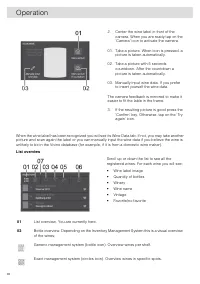
Main displays Standby display Time, in digital format. 01 Date 02 Time, hour hand of the analog clock. 03 Time, minute hand of the analog clock. 04 Wi-Fi status. 05 Charcoal filter icon. Visible only when charcoal filter needs to be replaced. 06 Humidity box refill icon. Visible only when humidity i...
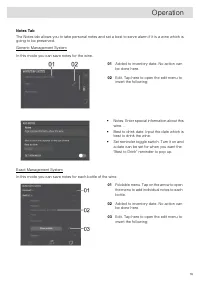
Page 46 - Inventory
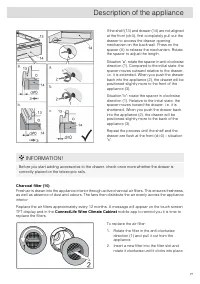
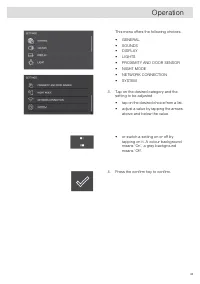
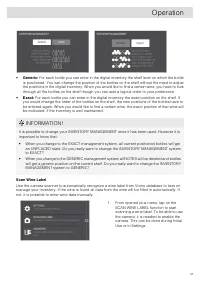
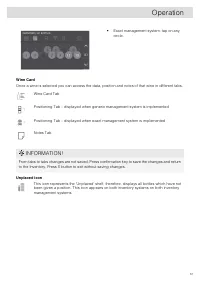
• Camera (switch ‘ On ’ or ‘ Off ’ ) • Key lock automatic (how long to automatically activate the key lock) • Use of Zone B (serving area or shelves) • Humidity (it is possible to stop monitoring humidity and the humidity box refill notifications) • Charcoal filters - Countdown ( ‘ Reset ’ button mu...
Page 57 - Maintenance
Defrosting the appliance • The wine climate cabinet is defrosted automatically. Drops of water will flow through an openingin the rear wall into a tray fitted above the compressor, from where they will evaporate. Cleaning the appliance WARNING! Switch off the appliance and remove the plug from the s...
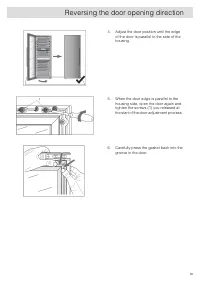
Page 58 - Reversing the door opening direction
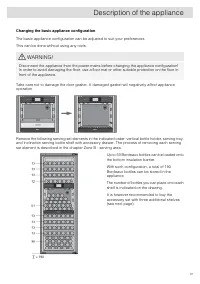
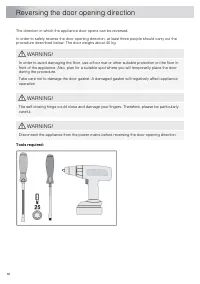
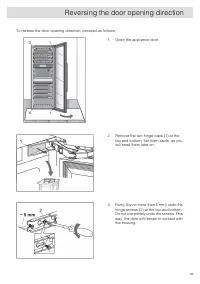
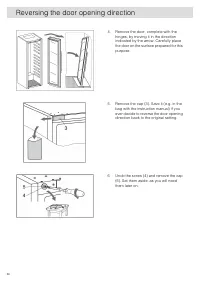
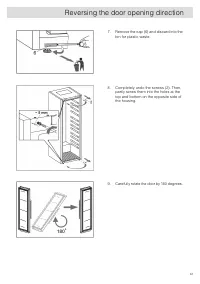
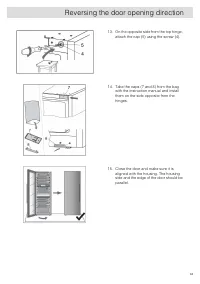
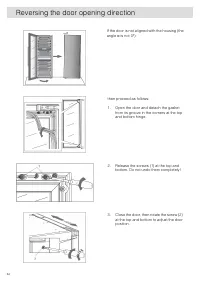
The direction in which the appliance door opens can be reversed. In order to safely reverse the door opening direction, at least three people should carry out theprocedure described below. The door weighs about 40 kg. WARNING! In order to avoid damaging the floor, use a floor mat or other suitable p...
Page 66 - Solving problems
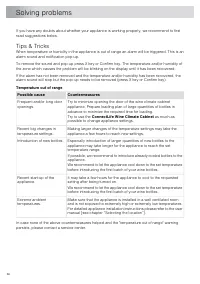
If you have any doubts about whether your appliance is working properly, we recommend to firstread suggestions below. Tips & Tricks When temperature or humidity in the appliance is out of range an alarm will be triggered. This is analarm sound and notification pop-up. To remove the sound and pop...
Page 67 - Error notifications
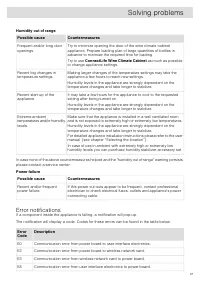
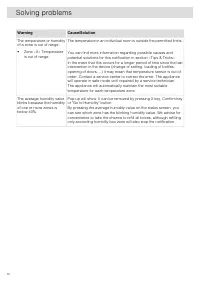
Humidity out of range Countermeasures Possible cause Try to minimize opening the door of the wine climate cabinetappliance. Prepare loading plan of large quantities of bottles inadvance to minimize the required time for loading. Frequent and/or long dooropenings. Try to use ConnectLife Wine Climate ...
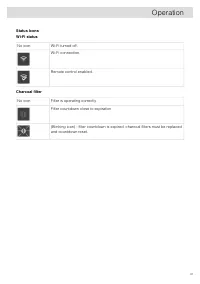
Page 69 - Other display warnings
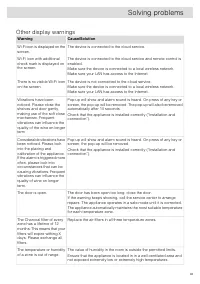
Other display warnings Cause/Solution Warning The device is connected to the cloud service. Wi-Fi icon is displayed on thescreen. The device is connected to the cloud service and remote control isenabled. Wi-Fi icon with additionalcheck mark is displayed onthe screen. Make sure the device is connect...
Page 71 - General problems
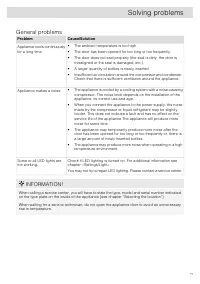
General problems Cause/Solution Problem Appliance cools continuouslyfor a long time. • The ambient temperature is too high. • The door has been opened for too long or too frequently. • The door does not seal properly (the seal is dirty, the door ismisaligned or the seal is damaged, etc.). • A larger...
Page 72 - Disposal of packaging and appliance; Environmental aspects
Disposal of packaging and appliance This appliance is made from sustainable materials. This appliance must be disposed of in aresponsible manner at the end of its service life. Contact the local authorities for information aboutthe method. INFORMATION! See also the chapter ‘ Disposal ’ in the Safety...