Page 4 - Contents
3 Important information for theuser 3 Safety instructions 3 Operating principle 4 Their behaviour: 4 Protecting the environment 5 Installing your appliance 5 Before hook-up 6 Location 7 Description of Your Appliance 7 The Appliance 7 Accessories 9 The timer 10 Traditional functions 10 Combined Micro...
Page 5 - Warning; Safety instructions; Important information for the user
Warning Keep this user guide with your appliance. If theappliance is ever sold or transferred to anotherperson, ensure that the new owner receives thisuser guide. Please read these guidelines beforeinstalling and using your appliance. They werewritten for your safety and the safety of others. Safety...
Page 6 - Protecting the environment
Their behaviour: • They are reflected by metals.• They travel through all other materials.• They are absorbed by water, fat, and sugar molecules. When food is exposed to microwaves itsmolecules begin moving rapidly, causing it to heatup. The penetration depth of waves into the food isapproximately 2...
Page 7 - Installing your appliance
Before hook-up Warning Ensure that your appliance has not beendamaged during transport (broken seal or door,etc.). If you notice any kind of damage, contactyour retailer before using the appliance. In orderto easily locate the make, model number, etc. ofyour appliance, we recommend that you notethis...
Page 8 - Location
Location The oven may be installed either under a worktopor in a column of cabinetry (open or closed) thathas the appropriate dimensions for built-ininstallation. Do not use your appliance immediately (waitapproximately 1 to 2 hours) after havingmoved it from a cold location to a hot locationbecause...
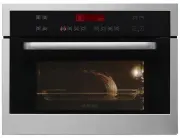
Page 9 - The Appliance; Accessories; The grill; Description of Your Appliance
The Appliance 4 3 2 1 Lamp 3 Control slot 1 Wire shelf supports 4 Programmer 2 Accessories Your appliance is equipped with a flat grid and aglass dish. The grill The grill should never be used with other metalcookware when using the microwave function.However, you can heat food in an aluminium trayp...
Page 11 - djustab; er; The timer
1 2 3 4 5 6 7 8 9 Combination button microwave 9 programmes 1 Auto button microwave 3 programmes 2 The defrost frost. buttons buttons are used to defrost. 3 programmes 3 The adjustable microwave power djustab button is used to set the power of themicrowaves in 100W increments. 4 The traditional func...
Page 13 - The display; Child safety; key symbol appears in the display.
The display The display guides you through programming the various settings: Time, programme time, microwavepower (Watts), weight of food (grams), stopping the turntable, automatic programs. 1 2 3 4 6 5 COOKING ANIMATION depending on theselected function 1000W MICROWAVE TRADITIONALMODES 1 TIME/PROGR...
Page 14 - Setting and adjusting the time; To set the time on the clock; time; by simult; Comments; Using Your Appliance
Setting and adjusting the time After connecting your appliance or after aprolonged power outage, “12:00” will flash in thedisplay 1 2 : 0 0 To set the time on the clock 1 Press the 6:30 . buttons to set the time, e.g 6:30. 2 0 6 : 3 0 1 2 Confirm by pressing A beep sounds to confirm that the time ha...
Page 15 - Programming
Programming Your appliance is now hooked up and the correcttime is set. Open the door using the handle. Place foodinside, then close the door. If the door is not closed properly, the appliancewill not work. Opening the door during operation does notcancel the current programme but simply pausesit. T...
Page 16 - The microwave function; functi; flashing in the; ramme tim; by pow; on; he mic; Con; e adjusted
The microwave function 1000W Direct programming 1 Press the e functi button. Turn the function selector to choose the maximum power micro-wave function. The corresponding display lights up. 1000W appears in the display. flashing in the 1 0 0 0 w The clock’s digits start flashing in the display. Pres...
Page 17 - Express microwave programming; Express programming; lasting up to 2 min 30 sec.; Heating on 2 levels; Heat and hold
Express microwave programming Express programming 1 Make sure your oven is off. 2 Press START/STOP The stop a programme or timer. for 1 second to set an express 15 second programme. The microwave operates at its maximumpower level (1000 W). The oven lights up and the programme starts. You can enter ...
Page 18 - Automatic cooking
Automatic cooking Using the automatic cooking function, the cookingmode and duration are automatically programmedbased on the type of food and the weight. 9automatic cooking positions are available using button PORK, VEAL, TURKEY A1 BEEF A2 POULTRY A3 READY-MADE MEALS A4 FROZEN READY-MADE MEALS A5 P...
Page 19 - Guide to automatic functions
Guide to automatic functions A1> Pork, Veal, Turkey (500 g to 2000 g) A2>Beef This function is used to cook and brown roastsweighing between 500 g and 2000 g . Cooking iscarried out through a combination of themicrowave + circulating heat and microwave. Use a heat-resistant, microwave-safe dis...
Page 21 - Defrosting; Recommendations; Defrost programmes times
Defrosting Defrosting frozen vegetables in your microwaveoven saves you a great deal of time. To defrost food, use the AUTO DEFROST function or the MICROWAVE function or the M with the power set to 1000 W (defrosting). Tips Small cuts of meat and fish can be cookedimmediately after defrosting. Large...
Page 22 - The DEFROST function; The program
The DEFROST function 1 Select the type and quantity of food that youwish to defrost and the automatic functionwill program the required defrosting time. 2 Turn the function selector to the “defrost” function . The corresponding display lights up. 100 g d1 100 g will appear in the display. 1 0 0 0 9 ...
Page 23 - Defrosting guide
Defrosting guide d1> Defrost of meat, poultry, fish, vegetables. d2> Bread d3> Ready-made dishes Defrosting pastry Duration Quantity Food type 1 – 3 min 400 g Flaky or short crust Recommendations Place on absorbent paper and turn over half waythrough. Defrosting shellfish Duration Quantity ...
Page 24 - Automatic microwave cooking; Programming a memory button
Automatic microwave cooking Using the automatic cooking function, the cookingmode and duration are automatically programmedbased on the type of food and the weight. 3automatic cooking positions are available using button. Programming a memory button 1 Access the memory function by pressing the e but...
Page 25 - Programming the heat circulation function
Cooking in traditional mode In this cooking mode the resistors are the onlysource of energy. Your appliance has 8 traditionalcooking modes. Heat circulation function The heat circulation function allows you to cookand brown foods like in a traditional oven. Programming the heat circulation function ...
Page 26 - Heat circulation cooking mode guide
Heat circulation cooking mode guide * Preheat the oven to the temperature indicated. Time Rack level Temperature Food Meat 90 min On the rack at level 2 160°C Roast pork (1kg) 70 – 75 min On the rack at level 2 180°C Roast veal (1kg) 38 – 40 min On the rack at level 2 220°C* Roast beef (1kg) 50 – 60...
Page 28 - KEEPING THINGS WARM; DEFROSTING
KEEPING THINGS WARM (recommended temperature 80°C min 35°C max 100°C)• This position allows you to keep your food warm by bursts of heat from the element at the back of the oven combined with fan. • Recommended for letting dough rise for bread, brioche, kouglof, etc. without exceeding 40°C (plate wa...
Page 29 - Caring for and cleaning your oven
We recommend that you clean the oven regularlyand remove any deposits of food from the insideand outside of the appliance. Use a damp, soapysponge. If the appliance is not cleaned regularly,its surface could become damaged, permanentlyaffecting the appliance's lifespan and possiblycausing a safety h...
Page 30 - Troubleshooting
If you suspect that your oven is not working properly, it might not necessarily be broken. In all cases,check the following: WHAT TO DO? YOU NOTICE THAT The appliance does not start. • Check that your appliance is plugged in.• Check that your oven's door is fully closed.• Check that the child safety...
Page 31 - Customer Service
Customer Service Customer Service Any repair made to yourappliance must be carried out by a qualifiedprofessional authorised to work on the brand. When you call, state your appliance's completereference information (model, type, serialnumber). This information appears on the manufacturer'snameplate....
Page 32 - Functional suitability tests
Functional suitability tests in accordance with IEC/EN/NF EN 60705 standards. The InternationalElectrotechnical Commission, SC. 59K, has established a standard for comparative performance testsconducted on various microwave ovens. We recommend the following for this appliance: Coockware/Tips Power l...