Page 3 - ADDENDUM; Sp ec i f i c at i o n s
(a) Do not attempt to operate this oven with the door o p e n s i n c e t h i s c a n r e s u l t i n h a r m f u l e x p o s u r e t o microwave energy. It is important not to break or tamper with the safety interlocks. (b) Do not place any object between the oven front face and the door or allow s...
Page 7 - The appliance must not be installed behind a
READ CAREFULLY AND KEEP FOR FUTUREREFERENCE 24. Care should be taken not to displace the turntable when removing containers from the appliance. (For fixed appliances and built-in appliances being used equal or higher than 900mm above the floor and having detacha le turntables. But this is not applic...
Page 9 - C A U T I O N; Personal Injury Hazard
CLEANING Be sure to unplug the appliance from the power supply.1. Clean the cavity of the oven after using with a slightly damp cloth.2. Clean the accessories in the usual way in soapy water.3. The door frame and seal and neighbouring parts must be cleaned carefully with a damp cloth when they are d...
Page 10 - Mat er i al s y o u c an u s e i n m i c r o w av e o v en; Mat er i al s t o b e av o i d ed i n m i c r o w av e o v en
Mat er i al s y o u c an u s e i n m i c r o w av e o v en Utensils Remarks Follow manufacturer’s instructions. The bottom of browning dish must beat least 3/16 inch (5mm) above the turntable. Incorrect usage may causethe turntable to break.Microwave-safe only. Follow manufacturer's instructions. Do...
Page 11 - SETTING UP YOUR OVEN; Nam es of Ov en Par ts and Ac c es s or i es; Tur ntabl e Ins tal l ati on
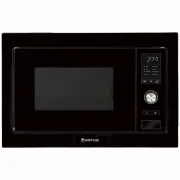
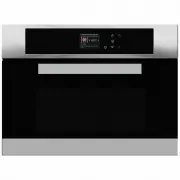
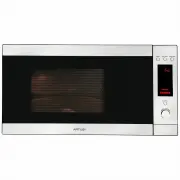
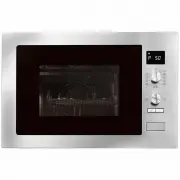
A) Control panelB) Turntable shaftC) Turntable ring assemblyD) Glass trayE) Observation windowF) Door assemblyG) Safety interlock system F G A C B E D SETTING UP YOUR OVEN Nam es of Ov en Par ts and Ac c es s or i es Remove the oven and all materials from the carton and oven cavity.Your oven comes w...
Page 12 - Installation and connection
Installation and connection 1.This appliance is only intended for domestic use.2.This oven is intended for built-in use only. It is not intended for counter-top use or for use inside a cupboard. 3. Please observe the special installation instructions.4.The appliance can be installed in a 60cm wide w...
Page 13 - Installation Instructions; Please Read the Manual Carefully Before Installation; Screw
!"#$%# &'(# )"#*(+,*$" *'&&#*(,'& !"# $%#& '( )'**#+ ,'*" - ./01 -&+ 20(* $&/3 4# 5$&*#+ *$ - .6$.#6/3 '&(*-//#+ #-6*"#+ ($57#*8 !"# ($57#* 20(* $&/3 4# '&(*-//#+ -&+ *"# 5$&*'&1 5-4/# 20(* $&/3...
Page 15 - Remove the bottom cabinet template and fix the mounting plate w
B.Prep are the cab i inet " a "" s e l o H PN:261800316968 3. Remove the bottom cabinet template and fix the mounting plate w ith screw. 2. Make the marks on the bottom plane of cabinet according to marks"a" of the template put the template on the bottom plane of cabinet. 1. Read...
Page 17 - Control Panel
Page 18 - Oper ati on Ins tr uc ti ons
Oper ati on Ins tr uc ti ons 1) Press " " once, the screen display "P100". 2) Turn " " to adjust the hour figures, the input time should be within 0--23. 3) Press " ", the minute figures will flash. 3) Press " " to confirm, and the screen displays "P 80�...
Page 22 - Trouble shooting
Ac c or di ng to Was te of El ec tr i c al and El ec tr oni c Equi pm ent(WEEE) di r ec ti v e, WEEE s houl d be s epar atel y c ol l ec ted andtr eated. If at any ti m e i n futur e y ou need to di s pos e of thi spr oduc t pl eas e do NOT di s pos e of thi s pr oduc t w i th hous ehol dw as te. Pl...
Page 23 - Warranty Card; ffi
Warranty Card Worldwide Appliances Pty Limited A.B.N. 45868077422O ffi ce: 48-50 Moore Street, Leichhardt N.S.W 2040 Post:Locked Bag 3000, Annandale, N.S.W 2038 P: 1300 694 583WARRANTY REGISTRATION Your ongoing satisfaction with your artusi product is important to us. We ask that you complete the en...
Page 24 - MODEL NUMBER; (a) These terms and conditions do not affect your; continued
4 Please complete and send to ARTUSI at: REPLY PAID 83617 LEICHHARDT NSW 2040 Last Name: First Name: Address: State: Postcode: Email: Home Phone: Mobile: Purchase Date: / / (Please attach proof of purchase to validate warranty) MODEL NUMBER SERIAL NUMBER (if you cannot locate the serial number pleas...