Page 3 - Thank you for choosing this dryer.
Thank you for choosing this dryer. This User Manual contains important safety information and instructions on the operation and maintenance of your dryer. Please take the time to read this User Manual before using your dryer and keep this book for future reference. Icon Caption Description WARNING R...
Page 4 - CONTENTS
EN - III CONTENTS 1. SAFETY INSTRUCTIONS ................................................................................. 5 1.1. Electrical Safety ............................................................................................... 51.2. Children's Safety ...................................
Page 5 - PRIMARY CONSIDERATIONS; Do not allow floor coverings to obstruct the
EN - 1 PRIMARY CONSIDERATIONS • This dryer can be used by children aged from 8 years and above and persons with reduced physical, sensory or mental capabilities or lack of experience and knowledge if they have been given supervision or instruction concerning use of the dryer in a safe way and unders...
Page 6 - should not be
EN - 2 accordance with the manufacturers instructions. • Remove all objects from pockets such as lighters and matches. • The dryer must not be installed behind a lockable door, a sliding door or a door with a hinge on the opposite side to that of the dryer, if it prevents the door from being fully o...
Page 7 - the performance of the dryer will be affected
EN - 3 opposite side of the dryer, in such a way that blocks the full opening of the dryer door. • Once the dryer has been installed, the connections must remain stable. When installing the dryer, make sure that the rear surface is not leaning on anything (e.g. tap, socket). • The operating temperat...
Page 8 - Disposing the Old Dryer
EN - 4 Disposing the Old Dryer This dryer complies with EU WEEE Directive (2013/19/EU). This dryer bears a classification symbol for waste electrical and electronic equipment (WEEE). This symbol, which is found on the dryer or information label, indicates that this dryer must not be disposed togethe...
Page 9 - SAFETY INSTRUCTIONS; a circuit that is regularly switched on and off by a
EN - 5 1. SAFETY INSTRUCTIONS This section contains safety instructions that will help protect you from risk of personal injury or property damage. Failure to follow these instructions will void any warranty. 1.1. Electrical Safety • The dryer must not be supplied through an external switching devic...
Page 10 - To avoid the risk or fire or electric shock, do not
EN - 6 To avoid the risk or fire or electric shock, do not use extension cords, multi sockets or adapters to connect the dryer to mains power. 1.2. Children's Safety • This dryer is not intended for use by people (including children) with reduced physical, sensory or mental capabilities, or lack of ...
Page 11 - of flammable cleaning agents or acetone, gas,
EN - 7 the running programme. • Do not allow children to sit/climb on or climb inside the dryer. 1.3. Dryer Safety Due to risk of fire, the following laundry items and dryer should NEVER be dried in the dryer: • Do not dry unwashed items in the dryer. • Items that have been soiled with substances su...
Page 12 - Risk of fire and damage!; flammable R290 gas. Keep open flame and fire; ATTENTION: Make sure that pets do not enter
EN - 8 FIRE: R290 Risk of fire and damage! This dryer contains enviromental friendly but flammable R290 gas. Keep open flame and fire sources away from the dryer. 1.4. Correct Use ATTENTION: Never stop a dryer before the end of the drying cycle unless all items are quickly removed and spread out so ...
Page 14 - affect the dryer performance.Condensed water that; Installing On Top Of a Washing Machine; To use the dryer on the washing machine, a fixing; CE Declaration of conformity
EN - 10 • Do not install the dryer in rooms where there is risk of freezing. Freezing temperatures negatively affect the dryer performance.Condensed water that freezes in the pump and hose may cause damage. 1.5. Installing On Top Of a Washing Machine ATTENTION: A washing machine cannot be placed on ...
Page 17 - PREPARING THE LAUNDRY
EN - 13 4. PREPARING THE LAUNDRY 4.1. Sorting the Laundry to be Dried Follow the instructions on the labels of the laundry to be dried. Only dry items that have a statement/symbol that indicates "they can be dried in a dryer".• Do not operate the dryer with load amounts and laundry types oth...
Page 19 - Programme Selection Knob; Functions
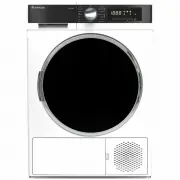
EN - 15 5. USING THE DRYER 5.1. Control Panel 1. Programme Selection Knob2. Electronic indicator and additional functions 5.1.1. Programme Selection Knob Use the programme selection knob to select the desired drying programme 1 2 5.1.2. Electronic Indicator and Additional Functions Display symbols: ...
Page 20 - Programme Selection and Consumption Table
EN - 16 5.2. Programme Selection and Consumption Table Press the Start/Pause button to start the programme. The Start/Pause LED that indicates that the programme has started and the remaining the of the program is seen on the display. Programme Load (kg) Washing machine spin speed Approximate amount...
Page 21 - Auxiliary Functions
EN - 17 5.2.1. Auxiliary Functions The table that summarises the options that can be selected in programmes is given below. Option Description Drying Level The humidity level obtained after drying can be increased by 3 levels. This way, level of required dryness can be selected. The levels that can ...
Page 22 - Starting the Programme
EN - 18 5.2.2. Starting the Programme The Start/Pause LED will flash during programme selection.Press the Start/Pause button to start the programme. The Start/Pause LED that indicates that the programme has started and the drying LED will come on. Programme Description Cotton Extra Dry This programm...
Page 23 - Drum Light Information
EN - 19 5.2.3. Programme Progress During the Programme If you open the door when the programme is running, the dryer will switch to standby mode. Once the door has been closed, press the Start/Pause key to resume the programme.Do not open the loading door when the programme is running. If you have t...
Page 25 - Emptying the Water Tank
EN - 21 6. CLEANING AND CARE IMPORTANT: Do not use industrial chemicals to clean your dryer. Do not use a dryer that has been cleaned with industrial chemicals. 6.1. Cleaning the Lint Filters IMPORTANT: DO NOT FORGET TO CLEAN THE LINT FILTERS AFTER EACH USE. To clean the lint filters: 1. Open the lo...
Page 26 - Cleaning the Heat Exchanger; DO NOT CLEAN; Cleaning the Humidity Sensor
EN - 22 3. If there is lint accumulated on the discharge cap in the tank, clean it with water.4. Refit the water tank. IMPORTANT: Never remove the water tank when the programme is running. The water condensed in the water tank is not suitable for human consumption. IMPORTANT: DO NOT FORGET TO EMPTY ...
Page 27 - Loading Door
EN - 23 WARNING: Due to the risk or fire and explosion, do not use solution agents, cleaning agents or similar dryer when cleaning the sensors. 6.5. Cleaning the Inner Surface of the Loading Door IMPORTANT: DO NOT FORGET TO CLEAN THE INNER SURFACE OF THE LOADING DOOR AFTER EACH DRYING PROCESS.Open t...
Page 28 - TECHNICAL SPECIFICATIONS
EN - 24 7. TECHNICAL SPECIFICATIONS Brand ARTUSI Model name AHPD8000W Height Min: 845 mm / Max: 855 mm* Width 596 mm Depth 609 mm Capacity (max.) 8 kg** Net weight (with plastic door) 46,8 kg Net weight (with glass door) 48,8 kg Voltage 220-240 V Power 1000 W *Min. height: Height with the adjustable...
Page 31 - AUTOMATIC FAULT WARNINGS AND WHAT TO DO
EN - 27 9. AUTOMATIC FAULT WARNINGS AND WHAT TO DO Your dryer is equipped with a built-in fault detection system, indicated by a combination of flashing operation lights. The most common failure codes are shown below. ERROR CODE SOLUTION E00 Contact the nearest authorised service agent. E03 / Empty ...
Page 32 - Packaging Information; Energy Efficiency
EN - 28 10. ENVIRONMENTAL PROTECTION AND PACKAGING INFORMATION 10.1. Packaging Information The packaging of this dryer is made of recyclable materials. Do not dispose of the packaging, waste together with household or other waste. Instead, take it to a packaging collection point defined by your loca...
Page 33 - Warranty Card; ffi
Warranty Card Worldwide Appliances Pty Limited A.B.N. 45868077422O ffi ce: 48-50 Moore Street, Leichhardt N.S.W 2040 Post:Locked Bag 3000, Annandale, N.S.W 2038 P: 1300 694 583WARRANTY REGISTRATION Your ongoing satisfaction with your artusi product is important to us. We ask that you complete the en...
Page 34 - MODEL NUMBER; (a) These terms and conditions do not affect your; continued
4 Please complete and send to ARTUSI at: REPLY PAID 83617 LEICHHARDT NSW 2040 Last Name: First Name: Address: State: Postcode: Email: Home Phone: Mobile: Purchase Date: / / (Please attach proof of purchase to validate warranty) MODEL NUMBER SERIAL NUMBER (if you cannot locate the serial number pleas...