Page 4 - ATTENTION; IMPORTANT INSTRUCTIONS; Read carefully and keep for future use
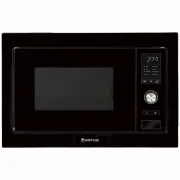
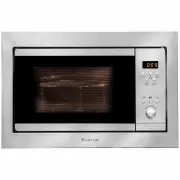
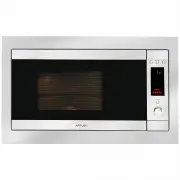
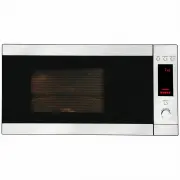
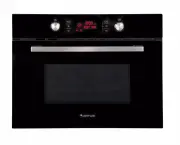
EN 2 Dear Customer, We would like to thank you and congratulate you on your choice. This new product has been carefully designed and built using top quality materials, and meticulously tested to ensure that it meets all your culinary requirements. Please read and observe these simple instructions, w...
Page 6 - - Warnings for Microwave Ovens
EN 4 1 - Warnings for Microwave Ovens Food preparation Danger of fire! Only use the microwave function for the preparation of food to be eaten. Any other uses can be dangerous or cause damage. For example, heated slippers or pillows filled with grain or cereals can catch fire even after several hour...
Page 8 - IMPORTANT; The oven’s identification plate is even accessible when the
EN 6 IMPORTANT The oven’s identification plate is even accessible when the appliance is installed. This identification plate, which is visible when you open the door, shows all the information you will need when requesting replacement parts for the appliance.
Page 10 - Respect for the environment
EN 8 Respect for the environment The documentation for this appliance is printed on paper bleached without chlorine or recycled paper to contribute to protecting the environment. The packaging was designed to prevent damage to the environment; they are ecological products that can be recovered or re...
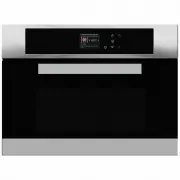
Page 11 - - The Control Panel; Keypad
EN 9 2 - The Control Panel Keypad To operate the key, press gently. The keypad will not work if more than one key is pressed at the same time. Movement arrows Return to previous display page. Keep pressed to return to Home page Switches the oven on and off. Confirms the settings and starts cooking o...
Page 12 - - General Oven Information; WARNING
EN 10 3 - General Oven Information Error codes This code appears in the event of the electronic control indicating a fault. When the error appears, the current function is blocked. If the type of error is related to a safety function, the oven becomes unusable and every time a start attempt is made,...
Page 13 - - General Oven Tips; Preheating the Oven; WARNINGS FOR DISHWARE; Oven Condensation and Temperature
EN 11 4 - General Oven Tips Preheating the Oven • Selecting a higher temperature does not shorten the preheat time. • Preheating is necessary for good results when baking cakes, cookies, pastry and breads. • Preheating will help to sear roasts and seal in meat juices.• Place oven racks in their prop...
Page 14 - Instructions for initial switch-on; in this phase, always keep the door
EN 12 5 - Getting Started Instructions for initial switch-on Once the oven has been connected to the power supply for the first time, the control automatically prepares for setting a number of user settings, which remain stored in case of any subsequent switch-on. NOTE: Both at the first and subsequ...
Page 15 - yk; Language; Time; AM
EN 13 6 - User Settings With the oven on, select the icon and confirm with the key to enter the SETTINGS menu. This menu permits personalizing the settings of your oven. To make access, no active cooking or any set time functions must be in progress. NOTE: The Setting menù can never be set if any ti...
Page 16 - ON; Volume; LEVEL
EN 14 Date Press the arrow key to select the date format from among the options “D.M.Y. – Y.M.D. – M.D.Y.” and confirm with the key. Subsequently set the value using the arrows and confirm with the key. 12 D.M.Y. Y.M.D. M.D.Y. 12 11/20/2015 Brightness Press the arrow key to choose which luminosity s...
Page 17 - Demo
EN 15 7 - System Setting With the oven on, select the icon and confirm with the key to enter the SETTINGS menu. This menu permits setting a number of parameters or special functions. It also permits accessing the error events list. 1. Press the keys to select the sub menu and confirm with the key. S...
Page 18 - - Starting Your Oven; Multifunction Oven; Thermal Oven; Traditional Cooking; Switching the oven on and off
EN 16 8 - Starting Your Oven Multifunction Oven Traditional Cooking TRUE CONVECTION (FAN HEAT) RING & GRILL (FAN HEAT & GRILL) CONVECTION BROIL (TURBO GRILL & BASE HEAT) BROIL (ECO GRILL) Microwave Cooking DEFROST BY TIME DEFROST BY WEIGHT MICROWAVE COOKING MICROWAVE AND GRILL MICROWAVE ...
Page 19 - Cooking Mode Tables
EN 17 Cooking Mode Tables Traditional Cooking COOKING MODE ICON TEMPERATURE Min. Preset Max. TRUE CONVECTION (FAN HEAT) 50° C 165° C 230° C RING & GRILL (FAN HEAT & GRILL) 50° C 210° C 230° C CONVECTION BROIL (TURBO GRILL & BASE HEAT) 50° C 165° C 230° C BROIL (ECO GRILL) 50° C 230° C 23...
Page 20 - - Traditional Cooking; Changing the cooking mode
EN 18 9 - Traditional Cooking Changing the cooking mode 1. During untimed cooking, a cooking pause can be set by pressing the key. All the settings of the suspended cooking operation remain stored and can be reactivated by pressing the same key again. 2. To change the cooking mode while the oven is ...
Page 21 - 0 - Time Oven Mode Operation; CAUTION; To Set a Timed Mode; Stop Time; To Delay the Start of a Timed Mode
EN 19 10 - Time Oven Mode Operation Be sure that the time-of-day clock is displaying the correct time. The timed mode turns off the oven at the end of the cook time. CAUTION Never leave food in the oven for more than one hour before and after cooking. This could deteriorate the properties of the foo...
Page 22 - 1 - Microwave Cooking; Weight Thawing Function; Microwave Function; MICROWAVE COOKING
EN 20 11 - Microwave Cooking NOTE: it is essential to carefully read the instructions and warnings to ensure correct use. ATTENTION Microwave functions will not start until the door has been closed. If the door is opened while the oven is on, the oven will go into pause mode and the message “DOOR OP...
Page 23 - Microwave + Grill Function; MICROWAVE AND GRILL; Microwave + Ring Function; MICROWAVE AND RING; MICROWAVE AND RING
EN 21 If you wish to personalise the time and output, open the sub- menu managed as follows:• TIME: Select the icon and use the keys and to personalise the time. • MICROWAVE OUTPUT: Select the icon and use the keys and to select the microwave output setting from the 6 possible levels, 150W - 300W - ...
Page 25 - 2 - Using Oven Lights
EN 23 12 - Using Oven Lights A single light key activates the lights. Touch to turn lights on or off . Oven lights turn on automatically when the door is opened. When an oven is in use, oven lights turn on automatically when a mode is started. Oven lights will turn off automatically when the oven mo...
Page 26 - Recipe List
EN 24 13 - Recipes Select an already-set recipe: 1. Switch the oven, select the icon and press the button . 2. Using the arrows select the list between “PRESET” or “PERSONAL” and confirm by means of the key. 3. Choose the type of food to be cooked using the arrows and the arrows and confirm by means...
Page 27 - Saving a personalized recipe:; Cancelling a Personalized recipe:; YES
EN 25 7. To start the recipe, confirm with the key. During a recipe, a number of acoustic and visual messages will ask you to perform the following operations. Simply follow the instructions on the screen. 8. Upon termination, the oven switches off and an acoustic and visual signal warns that the re...
Page 28 - 4 - For the Installer; Install the oven in the counter; The dimensions of the space must be those shown in figure.
EN 26 14 - For the Installer Install the oven in the counter The oven must be installed under a cook top, in a column, or combined with the relative food-warmer drawer. The dimensions of the space must be those shown in figure. The cabinet material must be able to withstand the heat. The oven must b...
Page 29 - TECHNICAL DATA; Power supply; TYPE AND MINIMUM DIAMETER OF THE CABLES
EN 27 TECHNICAL DATA Power supply 220-240 V~, 50 Hz Maximum absorbed power 3200 W Microwave power 900 W Grill 1500 W Hot air 1500 W Microwave frequency 2450 MHz Electrical Hook-Up Before making the electrical hook-up, make sure that:• the characteristics of the electrical system satisfy what is show...
Page 30 - 5 - Solving Traditional Baking Problems; Baking Problem
EN 28 15 - Solving Traditional Baking Problems With either Bake or Convection Bake, poor results can occur for many reasons other than a malfunction of the oven. Check the chart below for causes of the most common problems. Since the size, shape and material of baking utensils directly affect the ba...
Page 31 - 6 - Solving Operational Problems; Oven Problem
EN 29 16 - Solving Operational Problems Before contacting service, check the following to avoid unnecessary service charges. Oven Problem Problem Solving Steps Other F__ Error appears in the display window. Remove power and turn it back on again after a few seconds. If condition persists, note the c...
Page 32 - 7 - Assistance or Service; Ser vice Data Record; For authorized service or parts information see paragraph
EN 30 17 - Assistance or Service Before contacting service, please check “Troubleshooting.” It may save you the cost of a service call. If you still need help, follow the instructions below. When calling, please know the purchase date and the complete model and serial number of your appliance. This ...
Page 33 - Warranty Card; ffi
Warranty Card Worldwide Appliances Pty Limited A.B.N. 45868077422O ffi ce: 48-50 Moore Street, Leichhardt N.S.W 2040 Post:Locked Bag 3000, Annandale, N.S.W 2038 P: 1300 694 583WARRANTY REGISTRATION Your ongoing satisfaction with your artusi product is important to us. We ask that you complete the en...
Page 34 - MODEL NUMBER; (a) These terms and conditions do not affect your; continued
4 Please complete and send to ARTUSI at: REPLY PAID 83617 LEICHHARDT NSW 2040 Last Name: First Name: Address: State: Postcode: Email: Home Phone: Mobile: Purchase Date: / / (Please attach proof of purchase to validate warranty) MODEL NUMBER SERIAL NUMBER (if you cannot locate the serial number pleas...
Page 36 - DISCLAIMER
A R T U S I .C O M . A U P : 1 3 0 0 6 4 9 5 8 3 NSW & ACT ( HEAD OFFICE ) 48-50 MOORE STREET LEICHHARDTF 02 8569 4699 QLD 1 / 42 CAVENDISH ROAD COORPAROOF 07 3397 0850 VIC , TAS & SA 1211 TOORAK ROAD CAMBERWELLF 03 9809 2155 WA & NTUNIT 10 / 55 HOWE STREET OSBORNE PARKF 08 9201 9188 NZP...