Page 3 - HOOD DUCTING GUIDE
HOOD DUCTING GUIDE Here are some important points to consider when choosing and/or installing a range hood:• An externally ducted range hood will generally outperform a recirculating range hood. • We discourage the use of flexible ducting as this has a significant negative impact on airflow and nois...
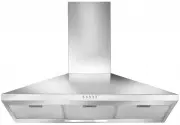
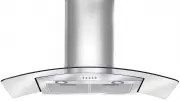
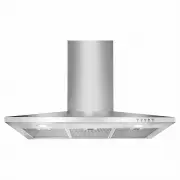
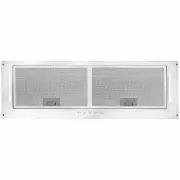
Page 5 - Know your cooker hood; Please read these instructions before using your cooker hood.
Know your cooker hood Please read these instructions before using your cooker hood. 1. Filters 2. Air duct assembly3. Cooker body 4. Damper flap5. Bottom outer chimney flue 6. Top inner chimney flue 1 2 3 4 5 6 Also included Damper flap Chimney fixed bolster Drill hole stencil User instruction manua...
Page 6 - Installation; Ensure the power is turned off before beginning the installation
3 Installation Ensure the power is turned off before beginning the installation 1 2 Check the voltage and frequency on the rating plate located inside the hood. Ensure the hood is installed so that the bottom of the hood is no less than 600mm and no more than 750mm above the cooking elements or burn...
Page 7 - Fig. 3 Attach the damper flap on the air outlet as shown.
4 Installation 3 Fig. 3 Attach the damper flap on the air outlet as shown. Installation work and electrical wiring must be done by qualified person(s) in accordance with all applicable laws, regulations and safety standards.
Page 8 - You will need two people to install this hood
5 Installation You will need two people to install this hood Using the drill hole stencil mark the screw positions on the wall. Drill four 8mm holes into the wall. Put one expansion plug and one 10mm screw into each of the holes. Screw the screws into place but not all the way into the plugs until a...
Page 10 - into a fuel
into a fuel venting direction. Installation Ensure the power is turned off before beginning the installation 7 Attach the ducting hose to the air duct. Vertical discharge of air. Run the ducting through a cupboard and/or into a space in the ceiling cavity to a roof cap. Horizontal discharge of air. ...
Page 11 - Attaching the chimney flues
Installation 11 12 Attaching the chimney flues Assemble the 2 flues, inner top to outer bottom.Place them onto the hood body covering the air duct assembly and screw into place. Measure the height for the chimney flue bracket. Pull the inner chimney to the desired height. 8
Page 13 - Hood Operation
Ensure the hood is OFF when first installed.Insert the power plug when all previous installation steps are completed. Press the Light button for the lights to turn ON.Press again to turn OFFPush button 1 for low speedPush button 2 for medium speedPush button 3 for high speedPush button 0 to turn off...
Page 14 - Replacement & maintenance
Replacement & maintenance 16 17 Clean the filters and ventilating fan at least once every 3 months or earlier as required. Fig 16. Replacing the light bulbWait 30minutes for the light bulb to cool down after using the hood.Open the filter and remove the old light bulbReplace with a new lightbulb...
Page 15 - Cleaning instructions; Turn off the hood before cleaning.
Cleaning instructions Turn off the hood before cleaning. 1. Clean the surface of the hood frequently using mild soap or detergent at least once every 3 months. 2. Avoid the use of harsh cleaning agents as it may spoil the hood’s appearance. 3. Wash the filters using mild soap or detergent. Note that...
Page 18 - (a) These terms and conditions do not affect your; Warranty Card tear off; ALL SERVICE CALLS MUST BE BOOKED THROUGH AN
Please complete and send to ARTUSI at: REPLY PAID 83617 LEICHHARDT NSW 2040 Last Name: First Name: Address: State: Postcode: Email: Home Phone: Mobile: Purchase Date: / / (Please attach proof of purchase to validate warranty) MODEL NUMBER SERIAL NUMBER (if you cannot locate the serial number please ...