Ariston NRA 640 C AUS - Manuals
Ariston NRA 640 C AUS – Manual in PDF format online.
Manuals:
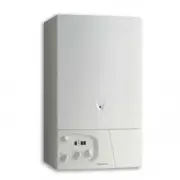
Manual Ariston NRA 640 C AUS


Summary
2 GB Installation ! Before operating your new appliance please read this instruction booklet carefully. It containsimportant information concerning the safe operation,installation and maintenance of the appliance. ! Please keep these operating instructions for future reference. Pass them on to any n...
3 GB F i x i n g The appliance must be installed on a perfectly level supporting surface.Any deformities caused by improper fixing couldaffect the features and operation of the hob.The thickness of the supporting surface should be taken into account when choosing the length of the screws for the fix...
4 GB connection required and position the connectionsupports as shown in the following table anddiagrams.4. Position the wires in accordance with theinformation given in the following table and diagramsand connect the appliance by tightening all thescrews for the springs as much as possible. Voltage...
Ariston Manuals
-
 Ariston microGenus PLUS
Manual
Ariston microGenus PLUS
Manual
-
 Ariston TX
Manual
Ariston TX
Manual
-
 Ariston Uno
Manual
Ariston Uno
Manual
-
 Ariston AWD 12
Manual
Ariston AWD 12
Manual
-
 Ariston OK 892EL S P AUS
Manual
Ariston OK 892EL S P AUS
Manual
-
 Ariston G.C.N.:47-116-66 (30 kW)
Manual
Ariston G.C.N.:47-116-66 (30 kW)
Manual
-
 Ariston LFF 8M5
Manual
Ariston LFF 8M5
Manual
-
 Ariston WMG 829
Manual
Ariston WMG 829
Manual
-
 Ariston 47-116-12
Manual
Ariston 47-116-12
Manual
-
 Ariston L 63 B-S-W
Manual
Ariston L 63 B-S-W
Manual
-
 Ariston ASL60VX
Manual
Ariston ASL60VX
Manual
-
 Ariston ADS9D 297
Manual
Ariston ADS9D 297
Manual
-
 Ariston 47-116-66
Manual
Ariston 47-116-66
Manual
-
 Ariston OK 999E LDP X AUS S
Manual
Ariston OK 999E LDP X AUS S
Manual
-
 Ariston A1637
Manual
Ariston A1637
Manual
-
 Ariston fm81r ix aus
Manual
Ariston fm81r ix aus
Manual
-
 Ariston LFT M16
Manual
Ariston LFT M16
Manual
-
 Ariston FH 527 IX AUS
Manual
Ariston FH 527 IX AUS
Manual
-
 Ariston Heaters
Manual
Ariston Heaters
Manual
-
 Ariston FC 97 P
Manual
Ariston FC 97 P
Manual