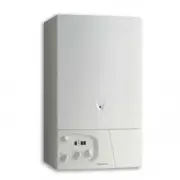
Page 2 - ENERAL
2 275 This manual is an integral and essential part of the product. It shouldbe kept with the appliance so that it can be consulted by the user andour authorised personnel. Please carefully read the instructions and notices about the unitcontained in this manual, as they provide impor tant infor mat...
Page 3 - Flues; IG; 4 RFFI SYSTEM
The technical information and instructions provided herein below areintended for the installer so that the unit may be installed correctlyand safely. The installation and initial start-up of the boiler must be by a CORGIApproved Installer in compliance with the installation standardscurrently in eff...
Page 4 - ITING THE; H = Condensate discharge
= 181 20 65 65 155 (A-B-D-E) 208 (C) 67 67 100 = 2.3. O VERALL D IMENSIONS F IG . 2.1 24 MFFI 24 RFFI SYSTEM 4 275 The appliance may be installed in any room or indoor area, althoughparticular attention is drawn to the requirements of the current I.E.E.Wiring Regulations, and in Scotland, the electr...
Page 5 - 4 MFFI SYSTEM
Fasten the boiler in place using the template and anchors suppliedwith the unit. It is highly recommended that a spirit level be used toposition the boiler so that it is perfectly level.For additional information, please consult the instructions containedin the connection kit and the flue kit. 2.5. ...
Page 6 - This boiler is suitable only for sealed systems.; : If any condensate pipe work is to be installed externally,
6 275 2.8. W ATER C ONNECTIONS L EGEND : A = Central Heating FlowB = Domestic Hot Water OutletC = Gas InletD = Domestic Cold Water Inlet)E = Central Heating ReturnF = Cylinder FlowG = Cylinder ReturnH = Condensate dischargeI = Safety valve discharge C ENTRAL H EATING Detailed recommendations are giv...
Page 7 - In F; outlet of fumes in; TERMINAL POSITION; T h e d o m e s t i c wa t e r m u s t b e i n a c c o r d a n c e w i t h t h e r e l eva n t
7 275 In F IG . 2.11 below, several different types of flue systems are shown. For additional infor mation regarding the flue accessories, pleaseconsult the Flue Pipe Accessories manual. Coaxial Systems Twin Pipe Systems Exhaust Type C 13 B 33 outlet of fumes in chimney or exhaust flue C 13 , C 33 ,...
Page 8 - CCESSORY; Unscrew the screws “A” and rotate the control panel forwards; OOM
8 275 F IG . 2.11 2.10. A CCESSORY C ONNECTION To carry out the connection for the roomstat or the outdoor sensor,proceed as follows: 1. Unscrew the screws “A” and rotate the control panel forwards; 2. Inser t the connection cable for the thermostat or the outdoorsensor into the cable gland “B” and ...
Page 9 - : The wiring of the RC must be done by using 2 x 0.5 mm; : The wiring of the Outdoor Sensor (SE) must be done by using
9 275 Refer to the illustrations in section 2.10.1. 1. Unscrew the screws “A” and rotate the control panel forwards. 2. Insert the connecting cable of the under floor heating sensor intothe cable gland “B” and open the lid of the instrument panelafter having unscrewed the fastening screws “C”. 3. Re...
Page 10 - : under absolutely no circumstances must jumpers 2, 7 and 8; not used; : it is essential that the operations involving setting of the; jumpers be carried out only with the device turned off.; LECTRICAL
L EGEND : A: JUMPERWhen needed, the P.C.B. allows the different options to be selectedby means of a wire link.The boiler has the following basic arrangement:1 OPEN 2 CLOSED (jumper) 3 OPEN4 OPEN5 OPEN6 OPEN7 CLOSED8 OPEN (MFFI); CLOSED (SYSTEM) N OTE : under absolutely no circumstances must jumpers ...
Page 11 - C3 = CONNECTION TO ROOMSTAT
11 275 2.12. W ATER C IRCUIT D IAGRAMS L EGEND : 1 - Fan 2 - Main Heat exchanger 3 - Ignition/detection electrode 4 - Burner 5 - Gas valve 6 - Heating return temperature probe 7 - Heating flow temperature probe 8 - Silencer 9 - Motorised valve 10 - Automatic by-pass 11 - Main circuit flow switch 12 ...
Page 14 - : the flashing dot on the left-hand display always indicates; “burner off ” if the still dot indicates “burner on”.; : a c o n f i g u r a t i o n i s a l s o p o s s i b l e w h i c h a l l o w s f o r t h e; LEFT; Turn on the gas cock and check the seals on the connections,; : the reference values of the CO
14 275 3.5. D ISPLAY : M ESSAGES S HOWN D URING N ORMAL O PERATION 3.6. O PERATING P ARAMETERS 3.6.1. C ONTROL M ODES During operation of the boiler, while it is carr ying out its nor maloperations, the left-hand display shows a series of characters thatrefer to the operations indicated below: -- Di...
Page 15 - The konb in vertical position set a temperature oh 20°C. Turning the
+20 20 -20 1 2 3 4 5 6 7 8 9 60 100 The type of curve is entered by means of the controls of the displayP. C. B l o c a t e d u n d e r t h e l i d o f t h e P. C. B. i t s e l f. To a c c e s s t h eprogramming buttons (+ / -), raise the lid with a screwdriver as shownin the illustration. In the ev...
Page 17 - : Dur ing the overr un per iod of the pump, the “COMFORT”; Indication on the; uu
17 275 3.7.2. S ETTING THE T EMPERATURE F IELD Remove the protection of the display using a screwdriver as a lever.Press the reset button for over 5 seconds. The display will show“ AA0033 ”. On pressing the reset button again the display will change to “ RR0000 ” (R indicates the setting of the fiel...
Page 18 - DISPLAY; When there is no ignition, check that the gas cock is open.; : To force the boiler to its maximum output it is necessary to
The pump overrun may be varied (after the burner has been turnedoff). To access this function, it is necessary to press the reset buttonfor over 5 seconds and then press it repeatedly until the character“ AA ” appears on the left-hand display. The following modes are available: 0011 1 minute of pump...
Page 19 - CAUSE; : In all cases, the circulation takes place in the heating system.
19 275 The draining of the heating system must be carried out as follows:- Turn off the boiler and the bipolar switch; - Loosen the automatic air release valve (27); - Open the system's discharge valve (18) and gather the waterthat comes out in a container; - E m p t y o u t f r o m t h e l o w e s ...
Page 20 - : the values refer to the upper calorific power; To regulate the gas, the sequence described below must be followed.; : the test of the volumetric rate of flow must be carried out for at
20 275 4. GAS ADJUSTMENTS 4.1. O VERALL V IEW 4.2. P RELIMINARIES Type of appliance Marking on the label of characteristics Further indications Factory setting for the Wobbe Wo indexin kWh/m3 Factory setting of the thermal capacityfor the production of hot water Factory setting of the thermal capaci...
Page 21 - C AT E G O R Y; • Display of recommended soft-light; : The test of the volumetric rate of flow must be carried out for at
21 275 4.4. C HANGING THE T YPE OF G AS 4.5. O PERATING T ESTS The boiler may be transformed for use with LPG (G30-G31); theoperation must be performed by an Authorised Service Centre.The operations to carry out are the following:1. Replacement of the nozzle (see table); 2. Replacement of the gas la...
Page 23 - Place the boiler in operation.
23 275 6.4. O PERATIONAL T EST After having carried out the maintenance operations, fill the heatingcircuit to a pressure of approx. 1.5 bar and release the air from thesystem. Also fill the domestic hot water system.- Place the boiler in operation. - If necessary, release the air again from the hea...
Page 24 - TECHNICAL INFORMATION; Merloni TermoSanitari SpA - Italy
7. TECHNICAL INFORMATION Certification 63AT4528 Category II2H3B/P Thermal Capacity min/max kW 8/24 Usable Thermal Power min/max (30/40°C) kW 8.8/26.1 Usable Thermal Power min/max (60/80°C) kW 7.9/23.3 Usable Thermal Power min/max (30/50°C) kW -/24.5 Power for Hot Water Production min/max kW 7.9/23.3...
Page 25 - Condensing; Country of destination: GB
ServicingInstructionsType C Boilers G.C.N: 41-116-03 47-116-17 LEAVE THESE INSTRUCTIONSWITH THE END-USER Condensing Country of destination: GB
Page 26 - SERVICING INSTRUCTIONS; - Removing the gas valve; FAULT FINDING; TABLE OF CONTENTS
2 1. SERVICING INSTRUCTIONS 1.1 R EPLACEMENT OF P ARTS 1.2 T O G AIN G ENERAL A CCESS - Lowering the control panel and removing the front panel- Removing the side panels 1.3 A CCESS TO THE C OMBUSTION C HAMBER - Removing the sealed chamber front cover- Removing the fan- Removing the burner- Removing...
Page 27 - SERVICING; control panel forward
3 F IG . 1.2 F IG . 1.1 1. SERVICING INSTRUCTIONS The life of individual components vary and they will need servicing orreplacing as and when faults develop.The fault finding sequence chart in chapter 2 will help to locate whichcomponent is the cause of any malfunction, and instructions for removal,...
Page 28 - Removing the side panels; Pull each panel away from the boiler, then lift the panel; CCESS TO THE; Removing the sealed chamber front cover; Pull the cover away from the boiler (F
4 Removing the side panels 1. Remove the screws “C” (F IG . 1.4); 2. Pull each panel away from the boiler, then lift the panel up and away from the boiler. 1.3 A CCESS TO THE C OMBUSTION C HAMBER D F IG . 1.5 D F IG . 1.4 C C C C D D Removing the sealed chamber front cover 1. Remove the screws “D” (...
Page 29 - Removing the fan; Pull off the hose “F” and disconnect the electrical; Pull the fan away from the exchanger (F
5 Removing the fan 1. Loosen nut “E” (F IG . 1.7); 2. Pull off the hose “F” and disconnect the electrical connector “G” (F IG . 1.8); 3. Remove the nuts “H” (F IG . 1.9); 4. Pull the fan away from the exchanger (F IG . 1.10). F IG . 1.10 E F IG . 1.9 F IG . 1.7 F IG . 1.8 F G H H H
Page 31 - Remove the nuts “M” from each side of rear of the; Release the condesate trap union “N” (F; Separate the collector from the combustion
7 Removing the condensate collector 1. Remove the nuts “L” from each side of front of the collector (F IG . 1.17); 2. Remove the nuts “M” from each side of rear of the collector (F IG . 1.18); 3. Release the condesate trap union “N” (F IG . 1.19); 4. Separate the collector from the combustion chambe...
Page 32 - Removing the condensate trap; Removing the injector; Disconnect all connections from the fan and remove
8 Removing the condensate trap 1. Loosen the union “O” (F IG . 1.22); 2. Remove the condensate trap (F IG . 1.23). F IG . 1.22 O Removing the injector See the section on removing the fan before carring out thisprocedure 1. Disconnect all connections from the fan and remove (F IG . 124); 2. Remove th...
Page 34 - Removing the gas valve; Remove the screws “T” from the bottom of the gas valve
10 1.4 A CCESS TO THE G AS V ALVE F IG . 1.28 S R Removing the gas valve 1. Disconnect the electrical connection “R” from the gas valve (F IG . 128); 2. Release the top nut “S” (F IG . 1.29); 3. Remove the screws “T” from the bottom of the gas valve pipe (F IG . 1.30); 4. Remove the gas valve (F IG ...
Page 35 - Removing the safety valve; Push the exchanger towards the rear of the boiler, lift; Before replacing the exchanger ensure that the O-rings
11 Removing the safety valve 1. Loosen union “W” (Fig. 1.35);2. Unscrew and remove the valve (Fig. 1.36). 1.5 A CCESS TO THE W ATER C IRCUIT F IG . 1.36 Removing the D.H.W. (secondary)exchanger 1. Remove the screw “U” (F IG . 1.32); 2. Remove the screw “V” (F IG . 1.33); 3. Push the exchanger toward...
Page 39 - Remove the electrical connector “K1” by pulling off; Remove the electrical connector “M1” by pulling off; Remove the electrical connector “O1” by pulling off
15 Removing the D.H.W. temperature probe (N.T.C.) (MFFIonly) 1. Remove the electrical connector “K1” by pulling off (Fig. 1.54); 2. Unscrew and remove the D.H.W. temperature probe “L1” (F IG . 1.55). K1 L1 F IG . 1.54 F IG . 1.55 M1 F IG . 1.56 Removing the C.H. flow temperature probe (N.T.C.) 1. Re...
Page 40 - Remove the fuses by pushing and rotating fuse holders; Unplug the electrical connection “R1” from the time clock
16 Checking the fuses1. Remove the inspection cover on the reverse of the control panel (F IG . 1.60); 2. Remove the fuses by pushing and rotating fuse holders “Q1” (F IG . 1.61). 1.6 A CCESS TO THE C ONTROL S YSTEM Removing the time clock1. Remove the inspection cover on the reverse of the control ...
Page 43 - AULT
19 2. FAULT FINDING TABLE I and II YES YES YES NO NO IS THE POWER L.E.D. AND DISPLAY ON? DOES A STOP CODE APPEAR ON THE DISPLAY? POSITION OF THE SUMMER/ WINTER SELECTOR 1. Check the fuses2. Check the power supply to the control panel3. Check/replace the ON/OFF button4. Check the connection between t...
Page 44 - Model 24 RFFI System
20 YES NO MAKE SURE THAT: 1. There is sufficient water in the system2. The gas is turned on3. The electrical supply is turned on PUSH THE ON/OFF BUTTON TO ON IS THE POWER L.E.D. AND DISPLAY ON? DOES A STOP CODE APPEAR ON THE DISPLAY? POSITION OF THE SUMMER/ WINTER SELECTOR SUMMER WINTER NO YES ON/OF...
Page 45 - Model 24 MFFI/24RFFI System
21 YES YES NO IS THE PUMP RUNNING? 1. Check if there is air in the system2. Check the main circuit flow switch operation3. Check the pressure on the water gauge and fill system to 1 bar 1. Check pump cable2. Check/replace main P.C.B. Release/replace pump Push the RESET button POWER TO THE PUMP? YES ...
Page 47 - III; T was detected; ABLE; II; Insufficient radiator temperature
23 T ABLE I T ABLE III D ISPLAY A01 A02A03A07 A19 A20 A21 A22A33A99 C AUSE Too many attempts to ignite on starting upAfter three attempts at ignition, no increase in ∆ T was detected The heating flow temperature exceeds 100°C during operationToo many failures to flame in one period during operationT...
Page 48 - DIAGRAMS; The opening of such contacts will lead to boiler malfunction.; Domestic hot water temperature adjustment
24 3. ELECTRICAL DIAGRAMS L EGEND : A: JUMPERWhen needed, the P.C.B. allows the different options to be selected by means ofa wire link.The boiler has the following basic arrangement:1 OPEN 2 CLOSED (jumper)3 OPEN4 OPEN5 OPEN6 OPEN7 CLOSED8 OPEN (MFFI); CLOSED (SYSTEM) N OTE : under absolutely no ci...
Page 50 - ecoGENUS 24 MFFI - ecoGENUS 24 RFFI
Page 51 - PARTS LIST
27 24 MFFI 21 15 13 301 302 301 53 50 49 48 46 47 54 52 55 57 56 49 2 51 52 2 1 4 5 3 51 57 62 26 27 29 33 40 42 43 44 41 39 38 3534 36 32 31 30 28 98 99 36 33 100 28 45 37 37 102 11 10 9 7 8 7 81 81 80 17 15 23 25 24 22 16 18 78 79 20 84 83 16 17 86 84 85 19 21 14 8 13 12 77 66 57 65 58 64 57 107 1...
Page 53 - ecoGENUS - 24 RFFI SYSTEM
29 24 RFFI SYSTEM 23 17 14 301 302 301 54 51 50 49 47 48 55 53 56 58 57 2 52 53 2 1 4 5 3 3 52 58 63 27 28 30 34 41 43 44 45 42 40 39 3635 37 33 32 31 29 96 97 37 34 98 29 46 38 38 100 25 26 21 24 21 21 22 80 79 80 83 82 8 16 15 67 58 66 59 65 58 105 106 104 103 102 101 92 94 89 88 86 76 3 3 6 8 87 ...
Page 56 - Models; ECOGENUS 24 MFFI
SPARE PARTS EXPLODED VIEWGAS WALL BOILERS Models ECOGENUS 24 MFFI Edition 1 of 1 December 1999
Page 57 - MODELS
301 302 301 53 50 49 48 46 47 54 52 55 57 56 49 2 51 52 2 1 4 5 3 51 57 62 26 27 29 33 40 42 43 44 41 39 38 3534 36 32 31 30 28 98 99 36 33 100 28 45 37 37 102 11 10 9 7 8 7 81 81 80 17 15 23 25 24 22 16 18 78 79 20 84 83 16 17 86 84 85 19 14 13 12 77 66 57 65 58 64 57 107 108 106 105 104 103 94 96 ...


 Ariston AS66VX
User Manual
Ariston AS66VX
User Manual
 Ariston microGenus PLUS
Manual
Ariston microGenus PLUS
Manual
 Ariston TX
Manual
Ariston TX
Manual
 Ariston Uno
Manual
Ariston Uno
Manual
 Ariston AWD 12
Manual
Ariston AWD 12
Manual
 Ariston CX109SV6
Manual
Ariston CX109SV6
Manual
 Ariston AFA 370
Manual
Ariston AFA 370
Manual
 Ariston OK 897E LSC X AUS
Manual
Ariston OK 897E LSC X AUS
Manual
 Ariston OK 892EL S P AUS
Manual
Ariston OK 892EL S P AUS
Manual
 Ariston G.C.N.:47-116-66 (30 kW)
Manual
Ariston G.C.N.:47-116-66 (30 kW)
Manual
 Ariston LI 670 B-S-X-W
Manual
Ariston LI 670 B-S-X-W
Manual
 Ariston LB6TX
Manual
Ariston LB6TX
Manual
 Ariston 32 MFFI
Manual
Ariston 32 MFFI
Manual
 Ariston LFF 8M5
Manual
Ariston LFF 8M5
Manual
 Ariston WMG 829
Manual
Ariston WMG 829
Manual
 Ariston 47-116-12
Manual
Ariston 47-116-12
Manual
 Ariston A1400SWD
Manual
Ariston A1400SWD
Manual
 Ariston FH 527 IX
Manual
Ariston FH 527 IX
Manual
 Ariston A1235
Manual
Ariston A1235
Manual
 Ariston L 63 B-S-W
Manual
Ariston L 63 B-S-W
Manual