Page 4 - I T; AVVERTENZE IMPORTANTI; LEGGERE QUESTE ISTRUZIONI PRIMA DELL’USO.; Non mettere l’apparecchio sopra o vicino a fonti di calore.
I T - 2 - AVVERTENZE IMPORTANTI LEGGERE QUESTE ISTRUZIONI PRIMA DELL’USO. Usando apparecchi elettrici è necessario prendere le opportune precauzioni, tra le quali : Non mettere l’apparecchio sopra o vicino a fonti di calore. 1. Non usare l’apparecchio in prossimità di persone, nè alzarlo all’altezza...
Page 6 - CONSERVARE QUESTE ISTRUZIONI; OFF) del corpo estraibile / Spia di ricarica
I T - 4 - colo, specialmente per i bambini che potrebbero servirsi dell’apparecchio per i propri giochi.Gli elementi dell’imballaggio non devono essere lasciati alla portata dei bambini 27. in quanto potenziali fonti di pericolo. 28. Per il corretto smaltimento del prodotto ai sensi della Direttiva ...
Page 7 - RICARICA DELLA BATTERIA
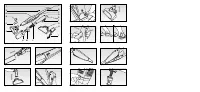
I T - 5 - RICARICA DELLA BATTERIA - Assemblare la base di ricarica (G) posizionandovi l’apposita parte superiore (H) (Fig. 4).- Con l’apparecchio assemblato, posizionare quest’ultimo sulla base di ricarica (G), assicurandosi che si inserisca perfettamente sul gancio posto sulla parte superiore (H) d...
Page 8 - ISTRUZIONI PER L’USO; Aspiratore Portatile; ATTENZIONE
I T - 6 - ISTRUZIONI PER L’USO - Prima di procedere con l’utilizzo, assicurarsi che la batteria sia completamente carica.- Con la parte portatile (F) correttamente assemblata nel corpo dell’apparecchio (R), premere il pulsante di accensione (T) ed inclinare indietro il manico nella tipica posizione ...
Page 10 - E N; IMPORTANT SAFEGUARDS; READ THESE INSTRUCTIONS BEFORE USE; as there is a serious risk of accident.
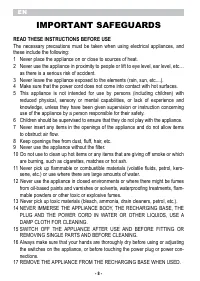
E N - 8 - IMPORTANT SAFEGUARDS READ THESE INSTRUCTIONS BEFORE USE The necessary precautions must be taken when using electrical appliances, and these include the following:1 Never place the appliance on or close to sources of heat.2 Never use the appliance in proximity to people or lift to eye level...
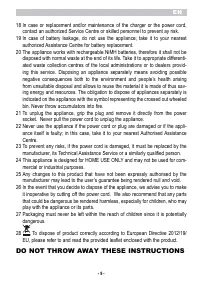
Page 11 - DO NOT THROW AWAY THESE INSTRUCTIONS
E N - 9 - 18 In case or replacement and/or maintenance of the charger or the power cord, contact an authorized Service Centre or skilled personnel to prevent ay risk. 19 In case of battery leakage, do not use the appliance; take it to your nearest authorized Assistance Centre for battery replacement...
Page 12 - Recharge light
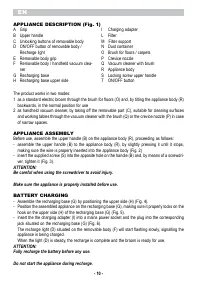
E N - 10 - APPLIANCE DESCRIPTION (Fig. 1) A GripB Upper handleC Unlocking buttons of removable bodyD ON/OFF button of removable body / Recharge light E Removable body gripF Removable body / handheld vacuum clea- ner G Recharging baseH Recharging base upper side I Charging adapter L FilterM Filter su...
Page 13 - Fully discharge the battery before a new recharge.; ATTENTION; Handheld vacuum cleaner
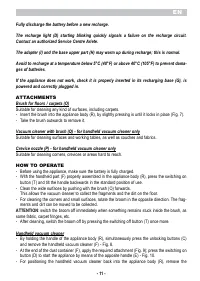
E N - 11 - Fully discharge the battery before a new recharge. The recharge light (D) starting blinking quickly signals a failure on the recharge circuit. Contact an authorized Service Centre Ariete. The adapter (I) and the base upper part (H) may warm up during recharge; this is normal. Avoid to rec...
Page 14 - CLEANING; WARNING; - Rotate the plastic screw towards the sign “
E N - 12 - installed attachment first, by removing it outward, position the end in the lower side of the apposite housing in the appliance body (R) and slightly push backward the handheld vacuum cleaner until it clicks into place (Fig. 11). WARNING: Make sure the handheld vacuum cleaner is properly ...
Page 15 - F R; INSTRUCTIONS IMPORTANTES; LIRE CES INSTRUCTIONS AVANT L’EMPLOI; cigarettes, les allumettes ou la cendre encore chaude.
F R - 13 - INSTRUCTIONS IMPORTANTES LIRE CES INSTRUCTIONS AVANT L’EMPLOI Lors de l’utilisation d’appareils électriques, il est nécessaire de prendre les précau-tions suivantes:1 Ne placez pas l’appareil au dessus ou près de sources de chaleur.2 N’utilisez pas l’appareil près d’autres personnes, et n...
Page 17 - amovible / Voyant lumineux de recharge
F R - 15 - ne peut en aucun cas être destiné à un usage commercial ou industriel. 25 Toute modification du produit, non autorisé expressément par le producteur, peut comporter la réduction de la sécurité et la déchéance de la garantie. 26 Si vous décidez de vous défaire de cet appareil, il est forte...
Page 18 - ASSEMBLAGE DE L’APPAREIL
F R - 16 - ASSEMBLAGE DE L’APPAREIL Avant de procéder à l’utilisation de l’appareil, il est nécessaire d’assembler le manche supérieur (B) sur le corps de l’appareil (R) en procédant comme suit:- assembler le manche supérieur (B) sur le corps de l’appareil (R) en le poussant avec précaution jusqu’à ...
Page 19 - ACCESSOIRES; Aspirateur Portatif
F R - 17 - ACCESSOIRES Brosse pour sols/tapis (O) Indiquée pour le nettoyage de tous les types de surfaces, y compris les tapis.- Assemblez la brosse sur le corps de l’appareil (R) en la poussant légèrement jusqu’à la butée (Fig. 7).- Pour enlever la brosse, il suffit de l’extraire. Aspirateur avec ...
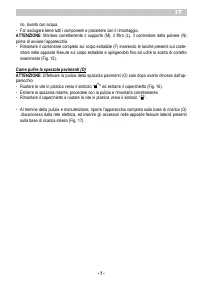
Page 20 - Comment vider le récipient de la poussière (N)
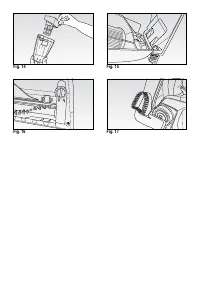
F R - 18 - Comment vider le récipient de la poussière (N) ATTENTION : Nettoyer le récipient à poussière (N) et le filtre (L) en temps utile; la puissance d’aspi- ration sera réduite si le récipient est plein ou si le filtre est bouché.- Vérifier, depuis la partie arrière de l’appareil, si le récipie...
Page 21 - D E; WICHTIGE HINWEISE; VOR GEBRAUCH BITTE DIESE ANLEITUNG LESEN; 4 DAS KÖRPER DES GERÄTS, DEN LADESOCKEL, DEN STECKER UND
D E - 19 - WICHTIGE HINWEISE VOR GEBRAUCH BITTE DIESE ANLEITUNG LESEN Beim Gebrauch von Elektrogeräten sind einige Vorsichtsmaßnahmen zu treffen:1 Gerät nicht auf oder an Wärmequellen abstellen.2 Verwenden Sie das Gerät nicht in der Nähe von Personen und bringen Sie es nie auf die Höhe von Augen und...
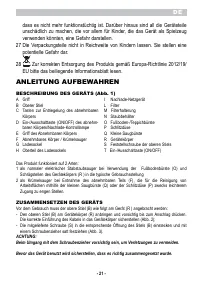
Page 23 - ANLEITUNG AUFBEWAHREN; Körpers
D E - 21 - dass es nicht mehr funktionstüchtig ist. Darüber hinaus sind all die Geräteteile unschädlich zu machen, die vor allem für Kinder, die das Gerät als Spielzeug verwenden könnten, eine Gefahr darstellen. 27 Die Verpackungsteile nicht in Reichweite von Kindern lassen. Sie stellen eine potenti...
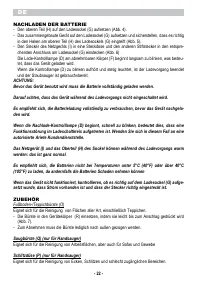
Page 24 - NACHLADEN DER BATTERIE
D E - 22 - NACHLADEN DER BATTERIE - Den oberen Teil (H) auf den Ladesockel (G) aufsetzen (Abb. 4).- Das zusammengebaute Gerät auf den Ladesockel (G) aufsetzen und sicherstellen, dass es richtig in den Haken am oberen Teil (H) des Ladesockels (G) eingreift (Abb. 5). - Den Stecker des Netzgeräts (I) i...
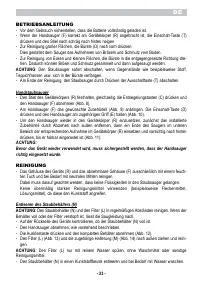
Page 25 - BETRIEBSANLEITUNG; Handstaubsauger; ACHTUNG
D E - 23 - BETRIEBSANLEITUNG - Vor dem Gebrauch sicherstellen, dass die Batterie vollständig geladen ist.- Wenn der Handsauger (F) korrekt am Gerätekörper (R) angebracht ist, die Einschalt-Taste (T) drücken und den Stiel nach schräg nach hinten neigen - Zur Reinigung großer Flächen, die Bürste (O) n...
Page 26 - ” drehen und den Deckel herausnehmen
D E - 24 - - Alle Teile gründlich trocknen lassen, bevor sie wieder eingesetzt werden. ACHTUNG : Die Halterung (M), den Filter (L), den Staubbehälter (N) richtig einsetzen, bevor das Gerät wieder eingeschaltet wird.- Den kompletten Behälter wieder am abnehmbaren Körper (F) anbringen, indem die Nasen...
Page 27 - E S; ADVERTENCIAS IMPORTANTES; LEER ESTAS INSTRUCCIONES ANTES DEL EMPLEO; obstruyan el flujo de aire.
E S - 25 - ADVERTENCIAS IMPORTANTES LEER ESTAS INSTRUCCIONES ANTES DEL EMPLEO Cuando se usan aparatos eléctricos es necesario tomar algunas precauciones, entre las cuales:1 No colocar el aparato sobre o en proximidad de fuentes de calor.2 No usar el aparato cerca de personas, ni levantarlo a la altu...
Page 29 - GUARDAR ESTAS INSTRUCCIONES; ble
E S - 27 - podrían utilizar el aparato para sus juegos. 27 Los elementos del embalaje no se tienen que dejar al alcance de los niños ya que constituyen fuentes potenciales de peligro. 28 Para la correcta eliminación del producto según la Directiva Europea 2012/19/EU se ruega leer el correspondiente ...
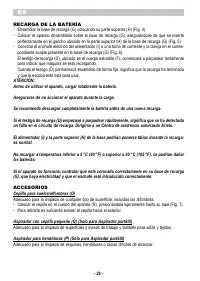
Page 30 - RECARGA DE LA BATERÍA
E S - 28 - RECARGA DE LA BATERÍA - Ensamblar la base de recarga (G) colocando su parte superior (H) (Fig. 4).- Colocar el aparato ensamblado sobre la base de recarga (G), asegurándose de que se inserte perfectamente en el gancho ubicado en la parte superior (H) de la base de recarga (G) (Fig. 5). - ...
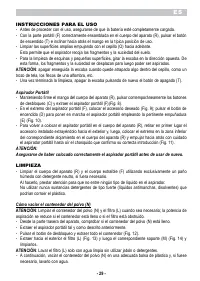
Page 31 - INSTRUCCIONES PARA EL USO; Aspirador Portátil; ATENCIÓN
E S - 29 - INSTRUCCIONES PARA EL USO - Antes de proceder con el uso, asegurarse de que la batería esté completamente cargada.- Con la parte portátil (F) correctamente ensamblada en el cuerpo del aparato (R), pulsar el botón de encendido (T) e inclinar hacia atrás el mango en la típica posición de us...
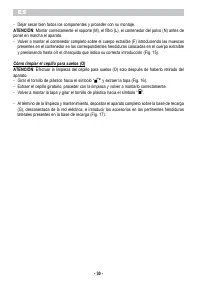
Page 32 - - Dejar secar bien todos los componentes y proceder con su montaje.
E S - 30 - - Dejar secar bien todos los componentes y proceder con su montaje. ATENCIÓN : Montar correctamente el soporte (M), el filtro (L), el contenedor del polvo (N) antes de poner en marcha el aparato.- Volver a montar el contenedor completo sobre el cuerpo extraíble (F) introduciendo las muesc...
Page 33 - P T; ADVERTÊNCIAS IMPORTANTES; LEIA ESTAS INSTRUÇÕES ANTES DE USAR O APARELHO; para evitar graves acidentes.
P T - 31 - ADVERTÊNCIAS IMPORTANTES LEIA ESTAS INSTRUÇÕES ANTES DE USAR O APARELHO Ao utilizar aparelhos eléctricos, é necessário tomar as devidas precauções, entre as quais:1 Não colocar o aparelho sobre ou perto de fontes de calor.2 Não aproxime a vassoura das pessoas, muito menos dos olhos, orelh...
Page 35 - GUARDE ESTAS INSTRUÇÕES; amovível / Luz avisadora de recarga
P T - 33 - para as crianças que podem utilizar o aparelho como um brinquedo. 27 Os elementos da embalagem não devem ser deixados ao alcance de crianças pois são potenciais fontes de perigo. 28 Para a correta eliminação do produto, nos termos da Diretiva Europeia 2012/19/EU, leia o folheto em anexo. ...
Page 36 - RECARGA DA BATERIA
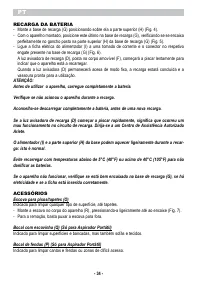
P T - 34 - RECARGA DA BATERIA - Monte a base de recarga (G) posicionando sobre ela a parte superior (H) (Fig. 4).- Com o aparelho montado, posicione este último na base de recarga (G), verificando se se encaixa perfeitamente no gancho posto na parte superior (H) da base de recarga (G) (Fig. 5). - Li...
Page 37 - MODO DE UTILIZAÇÃO; ATENÇÃO
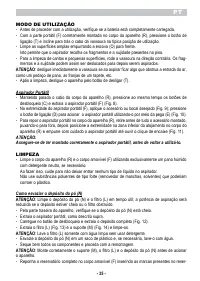
P T - 35 - MODO DE UTILIZAÇÃO - Antes de proceder com a utilização, verifique se a bateria está completamente carregada.- Com a parte portátil (F) corretamente montada no corpo do aparelho (R), pressione o botão de ligação (T) e incline para trás o cabo da vassoura na típica posição de utilização. -...
Page 39 - N L; BELANGRIJKE AANWIJZINGEN; VÓÓR HET GEBRUIK DEZE AANWIJZINGEN LEZEN; voorwerpen de luchtstroom verstoppen.
N L - 37 - BELANGRIJKE AANWIJZINGEN VÓÓR HET GEBRUIK DEZE AANWIJZINGEN LEZEN Bij het gebruik van elektrische apparaten moeten altijd de juiste voorzorgsmaatre-gelen worden genomen, waaronder:1 Zet het apparaat niet op of in de buurt van warmtebronnen.2 Gebruik het apparaat niet in de buurt van perso...
Page 41 - DEZE AANWIJZINGEN BEWAREN; re basis
N L - 39 - zijn goedgekeurd, kunnen de veiligheid van de gebruiker in gevaar brengen, tevens vervalt de gebruiksgarantie. 26 Wanneer men het apparaat als afval wil verwerken moet het onbruikbaar gemaakt worden door de voedingskabel er af te knippen. Bovendien wordt het aanbevolen om alle gevaarlijke...
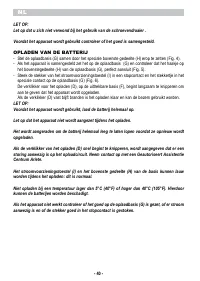
Page 42 - OPLADEN VAN DE BATTERIJ
N L - 40 - LET OP: Let op dat u zich niet verwond bij het gebruik van de schroevendraaier . Voordat het apparaat wordt gebruikt controleer of het goed is samengesteld. OPLADEN VAN DE BATTERIJ - Stel de oplaadbasis (G) samen door het speciale bovenste gedeelte (H) erop te zetten (Fig. 4).- Als het ap...
Page 43 - LET OP; Draagbare Zuiger
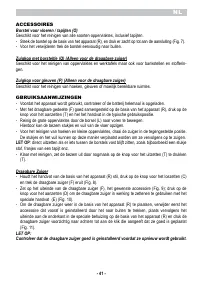
N L - 41 - ACCESSOIRES Borstel voor vloeren / tapijten (O) Geschikt voor het reinigen van alle soorten oppervlaktes, inclusief tapijten.- Steek de borstel op de basis van het apparaat (R), en druk er zacht op tot aan de aansluiting (Fig. 7).- Voor het verwijderen trek de borstel eenvoudig naar buite...
Page 44 - REINIGEN; - Draai de plastic schroeven in de richting van het symbool “
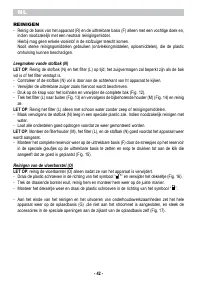
N L - 42 - REINIGEN - Reinig de basis van het apparaat (R) en de uittrekbare basis (F) alleen met een vochtige doek en, indien noodzakelijk met een neutraal reinigingsmiddel. Hierbij mag geen enkele vloeistof in de stofzuiger terecht komen. Nooit sterke reinigngsmiddelen gebruiken (ontvlekkingmiddel...
Page 45 - E L
E L - 43 - - , : 1 . 2 , , , .. . 3 ( , ). 4 . 5 ( - ) , . , - . 6 . 7 . 8 , , , . 9 . 10 , . 11 ( , , , .) . 12 , - . 13 ( , , - , , .). 14 , , , . 15
Page 51 - R U
R U - 49 - . - , , : 1 . 2 , - , . . 3 ( , . .) 4 , . 5 ( ) , - . , , , , . 6 , . 7 , . 8 , , . . 9 . 10 / , ., , . 11 ( , , . .), . 12 , . 13 ( , , - , . .). 14 , , ; . 15
Page 56 - wk –
R U - 54 - - . : (M), (L), (N). - (F), , ( . 15). ( ) : (O) . - “ ” ( . 16). - , . - “ ”. - (G), - , ( . 17). SN wk/yrabcdefg, wk – yr – abcdefg – 004/2011 « , 768 16 2011 020/2011 « », 879 9 2011 / - . 18B~ - 1800 mAh - III - IPX0 100-240B~ - 50/60 - 0,5A - II - IPX0 18B~ - 1800 mAh - III - IPX0 : ...
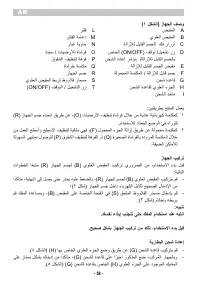
Page 60 - A R
A R - 58 - ( ( A B C ) ON/OFF ( / D / E / F G H I L M N / O P Q R S ) ON/OFF ( / T : ) R ( ) O ( . ) F ( ) P ( ) Q ( . ) R ( ) B ( : ) R ( ) B ( - ) ( ) B ( ) S ( - .( ( : . . .( ( ) H ( ) G ( - ) G ( - .) ( ) G ( ) H (