Page 2 - Congratulations; Product Overview
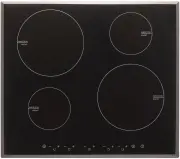
2 Congratulations on the purchase of your new Induction Hob. We recommend that you spend some time to read this Instruction / Installation Manual in order to fully understand how to install correctly and operate it. For installation, please read the installation section. Read all the safety instruct...
Page 3 - Control Panel; Induction Cooking; How It Works
3 Control Panel Induction Cooking Induction cooking is a safe, advanced, efficient, and economical cooking technology. It works by electromagnetic vibrations generating heat directly in the pan, rather than indirectly through heating the glass surface. The glass becomes hot only because the pan even...
Page 5 - Using your Induction Hob; To start cooking
5 Make sure that the base of your pan is smooth, sits flat against the glass, and is the same size as the cooking zone. Use pans whose diameter is as large as the graphic of the zone selected.Using a pot a slightly wider energy will be used at its maximum efficiency.If you use smaller pot efficiency...
Page 6 - When you have finished cooking
6 3. Select a heat setting by touching the “-“ or “+” control. • If you don’t choose a heat setting within 1 minute, the Induction hob will automatically switch off. You will need to start again at step 1. • You can modify the heat setting at any time during cooking. If the display flashes alternate...
Page 7 - Using the Boost function; OR
7 2. Beware of hot surfaces H will show which cooking zone is hot to touch. It will disappear when the surface has cooled down to a safe temperature. It can also be used as an energy saving function if you want to heat further pans, use the hotplate that is still hot. Using the Boost function Active...
Page 8 - Locking the Controls; To lock the controls; Over-Temperature Protection
8 • The function can work in any cooking zone. • The cooking zone returns to its original setting after 5 minutes. • If the original heat setting equals 0, it will return to 9 after 5 minutes. Locking the Controls • You can lock the controls to prevent unintended use (for example children accidental...
Page 9 - Auto Shutdown Protection; Using the Timer; Using the Timer as a Minute Minder
9 go on to standby in 1 minute. The fan will keep cooking down the induction hob for a further 1 minute. Auto Shutdown Protection Auto shut down is a safety protection function for your induction hob. It shut down automatically if ever you forget to turn off your cooking. The default working times f...
Page 10 - Setting the timer to turn one or more cooking zones off; If the timer is set on one zone:
10 3. Set the time by touching the “-“ or ”+” control of the timer Hint: Touch the “-“ or ”+” control of the timer once to decrease or increase by 1 minute. Touch and hold the “ -“ or “+” control of the timer to decrease or increase by 10 minutes. 4. Touching the “-“ and ”+” together, the timer is c...
Page 12 - Cooking Guidelines; Cooking Tips
12 (set to 15 minutes) (set to 45 minutes) 2. Once the countdown timer expires, the corresponding zone will switch off. Then it will show the new min. timer and the dot of corresponding zone will flash. (set to 30 minutes) Cooking Guidelines Take care when frying as the oil and fat heat up very quic...
Page 13 - Searing steak; Heat Settings; Heat setting
13 point. • Some tasks, including cooking rice by the absorption method, may require a setting higher than the lowest setting to ensure the food is cooked properly in the time recommended. Searing steak To cook juicy flavorsome steaks: 1. Stand the meat at room temperature for about 20 minutes befor...
Page 14 - Care and Cleaning
14 7 - 8 • sautéing • cooking pasta 9 • stir-frying • searing • bringing soup to the boil • boiling water Care and Cleaning What? How? Important! Spillovers on the touch controls 1. Switch the power to the cooktop off. 2. Soak up the spill 3. Wipe the touch control area with a clean damp sponge or c...
Page 15 - Hints and Tips; Problem
15 Hints and Tips Problem Possible causes What to do The induction hob cannot be turned on. No power. Make sure the induction hob is connected to the power supply and that it is switched on. Check whether there is a power outage in your home or area. If you’ve checked everything and the problem pers...
Page 16 - Cooking Hob; Zones; Supply Voltage
16 The induction hob or a cooking zone has turned itself off unexpectedly, a tone sounds and an error code is displayed (typically alternating with one or two digits in the cooking timer display). Technical fault. Please note down the error letters and numbers, switch the power to the induction hob ...
Page 17 - Zones; Installation; Selection of installation equipment
17 Cooking Hob CI6SE2 Cooking Zones 3 Zones Supply Voltage 220-240V~ Installed Electric Power 7200W Product Size L×W×H(mm) 590X520X56.5 Building-in Dimensions A×B (mm) 560X490 ecifications and designs without prior notice. Installation Selection of installation equipment Cut out the work surface acc...
Page 18 - Induction cooktops
18 A(mm) B(mm) C(mm) D E 760 50 mini 20 mini Air intake Air exit 5mm H EAT S HIELD V ERTICAL S UPPORT V ENTILATI ON S PA C E K ICK B OARD T OP OF C ABINET H EAT B ARRIER Induction cooktops heat rapidly and unlike other cooktops require air intake and air exhaust outlets. Heat barrier should be the w...
Page 20 - Cautions; Connecting the hob to the mains power supply
20 Cautions 1. The induction hotplate must be installed by qualified personnel or technicians. We have professionals at your service. Please never conduct the operation by yourself. 2. The hob will not be installed directly above a dishwasher, fridge, freezer, washing machine or clothes dryer, as th...
Page 21 - Safety Warnings; Electrical Shock Hazard
21 • If the cable is damaged or to be replaced, the operation must be carried out the by after-sale agent with dedicated tools to avoid any accidents. • If the appliance is being connected directly to the mains an omnipolar circuit-breaker must be installed with a minimum opening of 3mm between cont...
Page 22 - Operation and maintenance
22 • could reduce your installation costs. • In order to avoid a hazard, this appliance must be installed according to these instructions for installation. • This appliance is to be properly installed and earthed only by a suitably qualified person. • This appliance should be connected to a circuit ...
Page 24 - PRODUCT SERVICE NUMBER