Page 2 - Explanation of symbols; Throughout this User Manual the following symbols are used:; Please read this user manual first!
Explanation of symbols Throughout this User Manual the following symbols are used: C Important information or usefulhints about usage. A Warning for hazardous situationswith regard to life and property. B Warning for electric shock. Packaging materials of the product are manufactured from recyclable...
Page 3 - CONTENTS
0$18)$&785(*8$5$17(( CONTENTS ,16758&7,216)256$)(7<$1'(19,5210(17 4 General safety .......................................4Intended use ..........................................4Children’s safety .................................... 5Disposing of packaging material ........ 5Transportati...
Page 4 - Dishwasher / User’s Manual; instructions for safety and environment; OQMVHUIFQSPEVDUXIFOOPUJOVTF
Dishwasher / User’s Manual &/ instructions for safety and environment 1 5IJTTFDUJPODPOUBJOTTBGFUZJOTUSVDUJPOTUIBUXJMMIFMQUPHFUQSPUFDUFEGSPNSJTLPGQFSTPOBMJOKVSZPSQSPQFSUZEBNBHF'BJMVSFUPGPMMPXUIFTFJOTUSVDUJPOTTIBMMWPJEBMMXBSSBOUJFT (FOFSBMTBGFUZ • /FWFSQMBDFUIFQSPEVDUPOBDBSQFUDPWFSFEGMPPSPUIFSXJTF...
Page 7 - Dishwasher; Overview
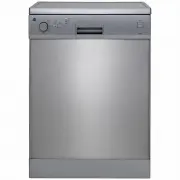
Dishwasher / User’s Manual &/ Dishwasher 2 Overview 1. Upper basket2. Upper impeller3. Lower impeller4. Silverware basket5. Door6. Rating Label7. Control panel8. Detergent dispenser9. Lower basket10. Filters11. Salt reservoir lid (depends on model)12. Upper basket rail13. Upper cutlery basket (d...
Page 8 - Technical specifications; Note for test institutions:; Fan drying system
Dishwasher / User’s Manual &/ Dishwasher Technical specifications Compliance to standards and test data / EC declaration of conformity This product complies with the following EU directives;Development, production and sales stages of this product comply with the safety rules included in all pert...
Page 9 - Installation; Connecting water supply
Dishwasher / User’s Manual 9 / 39 EN 3 Installation Refer to the nearest Authorised Service Agent for installation of your product. To make the product ready for use, make sure that the electricity, tap water supply and water drainage systems are appropriate before calling the Authorised Service Age...
Page 10 - Connection to the drain
Dishwasher / User’s Manual &/ Installation Permitted water temperature: up to 25°C The dishwasher should be connected to cold water inlet. • Do not use old or used water inlet hose on the new product. Use the new waterinlet hose supplied with the product. • Connect the water inlet hose directly ...
Page 11 - Initial use
Dishwasher / User’s Manual &/ Installation • The voltage and allowed fuse or breaker protection are specified in the “Technical specifications” section. If thecurrent value of the fuse or breaker in the house is less than 16 Amps, have a qualified electrician install a 16 Amp fuse. • The specifi...
Page 12 - Preparation; Tips for energy saving; Adding detergent
Dishwasher / User’s Manual &/ Preparation 4 Tips for energy saving Following information will help you use the product in an ecological and energy-efficient manner.Wipe away any coarse food remnants on the dishes before putting them in the product. Operate the product after filling it completely...
Page 13 - Tablet detergents
Dishwasher / User’s Manual &/ Preparation 3. Push the lid of the detergent dispenser to close it. A "click" will be heard when the lid is closed. 1 2 3 C Use powder or liquid/gel detergent in short programmes without prewash since the solubility of the tablet detergent changes depending ...
Page 14 - Rinse aid
Dishwasher / User’s Manual &/ Preparation 4. If there are stains on tableware items after washing, level must be increasedand if there is a blue trace after wiping them by hand, it must be decreased. This is set to position 3 as factory default. C The rinse aid adjustment is described under "...
Page 16 - Suggestions for loading the dishwasher
Dishwasher / User’s Manual &/ Preparation Suggestions for loading the dishwasher Lower basket Upper basket Improper Loading Of Dishware Improper Loading Of Dishware
Page 17 - Cutlery basket
Dishwasher / User’s Manual &/ Preparation Cutlery basket (depends on model) Cutlery basket is designed to wash your dishes such as knife, fork, spoon, etc. in an efficient manner.Since the cutlery basket can be moved (A, B), you can create more space while placing your dishes in the lower basket...
Page 19 - Tray Wash Supports
Dishwasher / User’s Manual &/ Preparation Tray Wash Supports (depends on model)Use the supports to wash trays in the bottom basket.See the Auxiliary functions section for appropriate programme and function selection. C Bringing the tines to the horizontal position by holding them from the tips m...
Page 20 - Slide the rack down and lock it by the
Dishwasher / User’s Manual &/ Preparation Lower basket multipurpose / height adjustable service rack (depends on model) This accessory located at the lower basket of your machine allows you to easily wash pieces such as extra glasses, long ladles and bread knives. C You may use the racks as requ...
Page 21 - Lower basket bottle wire
Dishwasher / User’s Manual &/ Preparation Upper basket multipurpose service rack (depends on model)This accessory located at the upper basket of your machine allows you to easily wash pieces such as extra long ladles and bread knives. You can lift up the upper basket multipurpose service rack to...
Page 22 - Lower the basket from its current
Dishwasher / User’s Manual &/ Preparation To lower the basket, while it is in the uppermost position;1. Hold the upper basket wires with both hands, slightly lift up the basket and simultaneously push and release the latches shown in the figure (B). 2. Lower the basket from its current position ...
Page 24 - Ceiling cutlery basket
24 Dishwasher / User’s Manual /39 EN Preparation Ceiling cutlery basket (depends on model)Ceiling cutlery basket is designed to wash your cutlery items such as forks, spoons and etc. by placing them between the bars on the basket. Ceiling cutlery basket (depends on model) Ceiling cutlery basket is d...
Page 25 - Silverware basket piece
Dishwasher / User’s Manual &/ Preparation Silverware basket piece (depends on model) You can place your forks, spoons and etc. to upper basket with the additional piece in the figure.. It is recommended that you should place the silverware basket piece on front left corner of the upper basket by...
Page 26 - Operating the product; Keys
Dishwasher / User’s Manual &/ 5 55 1-2-3-4-5-6-7- On/Off Control light Handle On/Off/Programme Selection key Start/Pause/Cancel key Programme Follow-up lights 1 2 3 4 5 6 7 Rinse Aid indicator Operating the product Keys On/Off/Programme Selection key When you use the On/Off/Programme Selection k...
Page 28 - Auxiliary functions; Half Load function; Select the desired programme and press; Starting the programme
Dishwasher / User’s Manual &/ Operating the product Auxiliary functions Washing programmes of your dishwasher are designed to obtain the best cleaning effect, considering the type of the soiling, soiling degree and properties of the dishes to be washed.Auxiliary functions are provided in order t...
Page 29 - Cancelling the programme; Release it when the Washing and; Salt indicator
Dishwasher / User’s Manual 29 / 39 EN Operating the product Programme follow-up You can track the current step of the selected programme on the programme step lights located on the control panel. C If the drying light is on, the machine will perform silent drying for 30-60 minutes. At the end of thi...
Page 30 - End of programme
Dishwasher / User’s Manual &/ Operating the product Adjusting the amount of rinse aid 1. While the Programme Selection Knob is in “Off” position, press and hold the function key and turn the Programme Selection Knob clockwise by one level,keeping the function key pressed for 2 seconds. At the en...
Page 31 - Maintenance and cleaning; Cleaning the filters; Press the two pawls on the coarse filter
Dishwasher / User’s Manual &/ Maintenance and cleaning 6 Service life of the product extends and frequently faced problems decrease if it is cleaned at regular intervals. A Unplug the product and turn off the tap before attempting any cleaning procedures. C Do not use abrasive substances for cle...
Page 32 - Clean all three filters under tap water by; Cleaning the hose filter; After taking out the filter, clean it under
Dishwasher / User’s Manual &/ Maintenance and cleaning 4. Clean all three filters under tap water by means of a brush. 5. Place the metal/plastic filter. 6. Place the coarse filter into the micro filter. Make sure that it is properly seated. Turn the coarse filter clockwiseuntil a "click"...
Page 33 - Cleaning the impellers
Dishwasher / User’s Manual &/ Maintenance and cleaning Cleaning the impellers Clean the impellers at least once a week in order for the machine operates efficiently. Lower impeller Check if the holes on the lower impeller (1) are clogged. If they are clogged, remove and clean the impeller. You c...
Page 34 - Troubleshooting; Machine does not start.
Dishwasher / User’s Manual &/ 7 Troubleshooting Machine does not start. • Power cable is unplugged. >>> Check if the power cable is plugged in. • Fuse is blown. >>> Check the fuses in your house. • Water is cut. >>> Make sure that the water inlet tap is open. • Door of...
Page 35 - Tea, coffee or lipstick stains remain on dishes.
Dishwasher / User’s Manual &/ Troubleshooting • Rinse aid is not sufficient. >>> Check the rinse aid indicator and add rinse aid if necessary. Increase the rinse aid setting if there is enough amount of rinse aid in themachine. • Machine is unloaded right after the programme is over. &g...
Page 36 - There is a different odour in the machine
Dishwasher / User’s Manual Troubleshooting There is a different odour in the machine C A new machine has a peculiar odour. It will fade out after a couple of washes. • Filters are clogged. >>> Check if the filter system is clean. Clean the filter systemregularly as illustrated in section “C...
Page 37 - Decorations and ornaments on kitchen utensils are being erased.
Troubleshooting • Detergent is stored under unsuitable conditions. >>> If you are using powder detergent,do not store the detergent package in humid places. Keep it in a closed container if possible. For ease-of-storing, we recommend you to use tablet detergents. • Impeller holes are clogge...
Page 38 - Water remains in the dishwasher at the end of the programme.
Troubleshooting Water remains in the dishwasher at the end of the programme. • Filters are clogged. >>> Check if the filter system is clean. Clean the filter systemregularly as illustrated in section “Cleaning and Care”. • Discharge hose is clogged/blocked. >>> Check the discharge ...