ANOVA AN600-US00 - Manuals
User Manual ANOVA AN600-US00


Summary
3 2 G E T S T A R T E D 3 2 4 1 Maximum Water Level Line Rear Screw Side Screw Cord + Plug Minimum Water Level Line fill a pot or container with at least 2.5" (63mm) of water, or above the Minimum Water Level Line on your Anova Precision® Cooker Pro, and place it on a heat-safe surface or trivet...
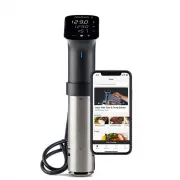
5 4 starting your cook and setting the timer • Set or change desired temperature by pressing the Target Temperature button followed by the +/- buttons on your Anova Precision® Cooker Pro • Set or change cooking time by pressing the Timer button followed by the +/- buttons • Press the Start button to...
6 7 C A R E + C L E A N I N G how to disassemble remove the clamp by loosening the side knob and sliding the clamp down off of the stainless steel skirt. remove the skirt by grasping the stainless steel skirt, and gently twisting it clockwise to unlock it from the upper body. Then carefully pull the...