Page 2 - Cleaning And Maintenance; TECHNICAL SPECIFICATIONS; Scan the QR code for more
Model No.: GCF20B Power : 950W Voltage: 120V~ 60Hz P u m p P r e s s u r e : 20 Bar C a p a c i t y o f W a t e r T a n k : 1.5L / 50.7 fl.oz Safety InstructionsProduct ComponentsHow To Use 2 4 5 Cleaning And Maintenance 12 Troublshooting 13 Limited Warranty 14 TECHNICAL SPECIFICATIONS TABLE OF CONT...
Page 3 - SAFETY INSTRUCTIONS; should be supervised at all times in order to ensure that they; do not; play with; IMPORTANT SAFETY INSTRUCTIONS; Do not
SAFETY INSTRUCTIONS 2 Read all the safety and operating instructions carefully and retain them for future reference. Don't use it outdoors. Keep it away from sources of heat, direct sunlight, humidity (never dip it into any liquid) and sharp edges. Do not use the appliance with wet hands. If the app...
Page 4 - SAVE THESE INSTRUCTIONS!; The appliance is only to be used as described in the user manual.; use the appliance for any commercial purposes.
SAFETY INSTRUCTIONS 3 SAVE THESE INSTRUCTIONS! HOUSEHOULD USE ONLY The appliance is only to be used as described in the user manual. Do not use the appliance for any commercial purposes. Any other use is not intended and can result in damages or personal injuries.The manufacturer assumes no liabilit...
Page 5 - KNOW YOUR COFFEE MACHINE; PRODUCT COMPONENTS
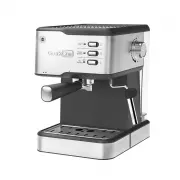
KNOW YOUR COFFEE MACHINE PRODUCT COMPONENTS 4 1. On/Off button 2. Espresso button 3. Steam button 4. On/Off button indicator 5. Espresso button indicator 6. Espresso and Steam temperatures ready indicator 7. Steam control knob 8. Drip tray grid 9. Drip tray 10. ESE (Easy Serve Espresso) pod filter 1...
Page 6 - BEFORE FIRST USE; HOW TO USE; There will be a noise and little shake when the machine; let the water flow into the empty pump for the first use.
BEFORE FIRST USE HOW TO USE 5 1. 2. 3. 4. 5. 6. Note : There will be a noise and little shake when the machine running first time. It’s normal for a 20 bar pump. The noise will be weak in the future using. It is recommended to run the machine without coffee grounds at least once before the first use. ...
Page 7 - PREPARING THE ESPRESSO; filter holder inserted.; Add one measuring spoon of coffee grounds (we recom-
HOW TO USE 6 PREPARING THE ESPRESSO MAKING THE ESPRESSO Place a large cup under the Filter Holder and press the Espresso Button. After the cup has been filled with water, press the Espresso Button again to stop and wait a few minutes for the machine to reach the correct temperature with the filter hol...
Page 8 - any residue from the Brew unit.; There will be noise during the operating process. This is; MAKING THE ESE (EASY SERVE ESPRESSO) POD ESPRESSO
HOW TO USE 7 To brew another cup of espresso, slowly and carefully remove the Filter holder, moving it to the left. Be careful not to burn yourself with the water left on the coffee grounds. Once the Filter holder has been removed, some water will still drip. This is due to the water pressure in the...
Page 9 - machine cold down to room temperature.; To prepare a traditional cappuccino or latte, we recommend:; FROTHING MILK; necessary to make cappuccino decorations.
Note : Be careful not to burn yourself with the water left on the ESE pod. Once the Filter holder has been removed, some water will still drip. This is due to the water pressure in the system. Stop the brewing process when the cup is 1/3 full (about 30-40ml/1 fl.oz) by pressing the Espresso button a...
Page 10 - The steam pressure increases as the knob is rotated.; with an appropriate angle to produce a stronger vortex.
HOW TO USE 9 Rotate the Steam Control Knob counterclockwise to let the steam come out. 5. Note : The steam pressure increases as the knob is rotated. The entire operation should last no longer than 60 seconds. To froth the milk correctly, the steam nozzle must always be in contact with the milk and ...
Page 11 - deeper to heat the milk well.; When milk foaming is complete and you want to make
HOW TO USE 10 Once the desired frothing has been achieved, the steam nozzle must be pushed deeper to heat the milk well. 6. Once the desired result has been achieved, close the Steam Control Knob, by rotating it clockwise, to stop dispensing steam and remove the jug. 7. Tips: It is advisable to alwa...
Page 12 - MAKING HOT WATER; Place a cup under the Steam Wand.; The Steam Wand may be very hot during and after
HOW TO USE MAKING HOT WATER Turn the machine on and wait until the Espresso indicator light turns on. Place a cup under the Steam Wand. Slowly turn the Steam Control Knob counter clockwise to " ON " , then press the Espresso Button to allow for hot water to be dispensed. Once the desired amo...
Page 13 - CLEANING AND MAINTENANCE; CLEANING THE STEAM WAND; Press the Espresso button and fill the cup with water.; CLEANING THE BREW UNIT; The filters should be kept clean to guarantee perfect results.; To avoid bums, the filter must only be replaced when
CLEANING AND MAINTENANCE 12 CLEANING THE STEAM WAND After each milk frothing: CLEANING THE GRID AND DRIP TRAY CLEANING THE WATER TANK Remove the Water tank and wash it with fresh water. Clean the Steam wand with a damp cloth. To clean it more thoroughly, you can unscrew the nozzle and wash it with r...
Page 14 - TROUBLESHOOTING
13 TROUBLESHOOTING No brewing. PROBLEM MAKE SURE THAT The pump is too noisy. There is water in the tank. The filter is not clogged because the mixture is too fine or the coffee is too pressed Excessive loss of water from the filter holder. The espresso is not creamy enough. The coffee is too cold. The mi...
Page 15 - LIMITED WARRANTY; THIS LIMITED WARRANTY DOES NOT APPLY TO :
LIMITED WARRANTY LIMITED WARRANTY Geek Technology Ltd. warrants to the original consumer or purchaser this Geek Chef Espresso Coffee Maker is free from defects in material or workmanship for a period of One (1) year from the date of purchase. If any such defect is discovered within the warranty peri...