Page 2 - Model Identification
2 Any questions or to locate an authorized Amana servicer,call toll free 1-866-426-2621 inside the U.S.A or Canada,or 1-319-622-5511 outside the U.S.A or Canada. Warrantyservice must be performed by an authorized Amanaservicer. Amana also recommends contacting anauthorized Amana servicer if service ...
Page 3 - WARNING; IMPORTANT SAFETY INSTRUCTIONS; Recognize this symbol as a SAFETY message
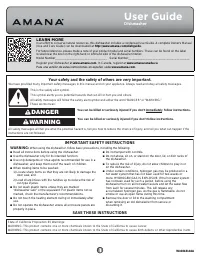
3 SAVE THESE INSTRUCTIONS PRECAUTIONS TO AVOID POSSIBLE EXPOSURE TO EXCESSIVE MICROWAVE ENERGY A. DO NOT attempt to operate this oven with the door open since open door operation can result in harmful exposure to microwave energy. It is important not to defeat or tamper with the safety interlocks. B...
Page 4 - SAVE THESE INSTRUCTIONS; CAUTION
4 SAVE THESE INSTRUCTIONS a. DO NOT overcook food. Carefully attend ovenwhen paper, plastic, or other combustiblematerials are placed inside the oven to facilitatecooking. b. Remove wire twist-ties from paper or plasticbags before placing bag in oven. c. If materials inside the oven ignite, keep ove...
Page 5 - Installation; Unpacking Oven; Radio Interference
5 Installation Unpacking Oven • Inspect oven for damage such as dents in door or inside oven cavity. • Report any dents or breakage to source of purchase immediately. Do not attempt to use oven if damaged. • Remove all materials from oven interior. • If oven has been stored in extremely cold area, w...
Page 6 - Single Pad Programming; or
6 Display and Features (some models) START/+30 SECPad The START/+30 SEC pad is used tobegin a cooking cycle and toincrease the reheat time in 30 secondincrements. • The START/+30 SEC pad is usedto reheat for 30 seconds at 100% (fullpower). The oven will startimmediately and 30 seconds will beadded t...
Page 7 - Defrost Pad
7 Display and Features (some models) Mute Function This function mutes the keypad beep sound (except for end of cycle beep) by: 1. Press and hold QTY 2X pad for 3 seconds. • DOUBLE displays, oven beeps and MUTE displays for 1 second, then :0 appears in display. 2. To deactivate, press and hold QTY 2...
Page 8 - Cooking Display; DOUBLE; Programming Display; Program; Oven Control
8 Display and Features (some models) Display Some items in the display can beseen but are not available dependingon the model. During normaloperation of oven, not all items will bedisplayed at same time. Ready Condition :0 displays when an oven control will accept entries. Cooking Display DISPLAYS D...
Page 9 - Using Electronic Oven Control; Manual Time Entr y; Factory Settings; QTY 2X Pad; Do I
9 Using Electronic Oven Control (some models only) Manual Time Entr y To cook food using a specific entered time and power level. NOTE: To use Time Entry, you must press POWER LEVEL Pad first. 1. Open oven door and place food in oven. Close door.• :0 displays. Light will turn on. 2. Press POWER LEVE...
Page 10 - Programming Electronic Oven Control; Programming Pads
10 Programming Electronic Oven Control (some models only) The displayshows PROGRAM PROGRAM PROGRAM PROGRAM PROGRAM . When PROGRAM pad is pressed, the display will show PROGRAM . POW ER LEVEL START/ +30 SEC Programming Pads Oven is shipped from factory with pads 1-10 preprogramed. To re-programpads 1...
Page 11 - Dial Operation; Dial option is available on some models only.; Heating; Inter rupting Operation
11 Dial Operation (some models only) Dial option is available on some models only. Oven Clearances A—Allow at least 4" (10.2 cm) of clearance around top and sides of oven. Proper air flow around oven cools electrical components. With restrictedair flow, oven may not operate properly and life of ...
Page 12 - Care and Cleaning; PART; Before Calling for Service; Problem Possible
12 Care and Cleaning PART CARE AND CLEANING RECOMMENDATION Interior, Exterior, and Door Clean microwave oven with mild detergent in warm water using soft sponge or cloth. Wring sponge or cloth to remove excess water before wiping equipment. If desired, boil a cup of water in microwave oven to loosen...