Page 2 - Contents; Model Identification
2 Contents Model Identification Complete enclosed registration card and promptly return.If registration card is missing, call Consumer AffairsDepartment at 1-800-843-0304 inside U.S.A.319-622-5511 outside U.S.A. When contacting Amana,provide product information located on rating plate. Ratingplate i...
Page 3 - Important Safety Information; WARNING; CAUTION; All Appliances
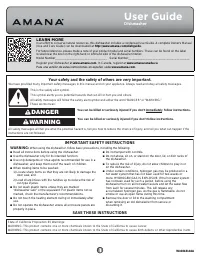
3 Important Safety Information WARNING ! This appliance contains or produces a chemical orchemicals which can cause death or serious illnessand which are known to the state of California tocause cancer, birth defects or other reproductive harm.To reduce the risk from substances in the fuel or fromfu...
Page 4 - Installation
4 6. Utensil Handles Should be Turned Inward and NotExtend Over Adjacent Surface Units. Reduce the riskof burns, ignition of flammable materials, and spillagedue to unintentional contact with the utensil. Positionutensil handle so that it is turned inward, and doesnot extend over adjacent surface un...
Page 7 - Duct Connections; Duct Length; Duct Length Piece Equivalents
7 Duct Connections •` Blower exhaust faces towards rear wall. Connect blower exhaust to ducting with 3¼ x 10 piece. Noscrews are necessary. • Do not install 2 elbow fittings next to each other. Two elbow fittings joined together create unusual airpatterns and can result in poor ventilation. • Do not...
Page 9 - Power Supply Connection; Removing and Reinstalling Cooktop
9 Power Supply Connection WARNING ! To avoid risk of electrical shock, personal injury, ordeath, make sure cooktop has been properly groundedand always disconnect it from main power supplybefore any servicing. To avoid risk of electrical shock or personal injurywhen connecting copper leads to alumin...
Page 10 - Grill and Griddle Module; Modules; Coil Modules
10 Grill and Griddle Module Grill and griddle module can be installed on either side. Modules This cooktop features a choice of different modules,shown below. On model AKED3060, modules can beinstalled on either side. Model AKES3060 only acceptsmodules on right side. Call your local authorized deale...
Page 11 - Installing Modules
11 Installing Modules WARNING ! To avoid risk of personal injury, all controls must be in"OFF" position before removing or installing modules. Installing Coil and Smoothtop Modules1. Turn all controls to OFF. 2. Hold module with terminals pointing toward rear ofcooktop. 3. Place end of modul...
Page 12 - Operation
12 Operation Coil Modules WARNING ! To avoid risk of serious personal injury, propertydamage, or fire, do not leave surface elementsunattended while in operation. Grease and spilloverscan ignite causing a fire. 1. Push in and turn surface element control to desiredsetting.• Cooktop has 1 indicator l...
Page 13 - Smoothtop Module; Smoke Control Grill
13 Smoothtop Module WARNING ! To avoid risk of serious personal injury, propertydamage, or fire, do not leave surface elementsunattended while in operation. Grease and spilloverscan ignite causing a fire. To avoid risk of serious personal injury never cook on abroken smoothtop module. Spillovers or ...
Page 14 - Griddle; Exhaust Fan
14 Griddle WARNING ! To avoid risk of serious personal injury, propertydamage, or fire, do not leave surface elementsunattended while in operation. Grease and spilloverscan ignite causing a fire. To avoid risk of property damage, do not use metalcooking utensils on the griddle. 1. Before using gridd...
Page 15 - Cooking Utensils
15 Cooking Utensils Cooking Utensils • Use proper pan size. Do not use utensils that overhang element by more than 1 inch. • Use care when using glazed cooking utensils. Some glass, earthenware, or other glazed utensils break dueto sudden temperature changes. • Select utensils without broken or loos...
Page 16 - Cleaning; Cleaning Cooktop; Part
16 Cleaning Cleaning Cooktop WARNING ! To avoid risk of electrical shock, always disconnect cooktop from main power supply before cleaning. Part Materials to Use General Directions Drip bowls Soap and water Drip bowls can be removed for ease in cleaning. For extra driedon soil, soak the bowls in war...
Page 17 - Cleaning Smoothtop Module
17 Cleaning Smoothtop Module Problem Cause To Prevent To Remove Brown streaksand specks Cleaning with a sponge orcloth containing soil ladendetergent water. Use smoothtop cleanerconditioner with clean damppaper towel. Use light application ofsmoothtop cleaner conditionerwith clean damp paper towel. ...
Page 18 - Warranty
18 COOKING PRODUCTS (excluding wall ovens) FULL ONE YEAR WARRANTY LIMITED SECOND YEAR WARRANTY ON ALL PARTS LIMITED THIRD THRU FIFTH YEAR WARRANTY ON GLASS/CERAMIC TOP, ELECTRIC SURFACE ELEMENTS, OR GAS SURFACE BURNERS FIRST YEARAmana Appliances will repair or replace, including related labor and tr...
Page 19 - Before You Call for Service
19 Before You Call for Service Review Owner’s Manual before calling for service.If problems are not caused by defective workmanshipor materials, or if part is consumer replaceable, youcould be charged for a service call though product isunder warranty. • If control knob is on but element does not he...