Amana AGR6303MMW - Manuals
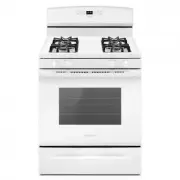
User Manual Amana AGR6303MMW


Summary
2 RANGE SAFETY Your safety and the safety of others are very important. We have provided many important safety messages in this manual and on your appliance. Always read and obey all safetymessages. This is the safety alert symbol. This symbol alerts you to potential hazards that can kill or hurt yo...
4 RANGE MAINTENANCE ANDCARE Self-Cleaning Cycle (on somemodels) WARNING Burn Hazard Do not touch the oven during the Self-Cleaning cycle. Keep children away from the oven during Self-Cleaningcycle. Failure to follow these instructions can result in burns. IMPORTANT: The health of some birds is extre...
6 SURFACE UNDER COOKTOP (on some models) The coil cooktop will lift up to provide easy access for cleaningbeneath. Lift the cooktop by both front corners until the supportlocks into place. Cleaning Method: � Glass cleaner, mild liquid cleaner or nonabrasive scrubbingpad. � Affresh ® Kitchen and Appl...
Amana Ranges Manuals
-
 Amana ACR4303MFW
User Manual
Amana ACR4303MFW
User Manual
-
Amana ACR4303MFW
Installation Manual
-
Amana ACR4303MFW
Troubleshooting Guide
-
Amana ACR4303MFW
Manual
-
 Amana ACR4303MMS
User Manual
Amana ACR4303MMS
User Manual
-
Amana ACR4303MMS
Troubleshooting Guide
-
 Amana AEP222VAW
User Manual
Amana AEP222VAW
User Manual
-
Amana AEP222VAW
Installation Manual
-
 Amana AER6303MFB
User Manual
Amana AER6303MFB
User Manual
-
 Amana AER6303MFW
User Manual
Amana AER6303MFW
User Manual
-
Amana AER6303MFW
Manual
-
 Amana AER6303MMS
User Manual
Amana AER6303MMS
User Manual
-
 Amana AER6603SMS
User Manual
Amana AER6603SMS
User Manual
-
 Amana AGG222VDW
User Manual
Amana AGG222VDW
User Manual
-
Amana AGG222VDW
Installation Manual
-
Amana AGG222VDW
Manual
-
Amana AGG222VDW
Troubleshooting Guide
-
 Amana AGR4203MNW
User Manual
Amana AGR4203MNW
User Manual
-
Amana AGR4203MNW
Installation Manual
-
Amana AGR4203MNW
Manual