Page 2 - KUNDENDIENST UND -BETREUUNG
INHALT 1. SICHERHEITSHINWEISE . . . . . . . . . . . . . . . . . . . . . . . . . . . . . . . . . . . . . . . . . . . . . . . . . . . . . . 3 2. GERÄTEBESCHREIBUNG . . . . . . . . . . . . . . . . . . . . . . . . . . . . . . . . . . . . . . . . . . . . . . . . . . . . . 6 3. BETRIEB . . . . . . . . . ....
Page 3 - SICHERHEITSHINWEISE; Sicherheit von Kindern und
1. SICHERHEITSHINWEISE Lesen Sie zu Ihrer Sicherheit und für eineoptimale Nutzung des Geräts vor derMontage und dem ersten Gebrauch dasvorliegende Benutzerhandbuch ein-schließlich der Ratschläge und Warnun-gen aufmerksam durch. Es ist wichtig,dass zur Vermeidung von Fehlern undUnfällen alle Personen...
Page 6 - Einschalten des Geräts
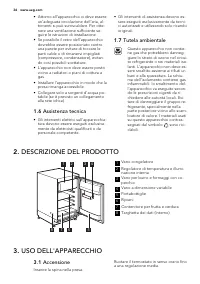
2. GERÄTEBESCHREIBUNG 1 2 3 4 5 6 7 8 1 Gefrierfach 2 Temperaturregler und Innenbe-leuchtung 3 Butter- und Käsefach mit Deckel 4 Variables Lagerfach 5 Flaschenhalter 6 Ablagen 7 Obst- und Gemüsefach 8 Typenschild (an der Innenseite) 3. BETRIEB 3.1 Einschalten des Geräts Stecken Sie den Stecker in di...
Page 8 - PRAKTISCHE TIPPS UND HINWEISE; Normale; Energiespartipps
5.4 Verstellbare Ablagen Die Wände des Kühlschranks sind mit ei-ner Reihe von Führungsschienen ausge-stattet, die verschiedene Möglichkeitenfür das Einsetzen der Ablagen bieten. 5.5 Positionieren der Türablagen Das Modell ist mit einem variablen La-gerfach ausgerüstet, das unter einer Tür-ablage bef...
Page 10 - REINIGUNG UND PFLEGE; Regelmäßige Reinigung
• Das Haltbarkeitsdatum auf der Tief- kühlkostverpackung darf nicht über-schritten werden. 7. REINIGUNG UND PFLEGE VORSICHT! Ziehen Sie bitte vor jeder Reini-gungsarbeit immer den Netzste-cker aus der Steckdose. Der Kältekreis des Gerätes ent-hält Kohlenwasserstoffe; War-tungsarbeiten und Nachfüllen...
Page 12 - Reinigen der Luftkanäle; Stillstandzeiten; Störung
7.4 Reinigen der Luftkanäle C A B 1. Entfernen Sie die Sockelleiste (A)und dann das Belüftungsgitter (B). 2. Reinigen Sie das Belüftungsgitter. 3. Ziehen Sie das Luftleitblech (C) vor-sichtig heraus und prüfen Sie, dasssich hier kein Tauwasser angesam-melt hat. 4. Reinigen Sie das Unterteil des Ge-r...
Page 14 - Ersetzen der Lampe
Störung Mögliche Ursache Abhilfe Die Tür ist nicht richtiggeschlossen. Siehe hierzu "Schließender Tür". Die Temperatur der zukühlenden Lebensmittelist zu hoch. Lassen Sie die Lebensmit-tel auf Raumtemperaturabkühlen, bevor Sie sie indas Gerät legen. Es wurden zu viele Le-bensmittel auf einma...
Page 15 - MONTAGE; Aufstellung; Umgebungstemperatur; Elektrischer Anschluss; GERÄUSCH
3. Ersetzen Sie die defekten Türdich-tungen, falls erforderlich. WendenSie sich hierzu an den Kundendienst. 9. MONTAGE WARNUNG! Lesen Sie bitte die "Sicherheits-hinweise" sorgfältig vor der Auf-stellung des Geräts durch, umGefahren für Sie selbst zu ver-meiden und einen korrekten Be-trieb de...
Page 16 - BRRR; SSSRR; OK
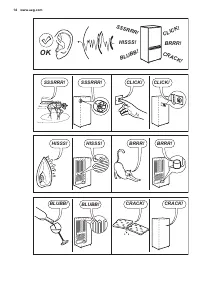
BRRR ! HISSS! CLICK! BLUBB! CRACK! SSSRR R! OK CLICK! CLICK! SSSRRR! SSSRRR! BRRR! BRRR! HISSS! HISSS! BLUBB! BLUBB! CRACK! CRACK! 16 www.aeg.com
Page 17 - TECHNISCHE DATEN; UMWELTTIPPS
11. TECHNISCHE DATEN Abmessungen Höhe 815 mm Breite 596 mm Tiefe 550 mm Lagerzeit bei Störung 13 Std. Spannung 230-240 V Frequenz 50 Hz Die technischen Daten befinden sich aufdem Typenschild innen links im Gerätsowie auf der Energieplakette. 12. UMWELTTIPPS Recyceln Sie Materialien mit demSymbol . E...
Page 19 - INSTRUCTIONS DE SÉCURITÉ; Sécurité des enfants et
1. INSTRUCTIONS DE SÉCURITÉ Pour votre sécurité et garantir une utili-sation correcte de l'appareil, lisez atten-tivement cette notice, y compris les con-seils et avertissements, avant d'installeret d'utiliser l'appareil pour la premièrefois. Pour éviter toute erreur ou accident,veillez à ce que tou...
Page 20 - Utilisation quotidienne
Si le circuit frigorifique est endomma-gé :– évitez les flammes vives et toute au- tre source d'allumage – aérez soigneusement la pièce où se trouve l'appareil • Ne modifiez pas les spécifications de l'appareil. Si le câble d'alimentationest endommagé, il peut causer uncourt circuit, un incendie et/...
Page 21 - DESCRIPTION DE L'APPAREIL
• Déballez l'appareil et vérifiez qu'il n'est pas endommagé. Ne branchezpas l'appareil s'il est endommagé. Si-gnalez immédiatement au revendeurde l'appareil les dommages constatés.Dans ce cas, gardez l'emballage. • Il est conseillé d'attendre au moins quatre heures avant de brancher l'ap-pareil pour...
Page 22 - FONCTIONNEMENT; Mise en fonctionnement; PREMIÈRE UTILISATION; Nettoyage intérieur; UTILISATION QUOTIDIENNE; Congélation d'aliments
3. FONCTIONNEMENT 3.1 Mise en fonctionnement Branchez l'appareil sur une prise murale.Tournez le bouton du thermostat dans lesens des aiguilles d'une montre sur uneposition moyenne. 3.2 Mise à l'arrêt Pour mettre à l'arrêt l'appareil, tournezle bouton du thermostat sur la position"O". 3.3 Ré...
Page 24 - CONSEILS UTILES
5.5 Mettez en place les balconnets de la porte. Le modèle est équipé d'un bac de ran-gement réglable, qui est fixé sous unbalconnet de porte et qui peut glisser la-téralement.Pour faciliter le nettoyage, il est possiblede retirer, puis de remettre en place ai-sément les balconnets supérieur et infé-...
Page 25 - ENTRETIEN ET NETTOYAGE
La période de conservation est de 1 à 2jours au maximum.Aliments cuits, plats froids, etc. : placez-les bien couverts sur une clayette.Fruits et légumes : placez-les une foisnettoyés dans le(s) bac(s) à légumesfourni(s).Beurre et fromage : placez-les dans desrécipients étanches spéciaux ou enve-lopp...
Page 26 - Nettoyage périodique; Dégivrage du réfrigérateur
7.1 Nettoyage périodique Cet appareil doit être nettoyé régulière-ment :• nettoyez l'intérieur de l'appareil et les accessoires avec un peu d'eau tiède etde bicarbonate de soude (5ml pour0,5 litre d'eau) • vérifiez régulièrement les joints de porte et nettoyez-les en les essuyantpour éviter toute ac...
Page 27 - Nettoyage des dispositifs de ventilation
6. Réglez le thermostat pour obtenirplus de froid et faites fonctionnerl'appareil pendant deux ou troisheures en utilisant ce réglage. 7. Replacez les produits surgelés oucongelés dans le compartiment. AVERTISSEMENT N'utilisez en aucun cas de cou-teau ou tout autre objet tran-chant, d'objet métalliq...
Page 28 - EN CAS D'ANOMALIE DE FONCTIONNEMENT; Anomalie
8. EN CAS D'ANOMALIE DE FONCTIONNEMENT AVERTISSEMENT Avant d'intervenir sur l'appareil,débranchez-le.La résolution des problèmes, nonmentionnés dans la présente no-tice, doit être exclusivement con-fiée à un électricien qualifié ou àune personne compétente. Certains bruits pendant le fonc-tionnement...
Page 30 - Fermeture de la porte; INSTALLATION; Emplacement; Température ambiante; Branchement électrique
8.1 Remplacement de l'ampoule d'éclairage 1. Débranchez l'appareil de la prisesecteur. 2. Retirez la vis du diffuseur. 3. Retirez le diffuseur (voir l'illustration). 4. Remplacez l'ampoule défectueusepar une ampoule neuve de puissan-ce identique, spécifiquement con-çue pour les appareils électroména...
Page 31 - BRUITS
Le fabricant décline toute responsabilitéen cas d'incident suite au non-respectdes consignes de sécurité sus-mention-nées. Cet appareil est conforme aux directivescommunautaires. 10. BRUITS L'appareil émet certains bruits pendantson fonctionnement (compresseur, cir-cuit frigorifique). BRRR ! HISSS! ...
Page 32 - CARACTÉRISTIQUES TECHNIQUES; EN MATIÈRE DE PROTECTION DE L'ENVIRONNEMENT
BLUBB! BLUBB! CRACK! CRACK! 11. CARACTÉRISTIQUES TECHNIQUES Dimensions Hauteur 815 mm Largeur 596 mm Profondeur 550 mm Autonomie de fonction-nement 13 h Tension 230-240 V Fréquence 50 Hz Les caractéristiques techniques figurentsur la plaque signalétique située sur le côté gauche à l'intérieur de l'a...
Page 33 - SERVIZIO CLIENTI E MANUTENZIONE
INDICE 1. ISTRUZIONI DI SICUREZZA . . . . . . . . . . . . . . . . . . . . . . . . . . . . . . . . . . . . . . . . . . . . . . . . . . . 34 2. DESCRIZIONE DEL PRODOTTO . . . . . . . . . . . . . . . . . . . . . . . . . . . . . . . . . . . . . . . . . . . . . . 36 3. USO DELL'APPARECCHIO . . . . . . . ...
Page 34 - ISTRUZIONI DI SICUREZZA; Sicurezza dei bambini e
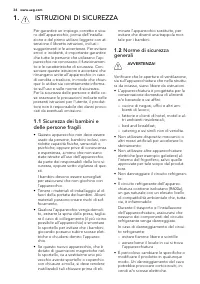
1. ISTRUZIONI DI SICUREZZA Per garantire un impiego corretto e sicu-ro dell'apparecchio, prima dell'installa-zione e del primo utilizzo leggere con at-tenzione il libretto istruzioni, inclusi isuggerimenti e le avvertenze. Per evitareerrori e incidenti, è importante garantireche tutte le persone che...
Page 36 - DESCRIZIONE DEL PRODOTTO; Accensione
• Attorno all'apparecchio vi deve essere un'adeguata circolazione dell'aria, al-trimenti si può surriscaldare. Per otte-nere una ventilazione sufficiente se-guire le istruzioni di installazione. • Se possibile il retro dell'apparecchio dovrebbe essere posizionato controuna parete per evitare di tocc...
Page 37 - PRIMO UTILIZZO
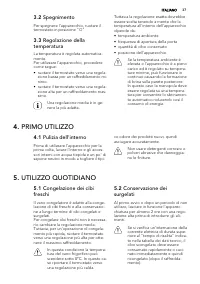
3.2 Spegnimento Per spegnere l'apparecchio, ruotare iltermostato in posizione "O". 3.3 Regolazione della temperatura La temperatura è regolata automatica-mente.Per utilizzare l'apparecchio, procederecome segue:• ruotare il termostato verso una regola- zione bassa per un raffreddamento mi-nim...
Page 38 - CONSIGLI E SUGGERIMENTI UTILI; Rumori normali durante il
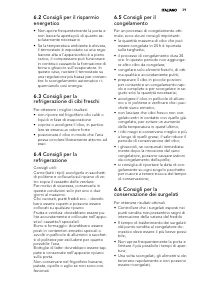
5.3 Scongelamento Prima dell'utilizzo, i cibi surgelati o con-gelati possono essere scongelati nel va-no frigorifero o a temperatura ambiente,in funzione del tempo disponibile perquesta operazione. I pezzi piccoli possono addirittura esserecucinati ancora congelati, direttamentedal congelatore: in q...
Page 40 - PULIZIA E CURA; Pulizia periodica
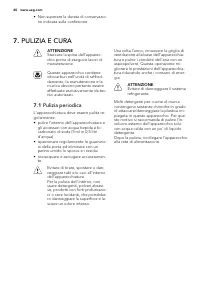
• Non superare la durata di conservazio- ne indicata sulla confezione. 7. PULIZIA E CURA ATTENZIONE Staccare la spina dell'apparec-chio prima di eseguire lavori dimanutenzione. Questo apparecchio contieneidrocarburi nell'unità di raffred-damento; la manutenzione e laricarica devono pertanto essereef...
Page 42 - Pulizia dei canali per l’aria; Periodi di inutilizzo; COSA FARE SE...; Problema
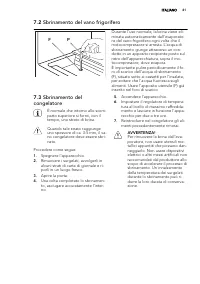
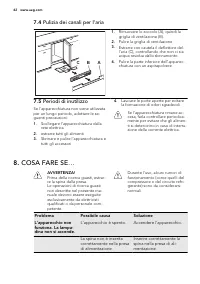
7.4 Pulizia dei canali per l’aria C A B 1. Rimuovere lo zoccolo (A), quindi lagriglia di ventilazione (B). 2. Pulire la griglia di ventilazione. 3. Estrarre con cautela il deflettore del-l'aria (C), controllando che non ci siaacqua residua dallo sbrinamento. 4. Pulire la parte inferiore dell'apparec...
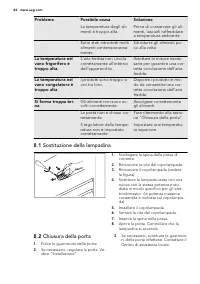
Page 44 - Sostituzione della lampadina; Chiusura della porta
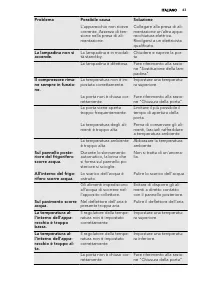
Problema Possibile causa Soluzione La temperatura degli ali-menti è troppo alta. Prima di conservare gli ali-menti, lasciarli raffreddarea temperatura ambiente. Sono stati introdotti moltialimenti contemporanea-mente. Introdurre gli alimenti po-co alla volta. La temperatura nelvano frigorifero ètrop...
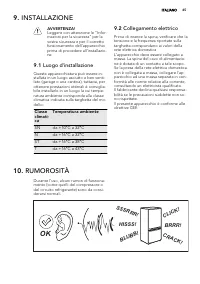
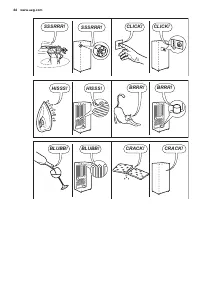
Page 45 - INSTALLAZIONE; Luogo d'installazione; Temperatura ambiente; Collegamento elettrico; RUMOROSITÀ
9. INSTALLAZIONE AVVERTENZA! Leggere con attenzione le "Infor-mazioni per la sicurezza" per lavostra sicurezza e per il correttofunzionamento dell'apparecchioprima di procedere all'installazio-ne. 9.1 Luogo d'installazione Questa apparecchiatura può essere in-stallata in un luogo asciutto e ...
Page 47 - DATI TECNICI; CONSIDERAZIONI AMBIENTALI
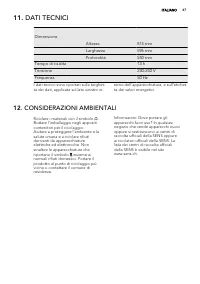
11. DATI TECNICI Dimensione Altezza 815 mm Larghezza 596 mm Profondità 550 mm Tempo di risalita 13 h Tensione 230-240 V Frequenza 50 Hz I dati tecnici sono riportati sulla targhet-ta dei dati, applicata sul lato sinistro in- terno dell'apparecchiatura, e sull'etichet-ta dei valori energetici. 12. CO...
Page 48 - CUSTOMER CARE AND SERVICE
CONTENTS 1. SAFETY INSTRUCTIONS . . . . . . . . . . . . . . . . . . . . . . . . . . . . . . . . . . . . . . . . . . . . . . . . . . . . . 49 2. PRODUCT DESCRIPTION . . . . . . . . . . . . . . . . . . . . . . . . . . . . . . . . . . . . . . . . . . . . . . . . . . . . 51 3. OPERATION . . . . . . . . ...
Page 49 - SAFETY INSTRUCTIONS; Children and vulnerable
1. SAFETY INSTRUCTIONS In the interest of your safety and to en-sure the correct use, before installingand first using the appliance, read thisuser manual carefully, including its hintsand warnings. To avoid unnecessary mis-takes and accidents, it is important toensure that all people using the appl...
Page 51 - PRODUCT DESCRIPTION; Switching on
• The appliance must not be located close to radiators or cookers. • Make sure that the mains plug is ac- cessible after the installation of the ap-pliance. • Connect to potable water supply only (If a water connection is foreseen). 1.6 Service • Any electrical work required to do the servicing of t...
Page 52 - Temperature regulation; FIRST USE; Cleaning the interior; DAILY USE; Freezing fresh food
3.3 Temperature regulation The temperature is automatically regula-ted.To operate the appliance, proceed asfollows:• turn the Temperature regulator to- ward lower settings to obtain the mini-mum coldness. • turn the Temperature regulator to- ward higher settings to obtain themaximum coldness. A medi...
Page 53 - HELPFUL HINTS AND TIPS; Normal Operating Sounds
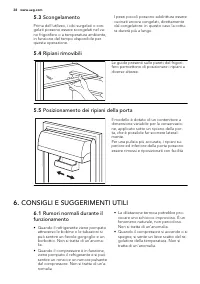
Small pieces may even be cooked stillfrozen, directly from the freezer: in thiscase, cooking will take longer. 5.4 Movable shelves The walls of the refrigerator are equip-ped with a series of runners so that theshelves can be positioned as desired. 5.5 Positioning the door shelves The model is equip...
Page 55 - CARE AND CLEANING; Periodic cleaning; Defrosting of the refrigerator
7. CARE AND CLEANING CAUTION! Unplug the appliance before car-rying out any maintenance oper-ation. This appliance contains hydrocar-bons in its cooling unit; mainte-nance and recharging musttherefore only be carried out byauthorized technicians. 7.1 Periodic cleaning The equipment has to be cleaned...
Page 56 - Defrosting the freezer; Cleaning the air channels; Periods of non-operation
7.3 Defrosting the freezer A certain amount of frost will al-ways form around the top com-partment. Defrost the freezer when thefrost layer reaches a thickness ofabout 3-5 mm. To remove the frost, do these steps: 1. Switch off the appliance. 2. Remove any stored food, wrap it inseveral layers of new...
Page 57 - WHAT TO DO IF...; Problem
8. WHAT TO DO IF… WARNING! Before troubleshooting, discon-nect the mains plug from themains socket.Only a qualified electrician orcompetent person must do thetroubleshooting that is not in thismanual. There are some sounds duringnormal use (compressor, refriger-ant circulation). Problem Possible cau...
Page 59 - Replacing the lamp; Closing the door; Positioning; Ambient temperature; Electrical connection
8.1 Replacing the lamp 1. Disconnect the mains plug from themains socket. 2. Remove the screw from the lampcover. 3. Remove the lamp cover (refer to theillustration). 4. Replace the used lamp with a newlamp of the same power and specifi-cally designed for household appli-ances. (the maximum power is...
Page 60 - NOISE
The manufacturer declines all responsi-bility if the above safety precautions arenot observed. This appliance complies with the E.E.C.Directives. 10. NOISE There are some sounds during normalrunning (compressor, refrigerant circula-tion). BRRR ! HISSS! CLICK! BLUBB! CRACK! SSSRR R! OK CLICK! CLICK! ...
Page 61 - TECHNICAL DATA; ENVIRONMENT CONCERNS
BLUBB! BLUBB! CRACK! CRACK! 11. TECHNICAL DATA Dimension Height 815 mm Width 596 mm Depth 550 mm Rising Time 13 h Voltage 230-240 V Frequency 50 Hz The technical information are situated inthe rating plate on the internal left sideof the appliance and in the energy label. 12. ENVIRONMENT CONCERNS Re...


 AEG AREH30LF
User Manual
AEG AREH30LF
User Manual
 AEG AREI20XLF
User Manual
AEG AREI20XLF
User Manual
 AEG FFB72746PM
User Manual
AEG FFB72746PM
User Manual
 AEG PS254DB
User Manual
AEG PS254DB
User Manual
 AEG NIK85M00AZ
User Manual
AEG NIK85M00AZ
User Manual
 AEG DGE5662HB
User Manual
AEG DGE5662HB
User Manual
 AEG DGE5962HB
User Manual
AEG DGE5962HB
User Manual
 AEG HVB95450IB
User Manual
AEG HVB95450IB
User Manual
 AEG PL700
User Manual
AEG PL700
User Manual
 AEG W14120
User Manual
AEG W14120
User Manual
 AEG DC240
User Manual
AEG DC240
User Manual
 AEG T738A4OBC
User Manual
AEG T738A4OBC
User Manual
 AEG T858M6OBC
User Manual
AEG T858M6OBC
User Manual
 AEG T859M6OBC
User Manual
AEG T859M6OBC
User Manual
 AEG T959M6ORS
User Manual
AEG T959M6ORS
User Manual
 AEG IKE95771FB
User Manual
AEG IKE95771FB
User Manual
 AEG AREI9XLF
User Manual
AEG AREI9XLF
User Manual
 AEG A18SPC3
User Manual
AEG A18SPC3
User Manual
 AEG LF7384O4C
User Manual
AEG LF7384O4C
User Manual