Page 2 - INHALTSVERZEICHNIS
2 3334 4577 7 8 999 11111112 13 13 14 14 8.0 GARANTIE UND SERVICE 7.0 ENTSORGUNG 6.0 TECHNISCHE DATEN 5.1 Reinigung, Wartung und Aufbewahrung 5.0 WARTUNG UND PFLEGE 4.7 Fehlersuche 4.6 Sicherungen wechseln 4.5 Verwendung der 12 V Kfz-Steckdose 4.4 Laden des Geräteakkus 4.3 Bedienung des Kompressors ...
Page 3 - Warnung vor heißer Oberfläche!
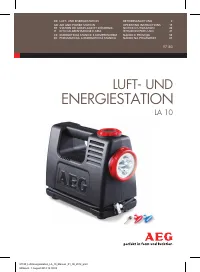
DE 3 Die Luft- und Energiestation LA 10 ist ausschließ-lich für den privaten Gebrauch bestimmt. Das Gerät ist zum Aufpumpen von PKW-, Motorrad- und Fahrradreifen sowie aufblasbaren Sport-, Spiel- und Freizeitartikeln geeignet. Die Energie-abgabe des internen Geräteakkus ist ausschließ-lich über die ...
Page 5 - Achtung; in; Achtung: Gefahr von Sachschäden; Das Eindringen von Flüssigkeiten in das
DE 5 2.2.7 Achten Sie bei der Benutzung des Gerätesdarauf, dass der Druckluftschlauch und die Kabel nicht durch scharfkantige Gegenstände und Wärmequellen beschädigt werden und knicken Sie diese nicht. Verlegen Sie die Kabel und den Druckluftschlauch so, dass man nicht darüber stolpern kann. Ein bes...
Page 7 - Durchmesser; Verhalten bei einem Notfall
7 Abbildungen können geringfügig vom Produktabweichen. Änderungen, die dem technischenFortschritt dienen, vorbehalten. Dekoration nichtenthalten. Verwenden Sie das Gerät nicht bei Beschädi-gung, Fehlfunktionen, oder wenn die Betriebsan-leitung nicht vorhanden oder nicht vollständig ist! Prüfen Sie d...
Page 8 - Anschlussbuchse für das Ladenetzteil; Grüne LED; = Akku ist halb voll; Rote LED
1 23 4 5 6 7 8 9 10 11 Manometer, Anzeige des Luftdrucks bis max. 10 bar / 145,03 PSI (bar und PSIsind Druckeinheiten, 1 Bar = 14,50 PSI)und ZifferblattbeleuchtungLeuchte mit 4 LEDsDruckluftschlauch, an der unteren Ge-häusevertiefung verstaubarAutoventil-Hebelstecker mit Ventilschnell-verschlussEins...
Page 10 - Achtung! Bei zu hohem Luftdruck besteht
5 5 13 19 5 19 4 13 19 4 5 13 19 19 13 5 19 13 19 10 Unverbindliche Richtwerte für DruckangabenAutoreifen ca. 1,9 - 3,5 bar Anhängerreifen ca. 2,4 - 3,4 bar Motorradreifen ca. 1,7 - 2,9 bar Fahrradreifen ca. 2,0 - 4,0 bar Fußball ca. 0,6 - 1,1 bar Volleyball ca. 0,18 - 0,22 bar Achtung! Beachten Sie...
Page 11 - Sicherungen wechseln; Stecken Sie das Ladenetzteil in eine 230 V; Laden des Geräteakkus
10 14 13 20 13 13 16 DE 11 ▪ Ziehen Sie die Flachstecksicherung mit einer Flachzange vorsichtig aus der Sicherungs-halterung in der Gehäuseeinheit für die Bedien- elemente heraus. ▪ Ersetzen Sie die defekte Sicherung durch eine neue 15 A Flachstecksicherung, indem Sie diese mit dem Daumen vorsichtig...
Page 12 - Mögliche Ursachen
12 Der Kompressor ist eingeschaltet, zeigt aber keine Funktion. Der Betriebsschalter ist nicht eingeschaltet. Schalten Sie vor dem Gebrauch des Kompressor den Betriebs-schalter des Gerätes ein. Laden Sie den Geräteakku mit dem 230 V Ladenetzteil. Beim Einschalten des Betriebs-schalters leuchten die ...
Page 14 - enthält Quecksilber und; Cd
14 Wenden Sie sich bei Beschädigungen, Repara-turen oder anderen Problemen mit dem Produkt an die Verkaufsstelle oder qualifiziertes Fach-personal. Die allgemeinen Garantiebedingungen beziehen sich auf Produktions- und Materialdefekte. Bringen Sie ein fehlerhaftes Produkt zur Verkaufs-stelle zurück....
Page 15 - TABLE OF CONTENTS
16161617 17 18 2020 2021 22222224242425 26 26 27 27 8.0 WARRANTY AND SERVICE 7.0 DISPOSAL 6.0 TECHNICAL DATA 5.1 Cleaning, maintenance and storage 5.0 MAINTENANCE AND CARE 4.7 Troubleshooting 4.6 Replacing fuses 4.5 Using the 12 V vehicle outlet 4.4 Charging the storage battery 4.3 Operating the com...
Page 16 - Unit functionality
The LA 10 Air and Power Station is intended for private use only. The unit is suitable for inflating vehicle-, motorcycle- and bicycle tyres as well as inflatable sporting goods, toys and recreational products. Power from the unit ' s internal storage battery may only be output via the 12 V vehicle ...
Page 17 - General safety instructions
2.1.10 Do not operate the unit if it has been dropped or otherwise damaged. Instead, have it inspected or repaired by a qualified electrician! 2.1.9 Do not modify (alter) the unit. 2.1.8 All repairs to the unit must be performed by a qualified electrician / professional. 2.1.7 Only operate the unit ...
Page 18 - Attention – risk of injury and proper-
2.2.7 When using the unit, be sure the com-pressed air hose and cables will not be damaged by sharp objects or heat sources, and do not bend. Place the cables and compressed air hose so as not to create a tripping hazard. Immediately replace a damaged compressed air hose or dam-aged cables! 2.2.6 On...
Page 24 - Image 7
▪ Using a pair of flat-nose pliers carefully pull the flat fuse inside the housing unit for the controls. ▪ Replace the defective fuse with a new 15 A flat fuse by carefully pushing the new fuse into the fuse holder with your thumb until it is flush with the unit housing (see Image 9). Image 9 Intac...
Page 25 - Possible causes
The compressor is switched on but not functioning. The operating switch is not activated. Activate the unit ' s operating switch before using the compressor. Charge the storage battery using the 230 V charging mains adapter. When switching on the operating switch the LEDs and manometer lighting do n...
Page 27 - = contains mercury and
Please contact your retailer or a qualified professional for damage, repairs or other product issues. The general warranty terms pertain to defects in manufacturing and material defects. Please return defective products to the retailer. To ensure speedy processing of your claim you will also need: ▪...
Page 28 - TABLE DES MATIÈRES
28 29292930 30313333 3334 353535373737 38 39 39 40 40 8.0 GARANTIE ET SERVICE APRÈS-VENTE 7.0 MISE AU REBUT 6.0 CARACTÉRIST. TECHNIQUES 5.1 Nettoyage, maintenance et conservation 5.0 MAINTENANCE ET ENTRETIEN 4.7 Recherche d ' erreur 4.6 Changer les fusibles 4.5 Utilisation de la prise automobile 12 ...
Page 30 - Accessoires; appareil
30 2.1.10 N ' utilisez pas l ' appareil lorsque celui-ci est tombé ou a été endommagé de quelque autre manière. Apportez-le à un électricien qualifié pour contrôle ou réparation. 2.1.9 L ' appareil ne doit pas être modifié. 2.1.8 Toutes les réparations sur l ' appareil doivent être effectuées par un...
Page 32 - vous; de dommages matériels et physiques !
32 2.2.29 La pression de l ' air générée ne peut pas être utilisée à des fins commerciales ni pour les secteurs alimentaire, pharmaceutique, des sports de plongée et médical. 2.2.28 Faites fonctionner l ' appareil maximum 10 minutes et éteignez-le immédiatement en cas de surchauffe en plaçant l ' in...
Page 34 - Fermeture à clip; Aperçu du produit
1 23 4 5 6 7 8 9 10 11 Manomètre, affichage de la pression de l ' air jusque max. 10 bar / 145,03 PSI (bar et PSI sont des unités de pression, 1 Bar = 14,50 PSI) et éclairage du cadranLampe avec 4 LEDTuyau d ' air comprimé, peut être rangé dans le renfoncement inférieur du boîtier.Fiche à levier de ...
Page 35 - Illustration 5
▪ Pour gonfler un pneu de voiture, vous n ' avez pas besoin d ' un adaptateur de valve. Retirez tout d ' abord le capuchon de la valve du pneu. ▪ Ouvrez la fermeture rapide et placez la fiche à levier aussi loin que possible sur la valve du pneu. Fermez ainsi la fermeture rapide. ▪ Contrôlez que la ...
Page 36 - du compresseur
▪ Ouvrez le cache de la valve de l ' article. ▪ Mettez l ' adaptateur de valve adapté avec la fermeture rapide et appuyez celle-ci dans la valve de l ' article. Si l ' adaptateur se détache de la valve pendant le gonflage, vous devez l ' appu- yer dans la valve à la main. ▪ Contrôlez que l ' adaptat...
Page 37 - Illustration 7
▪ Retirez le cache de la fiche automobile 12 V.. ▪ Connectez la fiche automobile 12 V de l ' appa- reil externe avec la prise 12 V de l ' appareil. ▪ Placez l ' interrupteur de marche / arrêt dans la osition . P ( I ) ▪ Connectez la petite prise ronde du chargeur avec la prise . ▪ Branchez le charge...
Page 38 - est; Causes possibles; erreur
38 Le compresseur allumé mais ne fonctionne pas. est L ' interrupteur n ' est pas allumé. Avant d ' utiliser le compresseur, allumez l ' interrupteur de l ' appareil. Chargez la batterie avec le chargeur 230 V. Lors de la mise en route de l ' in- terrupteur, les LED et l ' éclairage du manomètre ne ...
Page 39 - Batterie de l
FR 39 Description de l ' appareil : Station de gonflage et d ' énergie LA 10 Référence : 97180Dimensions : env. 26,5 x 14 x 22,5 cm (L x l x h cm) Poids : env. 3,7 kg Sécurité de l ' appareil : 15 A (ampère) fusibleà fiche plate Compresseur : Puissance du compres-seur : max. 10 bar / 145 psi (bar / ...
Page 41 - INDICE
42424243 43444646 4647 484848 50505051 52 52 53 53 8.0 GARANZIA E ASSISTENZA 7.0 SMALTIMENTO 6.0 DATI TECNICI 5.1 Pulizia, manutenzione e conservazione 5.0 MANUTENZIONE E CURA 4.7 Ricerca guasti 4.6 Sostituzione fusibile 4.5 Uso della presa auto 12 V 4.4 Caricamento batteria apparecchio 4.3 Uso del ...
Page 42 - Significato dei simboli
Il kit di alimentazione e aria LA 10 è stato proget-tato esclusivamente per uso domestico. L ' appa- recchio permette di pompare pneumatici per auto, moto e bici, così come di gonfiare articoli per lo sport, il gioco e il tempo libero. La fornitura di energia da parte della batteria interna all ' ap...
Page 47 - insieme del prodotto
1 23 4 5 6 7 8 9 10 11 Manometro, indica la pressione dell ' aria fino ad un max. di 10 bar / 145,03 PSI (bar e PSI sono unità della pressione, 1 Bar = 14,50 PSI) e illuminazione del quadrante Luci con 4 LEDTubo per l ' aria compressa, ripiegabile nello scomparto inferiore dell ' alloggiamento. Leva...
Page 49 - interruttore del compressore
▪ Aprire il coperchio della valvola dell ' articolo. ▪ Fissare l ' adattatore per valvola adeguato con la chiusura rapida inserendolo nella valvola dell ' articolo . Nel caso in cui l ' adattatore si stac- casse mentre pompate l ' articolo, tenerlo premuto con la mano nella valvola. ▪ Assicurarsi ch...
Page 50 - Sostituzione fusibile; Uso della presa auto 12 V
▪ Togliere la copertura del connettore femmina per auto 12 V. ▪ Collegare la presa 12 V per auto dell ' altro ap- parecchio con il connettore femmina dell ' appa- recchio. ▪ Premere l ' interruttore di funzionamento in posizione ( I ) . ▪ Collegare la piccola presa tonda del caricabatterie con la bu...
Page 51 - Possibili cause
Il compressore è acceso ma non indica alcuna funzione. L ' interruttore di funzionamento non è acceso. Prima di usare il compressoreaccendere l ' interruttore di fun- zionamento dell ' apparecchio. Caricare la batteria dell ' appa- recchio con il caricabatterie 230 V. Accendendo l ' interruttore di ...
Page 52 - Batteria apparecchio:
Descriz. apparecchio: kit di alimentazione e aria LA 10 Numero art.: 97180Dimensioni: ca. 26,5 x 14 x 22,5cm (L x L x A cm) Peso: ca. 3,7 kg Fusibile: 15 A (Ampere) fusibilepiatto Compressore: Prestazioni: max. 10 bar / 145 psi(bar / psi = unità pres-sione) Indicatore pressione/ manometro: indicator...
Page 54 - OBSAH; Chování v případě nouze
54 55555556 56575959 5960 61616163636364 65 65 66 66 8.0 ZÁRUKA A SERVIS 7.0 ODSTRAN Ě NÍ DO ODPADU 6.0 TECHNICKÁ DATA 5.1 Č išt ě ní, údržba a skladování 5.0 ÚDRŽBA A OŠET Ř OVÁNÍ 4.7 Hledání chyb 4.6 Výměna pojistky 4.5 Použití zástr č ky na 12 V pro motor ová vozidla 4.4 Nabíjení akumulátoru p ř ...
Page 56 - ístroje
56 2.1.10 Neuvádějte přístroj do provozu, jestliže spadl z výšky nebo byl jinak poškozen. Nechte ho zkontrolovat anebo opravit kvalifikovaným elektrikářem! 2.1.9 Přístroj se nesmí modifikovat (měnit). 2.1. 8 Opravy přístroje smí provádět jen kvalifikovaný elektrikář nebo kvalifikovaný odborník! 2.1....
Page 61 - ÍSLUŠENSTVÍ; Jestli
▪ na pumpování automobilovýchpneumatik nepotřebujete žádnýventilový adaptér. Odšroubujte nejdřívečepičku z ventilu pneumatiky. ▪ otevřete rychlouzávěr a nasaďte koncovku hadice s páčkou na ventil.Uzavřete koncovku páčkou. ▪ zkontrolujte držení opatrným táhnutím zakoncovku. Kompresor smí být v provoz...
Page 63 - ová vozidla
CZ 63 ▪ vytáhn ě te opatrn ě plochými klešt ě mi plochou pojistku z držáku z jednotkyovládacích element ů . ▪ nahra ď te vadnou pojistku novou plochou pojistkou 15 A, zatla č te ji palcem do p ř íslušného držáku tak, aby lícovala s t ě lesem p ř ístroje (viz obrázek 9). Obrázek 9 Betvadná plochá poj...
Page 64 - ěň; Možné p
64 Kompresor je zapnutý, ale neukazuje žádnou funkci. Provozní vypína č není zapnutý. P ř ed použitím kompresoru zapn ě te nejd ř íve provozní vypína č . Nabijte akumulátor p ř ístroje pomocí nabíjecího sí ť ového adaptéru pro 230 V. P ř i zapnutí provozního vypína č e se nerozsvítí LED ani osv ě tl...
Page 65 - OVÁNÍ
CZ 65 Popis p ř ístroje: Energetická stanice LA 10 s kompresorem Čí slo artiklu: 97180 Rozm ě ry: cca 26,5 x 14 x 22,5 cm (D x Š x V cm)Váha: cca 3,7 kg Pojistka p ř ístroje: 15 A (ampéry) plochá pojistka Kompresor: Výkon max. 10 bar / 145 psi kompresoru: (bar / psi = jednotky tlaku) Zobrazení tlaku...
Page 67 - Čo robiť v núdzovom prípade
68686869 69707272 7273 74747476767677 78 78 79 79 8.0 GARANCIA A SERVIS 7.0 LIKVIDÁCIA 6.0 TECHNICKÉ ÚDAJE 5.1 Čistenie, údržba a skladovanie 5.0 ÚDRŽBA A STAROSTLIVOS Ť 4.7 Vyh ľ adávanie chyby 4.6 Výmena poistiek 4.5 Používanie 12 V automobilovej zásuvky 4.4 Nabíjanie akum. batérie prístroja 4.3 O...
Page 69 - Všeobecné bezpečnostné pokyny; NÉ POKYNY; Vybavenie prístroja
2.1.10 Nepoužívajte prístroj, ak spadol alebo bol iným spôsobom poško-dený.Prineste ho na preskúšanie alebo opravu kvalifikovanému elektrikárovi! 2.1.9 Prístroj nesmie by ť modifikovaný (zmenený). 2.1.8 Všetky opravy na prístroji musí vykona ť kvalifikovaný elektrikár / kvalifikovaný odborný personá...
Page 77 - Vyhľadávanie chyby
Kompresor je zapnutý, ale nevykazuje žiadnu funkciu. Prevádzkový spína č nie je zapnutý. Pred použitím kompresora zapnite prevádzkový spína č prístroja. Akumulátorovú batériu prístroja nabíjajte 230 V nabíjacím sie ť ovým dielom. Pri zapnutí prevádzkového spína č a sa LED-kontrolky a osvetlenie mano...