Page 2 - KUNDENDIENST UND -BETREUUNG
INHALT 1. SICHERHEITSHINWEISE . . . . . . . . . . . . . . . . . . . . . . . . . . . . . . . . . . . . . . . . . . . . . . . . . . . . . . 3 2. BETRIEB . . . . . . . . . . . . . . . . . . . . . . . . . . . . . . . . . . . . . . . . . . . . . . . . . . . . . . . . . . . . . . . . . . . 5 3. TÄGLICHER ...
Page 3 - SICHERHEITSHINWEISE; Sicherheit von Kindern und
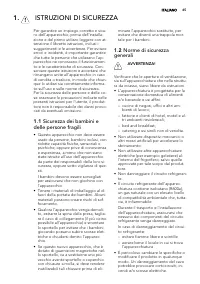
1. SICHERHEITSHINWEISE Lesen Sie zu Ihrer Sicherheit und für dieoptimale Geräteanwendung vor der In-stallation und dem Gebrauch des Gerä-tes die vorliegende Benutzerinformationaufmerksam durch, einschließlich derRatschläge und Warnungen. Es ist wich-tig, dass zur Vermeidung von Fehlernund Unfällen a...
Page 5 - BETRIEB; Einschalten des Geräts
• Kontrollieren Sie nach dem Auspacken das Gerät auf eventuelle Beschädigun-gen. Nehmen Sie das Gerät nicht inBetrieb, wenn es beschädigt ist. Mel-den Sie die Schäden umgehend demHändler, bei dem Sie es erworben ha-ben. Bewahren Sie in diesem Fall dieVerpackung auf. • Lassen Sie das Gerät mindestens...
Page 6 - TÄGLICHER GEBRAUCH; Reinigung des Innenraums
eine mittlere Einstellung ist imAllgemeinen am besten geeig-net. Allerdings muss für eine exakte Einstel-lung berücksichtigt werden, dass dieTemperatur im Innern des Gerätes vonverschiedenen Faktoren abhängt:• von der Raumtemperatur• von der Häufigkeit der Türöffnung• von der Menge der eingelagerten...
Page 8 - PRAKTISCHE TIPPS UND HINWEISE; Energiespartipps
4. PRAKTISCHE TIPPS UND HINWEISE 4.1 Energiespartipps • Öffnen Sie die Tür nicht zu häufig, und lassen Sie diese nicht länger offen alsunbedingt notwendig. • Wenn die Umgebungstemperatur hoch ist und der Temperaturregler aufeine niedrige Temperatur eingestelltund das Gerät voll beladen ist, kann esz...
Page 9 - REINIGUNG UND PFLEGE; Regelmäßige Reinigung
4.5 Hinweise zur Lagerung gefrorener Produkte So erzielen Sie die besten Ergebnissemit Ihrem Gerät:• Vergewissern Sie sich, dass die gefro- renen Lebensmittel vom Händler an-gemessen gelagert wurden. • Achten Sie unbedingt darauf, die ein- gekauften gefrorenen Lebensmittel inder kürzest möglichen Ze...
Page 12 - Stillstandzeiten; Problem
5.4 Stillstandzeiten Bei längerem Stillstand des Gerätesmüssen Sie folgendermaßen vorgehen:• trennen Sie das Gerät von der Netz-versorgung • entnehmen Sie alle Lebensmittel• Tauen Sie das Gerät ab (sofern vorge- sehen). Reinigen Sie den Innenraumund das gesamte Zubehör. • lassen Sie die Türen offen/...
Page 14 - MONTAGE; Aufstellung; Umgebungstemperatur; Elektrischer Anschluss
6.1 Ersetzen der Lampe 1. Ziehen Sie den Netzstecker aus derNetzsteckdose. 2. Lösen Sie die Schraube an der Lam-penabdeckung. 3. Nehmen Sie die Lampenabdeckungab (siehe hierzu die Abbildung). 4. Ersetzen Sie die defekte Lampedurch eine Lampe mit der gleichenLeistung, die speziell für Haushalts-gerät...
Page 15 - Wechsel des Türanschlags
nicht geerdet sein sollte, lassen Sie dasGerät bitte gemäß den geltenden Vor-schriften erden und fragen Sie dafür ei-nen qualifizierten Elektriker.Der Hersteller übernimmt keinerlei Haf-tung für Schäden oder Verletzungen, die durch Missachtung der oben genanntenSicherheitshinweise entstehen.Das Gerä...
Page 20 - GERÄUSCHE
Ha K 8 mm Nehmen Sie die Halterungen wiederab. Markieren Sie 8 mm ab der Türau-ßenkante die Stelle, an der der Nagel(K) eingesetzt werden muss. Hb Setzen Sie das Führungsstück erneutauf die Führungsschiene und schrau-ben Sie es mit den mitgeliefertenSchrauben fest.Richten Sie die Tür des Einbaumöbel...
Page 21 - BRRR; SSSRR; OK
BRRR ! HISSS! CLICK! BLUBB! CRACK! SSSRR R! OK CLICK! CLICK! SSSRRR! SSSRRR! BRRR! BRRR! HISSS! HISSS! BLUBB! BLUBB! CRACK! CRACK! DEUTSCH 21
Page 22 - TECHNISCHE DATEN; UMWELTTIPPS
9. TECHNISCHE DATEN Abmessung der Ausspa-rung Höhe 1580 mm Breite 560 mm Tiefe 550 mm Ausfalldauer 20 h Spannung 230-240 V Frequenz 50 Hz Die technischen Informationen befindensich auf dem Typenschild innen links imGerät sowie auf der Energieplakette. 10. UMWELTTIPPS Recyceln Sie Materialien mit dem...
Page 24 - INSTRUCTIONS DE SÉCURITÉ; Sécurité des enfants et
1. INSTRUCTIONS DE SÉCURITÉ Pour votre sécurité et garantir une utili-sation correcte de l'appareil, lisez atten-tivement cette notice, y compris les con-seils et avertissements, avant d'installeret d'utiliser l'appareil pour la premièrefois. Pour éviter toute erreur ou accident,veillez à ce que tou...
Page 25 - Utilisation quotidienne
Si le circuit frigorifique est endomma-gé :– évitez les flammes vives et toute au- tre source d'allumage – aérez soigneusement la pièce où se trouve l'appareil • Ne modifiez pas les spécifications de l'appareil. Si le câble d'alimentationest endommagé, il peut causer uncourt circuit, un incendie et/...
Page 26 - FONCTIONNEMENT; Mise en fonctionnement
• Déballez l'appareil et vérifiez qu'il n'est pas endommagé. Ne branchezpas l'appareil s'il est endommagé. Si-gnalez immédiatement au revendeurde l'appareil les dommages constatés.Dans ce cas, gardez l'emballage. • Il est conseillé d'attendre au moins quatre heures avant de brancher l'ap-pareil pour...
Page 27 - UTILISATION QUOTIDIENNE; Nettoyage intérieur
Toutefois, le réglage doit être choisi entenant compte du fait que la températu-re à l'intérieur de l'appareil dépend deplusieurs facteurs :• la température ambiante• la fréquence d'ouverture de la porte• la quantité de denrées stockées• l'emplacement de l'appareil. Si le thermostat est réglé sur la...
Page 28 - CONSEILS UTILES
3.4 Décongélation Avant utilisation, les aliments surgelésou congelés peuvent être décongelésdans le compartiment du réfrigérateurou à température ambiante en fonctiondu temps disponible pour cette opéra-tion.Les petites portions peuvent même êtrecuites sans décongélation préalable (lacuisson sera c...
Page 30 - ENTRETIEN ET NETTOYAGE; Nettoyage périodique
• prévoyez un temps réduit au minimum pour le transport des denrées du ma-gasin d'alimentation à votre domicile ; • évitez d'ouvrir trop souvent la porte du congélateur et ne la laissez ouverteque le temps nécessaire ; • une fois décongelés, les aliments se détériorent rapidement et ne peuventpas êt...
Page 33 - EN CAS D'ANOMALIE DE FONCTIONNEMENT; Problème
5.4 En cas d'absence prolongée ou de non-utilisation Prenez les précautions suivantes :• débranchez l'appareil • retirez tous les aliments• dégivrez si nécessaire et nettoyez l'ap- pareil ainsi que tous les accessoires • laissez la porte/les portes entrouver- te(s) pour prévenir la formationd'odeurs...
Page 35 - Remplacement de l'éclairage; Fermeture de la porte; INSTALLATION; Emplacement; Température ambiante; Branchement électrique
6.1 Remplacement de l'éclairage 1. Débranchez l'appareil de la prisesecteur. 2. Retirez la vis du diffuseur. 3. Retirez le diffuseur (voir l'illustration). 4. Remplacez l'ampoule défectueusepar une ampoule neuve de puissan-ce identique, spécifiquement con-çue pour les appareils électroména-gers. (La...
Page 41 - BRUITS
Ha K 8 mm Retirez les supports et repérez une dis-tance de 8 mm à partir de l'arête exté-rieure de la porte où le clou doit êtreposé (K). Hb Placez de nouveau le petit carré sur leguide et fixez-le à l'aide des vis four-nies.Alignez la porte du meuble de cuisineet celle de l'appareil en réglant la p...
Page 43 - CARACTÉRISTIQUES TECHNIQUES; EN MATIÈRE DE PROTECTION DE L'ENVIRONNEMENT
9. CARACTÉRISTIQUES TECHNIQUES Dimensions de la niched'encastrement Hauteur 1580 mm Largeur 560 mm Profondeur 550 mm Temps de levée 20 h Tension 230-240 V Fréquence 50 Hz Les caractéristiques techniques figurentsur la plaque signalétique située sur le côté gauche à l'intérieur de l'appareil etsur l'...
Page 44 - SERVIZIO CLIENTI E MANUTENZIONE
INDICE 1. ISTRUZIONI DI SICUREZZA . . . . . . . . . . . . . . . . . . . . . . . . . . . . . . . . . . . . . . . . . . . . . . . . . . . 45 2. USO DELL'APPARECCHIO . . . . . . . . . . . . . . . . . . . . . . . . . . . . . . . . . . . . . . . . . . . . . . . . . . . 47 3. UTILIZZO QUOTIDIANO . . . . ....
Page 45 - ISTRUZIONI DI SICUREZZA; Sicurezza dei bambini e
1. ISTRUZIONI DI SICUREZZA Per garantire un impiego corretto e sicu-ro dell'apparecchio, prima dell'installa-zione e del primo utilizzo leggere con at-tenzione il libretto istruzioni, inclusi isuggerimenti e le avvertenze. Per evitareerrori e incidenti, è importante garantireche tutte le persone che...
Page 48 - UTILIZZO QUOTIDIANO
3. UTILIZZO QUOTIDIANO 3.1 Pulizia dell'interno Prima di utilizzare l'apparecchio per laprima volta, lavare l'interno e gli acces-sori interni con acqua tiepida e un po' disapone neutro in modo a togliere il tipi-co odore dei prodotti nuovi, quindiasciugare accuratamente. Non usare detergenti corros...
Page 49 - CONSIGLI E SUGGERIMENTI UTILI
3.6 Ripiani rimovibili Le guide presenti sulle pareti del frigori-fero permettono di posizionare i ripiani adiverse altezze. 3.7 Posizionamento delle mensole Per facilitare l'introduzione di alimenti didiverse dimensioni, i ripiani della porta possono essere posizionati ad altezzedifferenti. 3.8 Pos...
Page 50 - PULIZIA E CURA; Pulizia periodica
Carne (tutti i tipi): avvolgerla in sacchettidi politene e collocarla sul ripiano di ve-tro sopra il cassetto delle verdure.Per motivi di sicurezza, conservarla inqueste condizioni solo per uno o duegiorni al massimo.Cibi cucinati, piatti freddi ecc..: dovreb-bero essere coperti e possono esserecoll...
Page 51 - Sbrinamento del vano frigorifero
• Controllare regolarmente le guarnizio- ni della porta e verificare che siano pu-lite e prive di residui. • Risciacquare e asciugare accuratamen- te. Non tirare, spostare o danneg-giare tubi e/o cavi all'interno del-l'apparecchio.Non usare mai detergenti, polve-ri abrasive, prodotti per la puliziac...
Page 52 - Periodi di inutilizzo
Per rimuovere la brina, procedere comesegue: 1. Spegnere l'apparecchiatura. 2. Rimuovere i surgelati, avvolgerli inalcuni strati di carta di giornale e ri-porli in un luogo fresco. ATTENZIONE Non toccare il cibo congelatocon le mani bagnate. Le manipotrebbero aderire all'alimentocongelato. 3. Lascia...
Page 53 - COSA FARE SE...; Problema
6. COSA FARE SE… AVVERTENZA! Prima della ricerca guasti, estrar-re la spina dalla presa.Le operazioni di ricerca guastinon descritte nel presente ma-nuale devono essere eseguiteesclusivamente da elettricistiqualificati o da personale com-petente. Durante l'uso, alcuni rumori difunzionamento (come qu...
Page 55 - INSTALLAZIONE; Temperatura ambiente
6.1 Sostituzione della lampadina 1. Scollegare la spina dalla presa dicorrente. 2. Rimuovere la vite dal coprilampada. 3. Rimuovere il coprilampada (vederela figura). 4. Sostituire la lampada usata con unanuova con la stessa potenza e stu-diata in modo specifico per gli elet-trodomestici. (la potenz...
Page 61 - RUMORI
Ha K 8 mm Togliere le staffe e segnare la posizio-ne in cui deve essere inserito il chiodo(K) ad una distanza di 8 mm dal bordoesterno della porta. Hb Riapplicare il quadratino sulla guida efissarlo con le viti in dotazione.Allineare lo sportello del mobile da cu-cina con quello dell'apparecchiatura...
Page 63 - DATI TECNICI; CONSIDERAZIONI AMBIENTALI
9. DATI TECNICI Nicchia di incasso Altezza 1580 mm Larghezza 560 mm Profondità 550 mm Tempo di salita 20 h Tensione 230-240 V Frequenza 50 Hz I dati tecnici sono riportati sulla targhet-ta del modello, applicata sul lato sinistro interno dell'apparecchiatura, e sull'eti-chetta dei valori energetici....
Page 64 - CUSTOMER CARE AND SERVICE
CONTENTS 1. SAFETY INSTRUCTIONS . . . . . . . . . . . . . . . . . . . . . . . . . . . . . . . . . . . . . . . . . . . . . . . . . . . . . 65 2. OPERATION . . . . . . . . . . . . . . . . . . . . . . . . . . . . . . . . . . . . . . . . . . . . . . . . . . . . . . . . . . . . . . . 67 3. DAILY USE . . ...
Page 65 - SAFETY INSTRUCTIONS; Children and vulnerable
1. SAFETY INSTRUCTIONS In the interest of your safety and to en-sure the correct use, before installingand first using the appliance, read thisuser manual carefully, including its hintsand warnings. To avoid unnecessary mis-takes and accidents, it is important toensure that all people using the appl...
Page 67 - OPERATION; Switching on
• The appliance must not be located close to radiators or cookers. • Make sure that the mains plug is ac- cessible after the installation of the ap-pliance. • Connect to potable water supply only (If a water connection is foreseen). 1.6 Service • Any electrical work required to do the servicing of t...
Page 68 - DAILY USE; Cleaning the interior
3. DAILY USE 3.1 Cleaning the interior Before using the appliance for the firsttime, wash the interior and all internalaccessories with lukewarm water andsome neutral soap so as to remove thetypical smell of a brand-new product,then dry thoroughly. Do not use detergents or abra-sive powders, as thes...
Page 69 - HELPFUL HINTS AND TIPS
3.7 Positioning the door shelves To permit storage of food packages ofvarious sizes, the door shelves can beplaced at different heights. 3.8 Positioning the sliding box The sliding box can be placed at differ-ent heights.Do make these adjustments proceed asfollow: 1. lift the shelf with the sliding ...
Page 70 - CARE AND CLEANING; Periodic cleaning
4.4 Hints for freezing To help you make the most of the freez-ing process, here are some importanthints:• the maximum quantity of food which can be frozen in 24 hrs. is shown onthe rating plate; • the freezing process takes 24 hours. No further food to be frozen shouldbe added during this period; • ...
Page 72 - Periods of non-operation
To remove the frost, follow the instruc-tions below: 1. Switch off the appliance. 2. Remove any stored food, wrap it inseveral layers of newspaper and putit in a cool place. CAUTION! Do not touch frozen goods withwet hands. Hands can freeze tothe goods. 3. Leave the door open and insert theplastic s...
Page 73 - WHAT TO DO IF...
6. WHAT TO DO IF… WARNING! Before troubleshooting, discon-nect the mains plug from themains socket.Only a qualified electrician orcompetent person must do thetroubleshooting that is not in thismanual. There are some sounds duringnormal use (compressor, refriger-ant circulation). Problem Possible cau...
Page 74 - Replacing the lamp; Closing the door
Problem Possible cause Solution Products prevent that wa-ter flows into the watercollector. Make sure that productsdo not touch the rearplate. Water flows on theground. The melting water outletdoes not flow in the evap-orative tray above thecompressor. Attach the melting wateroutlet to the evaporati...
Page 75 - Positioning; Ambient temperature; Electrical connection
7. INSTALLATION WARNING! Read the "Safety Information"carefully for your safety and cor-rect operation of the appliancebefore installing the appliance. 7.1 Positioning Install this appliance at a location wherethe ambient temperature corresponds tothe climate class indicated on the ratingpla...
Page 80 - NOISES
Ha K 8 mm Remove the brackets and mark a dis-tance of 8 mm from the outer edge ofthe door where the nail must be fitted(K). Hb Place the small square on the guideagain and fix it with the screws sup-plied.Align the kitchen furniture door andthe appliance door by adjusting thepart (Hb). Hb Hd Press t...
Page 82 - TECHNICAL DATA; ENVIRONMENT CONCERNS
9. TECHNICAL DATA Dimension of the recess Height 1580 mm Width 560 mm Depth 550 mm Rising Time 20 h Voltage 230-240 V Frequency 50 Hz The technical information are situated inthe rating plate on the internal left sideof the appliance and in the energy label. 10. ENVIRONMENT CONCERNS Recycle the mate...