Page 2 - HVHWVHF
Page 3 - aus; Table of contents; Protection of the environment . 9
aus 3 Table of contents 8 Intended use . . . . . . . . . . . . . . . 4 ( Safety instructions . . . . . . . . . . 4 Before you switch ON the appliance . 4Delivery . . . . . . . . . . . . . . . . . . . . . . . . 5Installation. . . . . . . . . . . . . . . . . . . . . . 5In daily use . . . . . . . . . ....
Page 4 - Intended use
aus Intended use 4 4 Customer service . . . . . . . . . . 34 5 Installation and connection . . 34 Product package . . . . . . . . . . . . . . . 34Safety instructions. . . . . . . . . . . . . . . 34Delivery . . . . . . . . . . . . . . . . . . . . . . . 35Technical specifications . . . . . . . . . . 3...
Page 5 - Delivery
Safety instructions aus 5 Delivery 1. Check the packaging and dishwasher immediately for damage caused in transit. Do not switch on a damaged appliance, but contact your supplier. 2. Please dispose of the packaging material in an environmentally friendly manner. 3. Do not let children play with pack...
Page 6 - In daily use; Activating the button lock:
aus Safety instructions 6 If you cannot obtain any information from the manufacturer, you must not install the dishwasher above or below these appliances.If you install a microwave oven above the dishwasher, the microwave oven may be damaged.Install built-under or integratable appliances only under ...
Page 7 - Deactivating the button lock:
Safety instructions aus 7 Deactivating the button lock: Hold down the button + for approx. 4 sec. until the display ’– goes out. When the programme ends ( ‹ : ‹‹ on the digital display), the button lock is cancelled. If there is a power failure, the button lock is retained. Whenever a programme is r...
Page 8 - Warning
aus Safety instructions 8 m Warning Risk of scalding! Open the door carefully when the programme is still running. There is a risk of hot water spraying out of the appliance. m Warning Risks to children! If fitted, use the childproof lock. An exact description can be found in the back of the envelop...
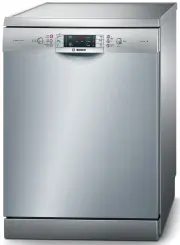
Page 9 - Protection of the; Packaging; Getting to know your; Control panel
Protection of the environment aus 9 7 Protection of the environment P r o t e c t i o n o f t h e e n v i r o n m e n t Both the packaging of new appliances and the old appliances themselves contain valuable raw materials and recyclable materials.Please dispose of the individual parts separated acco...
Page 10 - Appliance interior; Rinse aid
aus Rinse aid 10 Appliance interior * depending on model Overview of menu The settings can be found in the individual chapters. , Rinse aid R i n s e a i d As soon as the rinse-aid refill indicator @ is lit on the fascia, there is still a rinse-aid reserve of 1-2 rinsing processes. Refill with rinse...
Page 11 - Setting amount of rinse aid; Utensils; Not suitable
Utensils aus 11 3. Close cover until it clicks shut. 4. To prevent excessive foam formation during the next rinse cycle, remove any rinse aid which has run over with a cloth. Setting amount of rinse aid The amount of rinse aid can be set from § : ‹‹ to § : ‹‡ . Please set rinse aid on § : ‹† to obta...
Page 12 - Glass and utensil damage; Note; Cups and glasses
aus Utensils 12 Glass and utensil damage Causes: Glass type and glass production process.Chemical composition of the detergent.Water temperature of the wash programme. Recommendation: Use only glasses and porcelain which the manufacturer designates as dishwasher-proof.Use a detergent which protects ...
Page 13 - Pans; Bottom basket; Cutlery basket
Utensils aus 13 Note Utensils must not be placed above the tablet collecting tray 1: . These may block the lid of the detergent dispenser and prevent it from opening fully. Pans Bottom basket 1b Tip Heavily soiled utensils (pans) should be placed in the bottom basket. The more powerful spray jet pro...
Page 14 - Small accessories holder *
aus Utensils 14 Etagere Etagere * The etagere and the space underneath can be used for small cups and glasses or for larger items of cutlery, such as wooden spoons or serving cutlery. The etagere can be folded up if not required. * Depending on the model, a 3-fold height adjustment is possible. To d...
Page 15 - Adjusting the height of the; lower
Utensils aus 15 Adjusting the height of the basket Adjusting the height of the basket * * depending on modelIf required, the height of the upper utensils basket 1* can be adjusted to provide more space for tall utensils either in the upper or lower basket. Appliance height 81.5 cm Appliance height 8...
Page 16 - Detergent; Adding detergent; PO
aus Detergent 16 . Detergent D e t e r g e n t You can use tablets as well as powder or liquid detergents for dishwashers, but never use washing up liquid. The dosage can be individually adjusted with powder or a liquid detergent according to the degree of soiling. Tablets contain an adequately larg...
Page 18 - Overview of programmes; Programm
aus Overview of programmes 18 / Overview of programmes O v e r v i e w o f p r o g r a m m e s The max. possible number of programmes is illustrated in this overview. The corresponding programmes for your appliance can be found on the fascia. The programme data has been measured in the laboratory ac...
Page 19 - Programme selection; on the appliance door.
Overview of programmes aus 19 Programme selection You can select a suitable programme according to the type of utensils and degree of soiling. Information for test institutes Test institutes can request the conditions for running comparison tests by sending an e-mail to [email protected]. Quote the ...
Page 20 - Additional options; Express Wash/ Speed
aus Additional options 20 0 Additional options A d d i t i o n a l o p t i o n s * depending on modelAdditional options can be set with the buttons X . Express Wash/ Speed Perfect (VarioSpeed) Ÿ Express Wash/ Speed Perfect/ (VarioSpeed) * This function can reduce the running time by approx. 20% to 5...
Page 21 - Operating; Switching on the appliance; Programme sequence
Operating the appliance aus 21 1 Operating the appliance O p e r a t i n g t h e a p p l i a n c e Aqua sensor Aqua sensor * * depending on modelThe Aqua sensor is an optical measuring device (light barrier) which measures the turbidity of the rinsing water.The Aqua sensor is used according to the p...
Page 22 - End of programme
aus Operating the appliance 22 Timer programming Timer programming * * depending on modelYou can delay the start of the programme in 1-hour steps up to 24 hours. 1. Close the door. 2. Switch on ON/OFF switch ( . 3. Press button P + until the digital display )" jumps to œ : ‹‚ . 4. Press P + or –...
Page 23 - Switching off the appliance; Interrupting the programme; Terminating the programme
Operating the appliance aus 23 To change the setting:1. Press programme button 3 . Each time the button is pressed, the set value increases by one level; when the value of ˜ : ‹ƒ has been reached, the display jumps back to ˜ : ‹‹ . 2. Press START button ` . The set value is saved. Switching off the ...
Page 24 - Intensive drying; Cleaning and
aus Cleaning and maintenance 24 Intensive drying The final rinse uses a higher temperature which improves the drying result. The running time may increase slightly. (Caution if utensils are delicate!) 1. Close the door. 2. Switch on ON/OFF switch ( . 3. Hold down programme button # and press START b...
Page 25 - Rinse aid
Cleaning and maintenance aus 25 m Warning – Health hazard Never use other domestic detergents, e.g. containing chlorine! Rinse aid Check the refill indicator @ . If required, refill rinse aid. Filters The filters 1R keep large foreign objects in the rinsing water away from the pump. These foreign ob...
Page 26 - Waste water pump; Warning – Risk of cuts!
aus Fault, what to do? 26 3 Fault, what to do? F a u l t , w h a t t o d o ? Experience has shown that you can rectify most faults which occur in daily operation yourself. This ensures that the machine is quickly available to you again. In the following overview you can find possible causes of malfu...
Page 27 - Fault table; Fault
Fault, what to do? aus 27 Fault table Fault Cause Remedial action “Check water supply” display 8 lights up. Supply hose kinked. Install supply hose without kinks. Tap turned off. Turn on the tap. Tap jammed or calcified. Turn on the tap.Flow rate must be min. 10 l/min. when water supply is open. Fil...
Page 34 - Customer service; Product package
aus Customer service 34 4 Customer service C u s t o m e r s e r v i c e If you are unable to rectify the fault, please contact your customer service. We always find a suitable solution, even to avoid unnecessary visits by technicians. Contact information for your nearest customer service can be fou...
Page 35 - minimum 10 litres/minute; Installation
Installation and connection aus 35 Delivery Your dishwasher has been checked thoroughly in the factory to ensure that it is in working order. This may cause small water stains. These will disappear after the first wash cycle. Technical specifications Weight: max. 60 kg Voltage: 220–240 V, 50 Hz or 6...
Page 36 - Drinking water connection; Electrical connection; . Only this extension
aus Installation and connection 36 Drinking water connection 1. Fasten the drinking water connection to the tap according to the installation instructions using the enclosed parts.Ensure that the drinking water connection is not kinked, crushed or twisted. 2. When replacing the appliance, always use...
Page 37 - Removing the appliance
Installation and connection aus 37 Removing the appliance Also observe the sequence of worksteps here. 1. Disconnect the appliance from the power supply. 2. Turn off the water supply. 3. Undo the waste water and drinking water connection. 4. Loosen fastening screws for the furniture parts. 5. If fit...
Page 38 - Protection against frost; XEMHFWWRFKDQJHV
aus Installation and connection 38 Protection against frost Protection against frost (Emptying the appliance) If the appliance is in a room where there is a risk of frost (e.g. holiday home), empty the appliance completely (see Transportation). 6XEMHFWWRFKDQJHV
Page 39 - &KLOGSURRIORFNGRRUORFN
&KLOGSURRIORFNGRRUORFN $FWLYDWHWKHFKLOGSURRIORFN 2SHQWKHGRRUZLWKDFWLYDWHG FKLOGSURRIORFN 'HDFWLYDWHFKLOGSURRIORFN $OZD\VFORVHWKHDSSOLDQFHGRRUFRPSOHWHO\ ZKHQ\RXOHDYHWKHDSSOLDQFH 7KLVLVWKHRQO\ZD\\RXFDQSURWHFW\RXU FKLOGUHQIURPSRWHQWLDOGDQJHUV :DUQLQJ %DNLQJVKHHWVSUD\KHDG /DUJHVKHHWVRUJULOOHVDQGSODW...