Bosch PRS9A6L70A - User Manual
Bosch PRS9A6L70A Hob – User Manual, read for free online in PDF format. We hope this helps you resolve any issues you may have. If you have further questions, please contact us through the contact form.


Table of Contents:
- Page 3 – Futher information and explanations are available online:; Table of contents; Safety; General information
- Page 4 – Safe installation
- Page 5 – WARNING ‒ Risk of poisoning!
- Page 6 – WARNING ‒ Risk of injury!; Installation instructions; Statutory requirements
- Page 8 – Positioning the appliance; Wiring diagram
- Page 9 – Connecting the unit to the gas line; Before leaving
- Page 10 – Injectors
- Page 11 – Replacing the injectors
- Page 12 – Reinstalling the appliance; Preventing material damage
- Page 13 – Environmental protection and saving energy; Disposing of packaging; Familiarising yourself with your appliance
- Page 15 – Basic operation; Igniting a gas burner; Igniting a gas burner manually; Cookware; Suitable cookware
- Page 16 – Recommended settings for cooking; 0 Cleaning and servicing; Cleaning product
- Page 17 – Cleaning the appliance; 1 Troubleshooting
- Page 19 – 3 Customer Service; Disposing of old appliance
- Page 20 – Register your new device on MyBosch now and profit directly from:; • Expert tips & tricks for your appliance; Free and easy registration – also on mobile phones:; BSH Hausgeräte GmbH; A Bosch Company
Register
your
new device on
MyBosch now and
get free benefits:
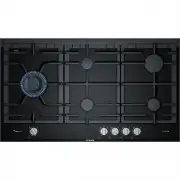
Built-in gas hob
PRS9A.D7.A
PRS9A.L7.A
"Loading the manual" means you need to wait until the file loads and becomes available for online reading. Some manuals are very large, and the time they take to appear depends on your internet speed.
Summary
Safety en 3 Futher information and explanations are available online: Table of contents INFORMATION FOR USE 1 Safety ................................................................... 3 1.4 Safe installation .................................................. 4 2 INSTALLATION INSTRUCTIONS ..........
en Safety 4 1.4 Safe installation Follow these safety instructions when in-stalling the appliance. ¡ Read the installation instructions carefully.→ "Installation instructions", Page 6 ¡ The images shown in these instructions arefor guidance only. ¡ The appliance can only be used safely if ...
Safety en 5 WARNING ‒ Risk of poisoning! Using the gas cooking appliance leads to abuild-up of heat, moisture and combustionproducts in the room where the appliance isinstalled. ▶ Ensure that the kitchen is sufficiently ventil-ated, in particular when operating the gascooking appliance. ▶ If the ap...