Page 2 - Table of Contents
2 Table of Contents Use and care manual Safety Definitions .......................................................... 3IMPORTANT SAFETY INSTRUCTIONS ........................ 4 9 PRECAUTIONS TO AVOID POSSIBLE EXPOSURE TO EXCESSIVE MICROWAVE ENERGY .......................... 4GROUNDING INSTRUCTIONS .....
Page 3 - ZZZERVFKKRPHFRPXV
3 Safety Definitions Safety Definitions 9 WARNING This indicates that death or serious injuries may occur as a result of non-observance of this warning. 9 CAUTION This indicates that minor or moderate injuries may occur as a result of non-observance of this warning. NOTICE: This indicates that damag...
Page 4 - IMPORTANT SAFETY INSTRUCTIONS; READ ALL INSTRUCTIONS BEFORE USING THE APPLIANCE; SAVE THESE INSTRUCTIONS.; PRECAUTIONS TO AVOID
9 IMPORTANT SAFETY INSTRUCTIONS READ ALL INSTRUCTIONS BEFORE USING THE APPLIANCE 4 SAVE THESE INSTRUCTIONS. I M P O R T A N T S A F E T Y I N S T R U C T I O N S R E A D A L L I N S T R U C T I O N S B E F O R E U S I N G T H E A P P L I A N C E 9 PRECAUTIONS TO AVOID POSSIBLE EXPOSURE TO EXCESSIVE ...
Page 5 - GROUNDING INSTRUCTIONS; TV / Radio Interference
SAVE THESE INSTRUCTIONS. 5 9 IMPORTANT SAFETY INSTRUCTIONS READ ALL INSTRUCTIONS BEFORE USING THE APPLIANCE GROUNDING INSTRUCTIONS For all cord-connected appliances: This appliance must be grounded. Grounding reduces risk of electric shock by providing a safe pathway for electric current in the even...
Page 6 - Cleaning Safety; Cooking Safety; In Case of Fire
9 IMPORTANT SAFETY INSTRUCTIONS READ ALL INSTRUCTIONS BEFORE USING THE APPLIANCE 6 SAVE THESE INSTRUCTIONS. Cleaning Safety When cleaning surfaces of door and oven that come together on closing the door, use only mild, nonabrasive soaps, or detergents applied with a sponge or soft cloth. See door su...
Page 7 - Cooking Items; Cooking Utensils; Metal Tray Turntable
SAVE THESE INSTRUCTIONS. 7 9 IMPORTANT SAFETY INSTRUCTIONS READ ALL INSTRUCTIONS BEFORE USING THE APPLIANCE ▯ Stir or turn the food several times during cooking. Check the temperature. ▯ After heating, allow the food to stand for a further 2 to 5 minutes so that it can achieve an even temperature. ▯...
Page 8 - Thermometers; State of California Proposition 65; Fan Motor Operation
9 IMPORTANT SAFETY INSTRUCTIONS READ ALL INSTRUCTIONS BEFORE USING THE APPLIANCE 8 SAVE THESE INSTRUCTIONS. Thermometers Do not use regular cooking thermometers in oven. Most cooking thermometers contain mercury and may cause electrical arc, malfunction, or damage to the oven. Pacemakers CAUTION To ...
Page 9 - Tips for saving energy
9 Causes of Damage NOTICES: ▯ Metal e.g. a spoon in a glass must be kept at least 1 inch (25 mm) from the oven walls and the inside of the door. Sparks could irreparably damage the glass on the inside of the door. ▯ Water in the hot oven interior: Never pour water into the hot oven interior. Ste...
Page 10 - Getting to know the appliance; Parts
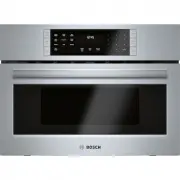
10 Getting to know the appliance Parts Oven Vents The oven vents are located around the sides of the oven cavity. Warm air may be released from the top and bottom vents before, during and after cooking. It is normal to see steam escaping from these vents, and condensation may collect in this area. T...
Page 11 - Control Panel
11 Control Panel Touch keys You can activate a function by briefly touching the corresponding touch key. Each time you touch a key a short beep will sound. A long beep will tell you that you have made an invalid input. Display elements The display gives you information on the current settings of you...
Page 12 - Accessories
12 Accessories How to install the turntable Place the turntable with the rollers " A " as shown in the picture, on the carrier " B " in the middle of the oven cavity bottom.The turntable must sit straight on the carrier. Note: Do not use the appliance if the turntable is not in place...
Page 13 - Before using the appliance for the first time; Setting the clock; Heating up the appliance; Cleaning accessories
13 Inserting the wire rack 1. Place rack securely in the four plastic supports. Note: Rack must not touch metal walls or back of microwave. 2. Place food on the rack. 9 CAUTION ▯ Do not use the rack to pop popcorn. ▯ The rack must be on the four plastic supports when used. ▯ Do not cook with rack on...
Page 14 - Microwave; Microwave utensil guide; Microwave power levels
14 Microwave Microwave utensil guide Suitable ovenware ▯ Heat-resistant glass, glass ceramic and earthenware: Utility dishes, loaf dishes, pie plates, cake plates, liquid measuring cups, casseroles and bowls without metallic trim (e.g. Pyrex ® , Anchor Hocking™, Corning Ware ® , Emile Henry, etc.). ...
Page 16 - Cookware tips for Convection
16 ▯ Arranging food Arrange unevenly shaped foods, such as chicken pieces or salmon, with the thicker or meatier parts toward the outside of the turntable tray. ▯ Letting food stand After removing the food from the microwave, cover the food with foil or a casserole lid and let it stand to finish coo...
Page 17 - Broil; Setting Broil mode; Automatic programs; Speed Chef
17 Broil The Broil feature uses intense heat radiated from the upper element. You can set two intensity levels: ▯ Broil high ( ▯ Broil low * Setting Broil mode The appliance must turned off. 1. Touch Broil . The Broil mode is set to high. •‚ and start/enter are blinking, the Broil high symbol ( will...
Page 19 - Auto Defrost
19 Auto Defrost With the Auto Defrost feature you can defrost three different types of food by entering the weight. The ideal defrost time will be calculated by the program. Ovenware for defrosting Place the food in a microwaveable shallow dish, such as a glass casserole dish or glass plate, but do ...
Page 21 - Sensor cooking; Sensor Reheat
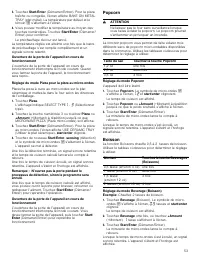
21 Opening appliance door during operation Opening the appliance door during operation will interrupt the current mode. Close the appliance door and then touch Start/Enter to resume operation. Popcorn 9 CAUTION Do not leave oven unattended while popping corn. Popcorn may ignite and cause fire. The p...
Page 22 - Sensor Cook
22 Reheat cooking suggestions Sensor Cook Sensor Cook allows you to cook many of your favorite foods without selecting cooking times and power levels. The microwave oven automatically determines the required cooking time for each food item. Sensor Cook programs Setting Sensor Cook The appliance must...
Page 23 - More Modes; Setting Keep Warm
23 When sensing is complete, a beep will sound and the calculated cook time will start to count down. Note: Do not open the door during the sensing process, or the program will be cancelled . Once the calculated cook time is displayed, you can open the door to stir, turn or rearrange the food. Touch...
Page 24 - Kitchen timer; Setting the kitchen timer
24 Setting Melt Chocolate You can set two different quantities for melting chocolate: ▯ 1 cup ▯ 2 cups 1. Touch More Modes once. The display shows SELECT PROGRAM 1 - 6. 2. Touch the number key 4 or touch More Modes four times.MELT CHOCOLATE and the microwave symbol Ý are displayed. The first quantit...
Page 25 - Changing the basic settings
25 Panel Lock You can use the panel lock to prevent children from accidentally turning the appliance on.The panel lock feature is also very useful when cleaning the control panel. The lock will prevent accidental programming when wiping the control panel clean. To activate the panel lock: Touch and ...
Page 26 - Cooking Charts; Convection Broil
26 Cooking Charts The charts can be used as a guide. Follow package or recipe directions. Broil Place pan of food on the wire rack with the recess facing up. Convection Broil Place pans of food on the wire rack with the recess facing up. Convection Preheat the oven before adding foods. Once the oven...
Page 28 - Cleaning and Maintenance; Cleaning Guide
28 Cleaning and Maintenance 9 WARNING Be sure the entire appliance has cooled and grease has solidified before attempting to clean any part of the appliance. Cleaning Guide ▯ For best performance and for safety reasons, keep the oven clean inside and outside. Take special care to keep the inner door...
Page 29 - Before Calling for Service
29 Before Calling for Service Before calling customer service, consider the suggestions and instructions below: Problem Suggestion Neither the microwave’s display nor oven operates. ▯ Properly insert the plug into a grounded power outlet. ▯ Reset the household circuit breaker or replace any blown fu...
Page 30 - Before Calling Service; Data Plate; Parts and Accessories
30 Bosch ® Support Before Calling Service See the Use and Care Manual for troubleshooting information. Refer to the “Statement of Limited Product Warranty” in the Use and Care Manual.To reach a service representative, see the contact information at the front of the manual or in the following section...
Page 31 - STATEMENT OF LIMITED PRODUCT WARRANTY; What this Warranty Covers & Who it; How Long the Warranty Lasts; Repair/Replace as Your Exclusive Remedy
31 STATEMENT OF LIMITED PRODUCT WARRANTY What this Warranty Covers & Who it Applies to The limited warranty provided by BSH Home Appliances Corporation (“BSH“) in this Statement of Limited Product Warranty applies only to the Bosch appliance (“Product“) sold to you, the first using purchaser, pr...
Page 33 - Table des Matières
33 Table des Matières Notice d’utilisation Définitions de sécurité ................................................ 34CONSIGNES DE SÉCURITÉ IMPORTANTES ............. 35 9 MESURES DE PRÉCAUTION POUR ÉVITER L’EXPOSITION EXCESSIVE À L’ÉNERGIE MICRO-ONDE ....................................................
Page 34 - ââ; RXVQRXVIHURQVXQSODLVLUGHYRXVVHUYLU
34 Définitions de sécurité Définitions de sécurité 9 AVERTISSEMENT Ceci indique que le non-respect de cet avertissement peut entraîner des blessures graves, voire la mort. 9 ATTENTION Ceci indique que le non-respect de cet avertissement peut entraîner des blessures légères ou de gravité moyenne. AVI...
Page 35 - CONSERVEZ CES INSTRUCTIONS.; CONSIGNES DE SÉCURITÉ IMPORTANTES; LISEZ TOUTES LES INSTRUCTIONS AVANT D'UTILISER L'APPAREIL; MESURES DE
CONSERVEZ CES INSTRUCTIONS. 35 9 CONSIGNES DE SÉCURITÉ IMPORTANTES LISEZ TOUTES LES INSTRUCTIONS AVANT D'UTILISER L'APPAREIL C O N S I G N E S D E S É C U R I T É I M P O R T A N T E S L I S E Z T O U T E S L E S I N S T R U C T I O N S A V A N T D ' U T I L I S E R L ' A P P A R E I L 9 MESURES DE ...
Page 36 - INSTRUCTIONS DE MISE; Interférences radio/télévision
9 CONSIGNES DE SÉCURITÉ IMPORTANTES LISEZ TOUTES LES INSTRUCTIONS AVANT D'UTILISER L'APPAREIL 36 CONSERVEZ CES INSTRUCTIONS. Pour réduire le risque de feu dans la cavité du four : ▯ Ne cuisez pas trop les aliments. Surveillez attentivement l’appareil quand des matériaux en papier, plastique et autre...
Page 37 - Sécurité des enfants; Sécurité de cuisson; En cas d’incendie
CONSERVEZ CES INSTRUCTIONS. 37 9 CONSIGNES DE SÉCURITÉ IMPORTANTES LISEZ TOUTES LES INSTRUCTIONS AVANT D'UTILISER L'APPAREIL Sécurité des enfants Ne pas permettre aux enfants d’utiliser cet appareil sauf sous la surveillance attentive d’un adulte. Ne pas laisser les enfants et les animaux seuls ou s...
Page 38 - Liquides; Articles de cuisson
9 CONSIGNES DE SÉCURITÉ IMPORTANTES LISEZ TOUTES LES INSTRUCTIONS AVANT D'UTILISER L'APPAREIL 38 CONSERVEZ CES INSTRUCTIONS. Liquides Des liquides, comme de l’eau, du café ou du thé peuvent surchauffer. Ils peuvent être chauffés au-delà du point d’ébullition sans que cela ne paraisse. Par exemple, l...
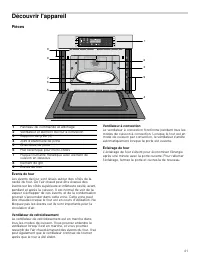
Page 41 - Pièces
41 Découvrir l'appareil Pièces Évents de four Les évents de four sont situés autour des côtés de la cavité du four. De l’air chaud peut être évacué des évents sur les côtés supérieure et inférieure cavité, avant, pendant et après la cuisson. Il est normal de voir de la vapeur s’échapper de ces évent...
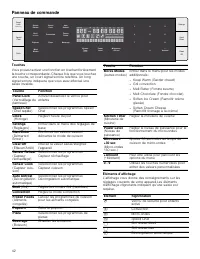
Page 42 - Panneau de commande
42 Panneau de commande Touches Vous pouvez activer une fonction en touchant brièvement la touche correspondante. Chaque fois que vous touchez une touche, un court signal sonore retentira. Un long signal sonore indiquera que vous avez effectué une saisie invalide. Éléments d’affichage L’affichage vou...
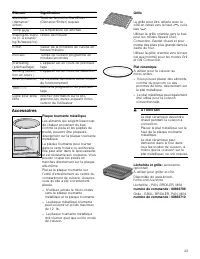
Page 43 - Accessoires
43 Accessoires start/enter (démarrer/ entrer) Touchez la touche Start/Enter (Démarrer/Entrer) requise Temp ‹‹‹ ° La température est affichée tbsp/kg/lb/cups/ oz (c. à soupe)/ kg/lb/tasses/oz) Unités de mesure h/min Valeur de la minuterie de cuisine en heures/minutes min/sec Temps de cuisson programm...
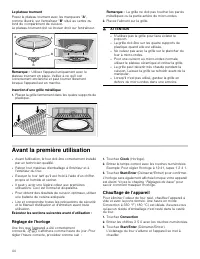
Page 44 - Avant la première utilisation; Réglage de l’horloge; Chauffage de l’appareil
44 Le plateau tournant Posez le plateau tournant avec les marqueurs " A ", comme illustré, sur l'entraîneur " B " situé au centre du fond du compartiment de cuisson.Le plateau tournant doit se trouver droit sur l'entraîneur. Remarque : Utilisez l'appareil uniquement avec le plateau t...
Page 45 - Guide des ustensiles pour micro-ondes
45 Accessoires de nettoyage Avant d’utiliser les accessoires pour la première fois, lavez les accessoires à fond avec de l’eau savonneuse et un chiffon propre et doux. Appliquer l'étiquette de programme Choisir la langue soutaitée des étiquettes incluses. Fixer l'étiquette au côté de la cavité du fo...
Page 47 - Suggestions pour les meilleurs résultats
47 3. Touchez Start/Enter (Démarrer/Entrer). Le fonctionnement du micro-ondes se poursuit avec le nouveau niveau de puissance. Ouverture de la porte de l’appareil en cours de fonctionnement L’ouverture de la porte de l’appareil en cours de fonctionnement interrompra le mode courant. Vous devez ferme...
Page 48 - Conseils de plats de cuisson pour le mode
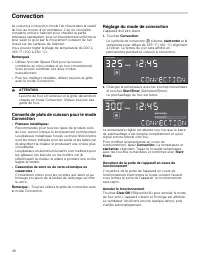
48 Convection La cuisson à convection circule l’air chaud dans la cavité du four au moyen d’un ventilateur. L’air en circulation constante entoure l’aliment pour chauffer la partie extérieure rapidement, pour un brunissement uniforme et pour saisir le goût par le mouvement constant de l’air chaud su...
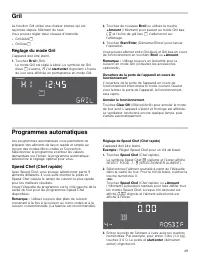
Page 49 - Gril; Réglage du mode Gril; Programmes automatiques
49 Gril La fonction Gril utilise une chaleur intense qui est rayonnée depuis l’élément du haut. Vous pouvez régler deux niveaux d’intensité: ▯ Gril élévé ( ▯ Gril bas * Réglage du mode Gril L’appareil doit être éteint. 1. Touchez Broil (Gril). Le mode Gril est réglé à élevé. Le symbole de Gril élevé...
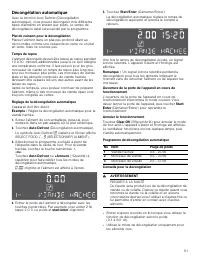
Page 51 - Décongélation automatique
51 Décongélation automatique Avec la fonction Auto Defrost (Décongélation automatique), vous pouvez décongeler trois différents types d’aliments en entrant leur poids. Le temps de décongélation idéal sera calculé par le programme. Plat de cuisson pour la décongélation Placez l’aliment dans un plat p...
Page 54 - Capteur cuisson; Capteur réchauffage
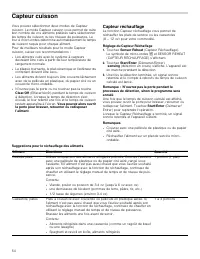
54 Capteur cuisson Vous pouvez sélectionner deux modes de Capteur cuisson. Le mode Capteur cuisson vous permet de cuire bon nombre de vos aliments préférés sans sélectionner les temps de cuisson ou les niveaux de puissance. Le four à micro-ondes détermine automatiquement le temps de cuisson requis p...
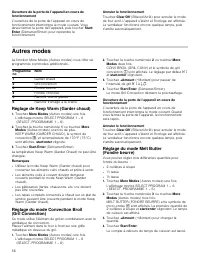
Page 56 - Autres modes; Réglage du mode Convection Broil
56 Ouverture de la porte de l’appareil en cours de fonctionnement L’ouverture de la porte de l’appareil en cours de fonctionnement interrompra le mode courant. Vous devez fermer la porte de l’appareil, puis toucher Start/ Enter (Démarrer/Entrer) pour reprendre le fonctionnement. Annuler le fonctionn...
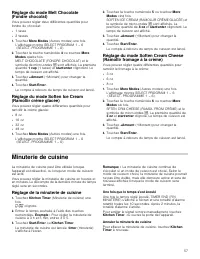
Page 57 - Minuterie de cuisine; Réglage de la minuterie de cuisine
57 Réglage du mode Melt Chocolate (Fondre chocolat) Vous pouvez régler deux différentes quantités pour fondre du chocolat: ▯ 1 tasse ▯ 2 tasses 1. Touchez More Modes (Autres modes) une fois. L’affichage montre SELECT PROGRAM 1 – 6 (SÉLECT. PROGRAMME 1 – 6) 2. Touchez la touche numérotée 4 ou touchez...
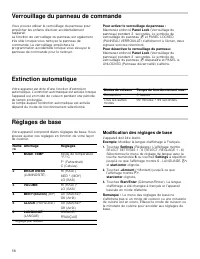
Page 58 - Modification des réglages de base
58 Verrouillage du panneau de commande Vous pouvez utiliser le verrouillage du panneau pour empêcher les enfants d'activer accidentellement l'appareil.La fonction de verrouillage du panneau est également très utile lorsque vous nettoyez le panneau de commande. Le verrouillage empêchera la programmat...
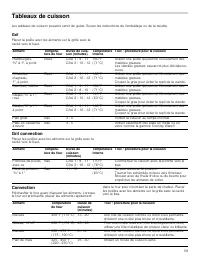
Page 59 - Tableaux de cuisson; Gril convection
59 Tableaux de cuisson Les tableaux de cuisson peuvent servir de guide. Suivez les instructions de l'emballage ou de la recette. Gril Placer la poêle avec les aliments sur la grille avec la cavité vers le haut. Gril convection Placer les poêles avec les aliments sur la grille avec la cavité vers le ...
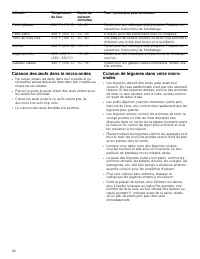
Page 61 - Cuisson de fruits de mer dans le micro-ondes; Nettoyage et entretien; Guide de nettoyage
61 Cuisson de fruits de mer dans le micro-ondes Assurez-vous de disposer le poisson sur une grille à rôtir et dans un plat transparent aux micro-ondes. Assurez- vous de toujours cuire le poisson jusqu’à ce qu’il se détache facilement à la fourchette. Utilisez un couvercle bien serré pour cuire à la ...
Page 63 - Dépannage
63 Dépannage Avant de contacter le service à la clientèle, veuillez songer à suivre les suggestions et les instructions ci- dessous : Problème Suggestion Ni l’écran ni le four du micro- ondes fonctionne. ▯ Insérez correctement la fiche dans une prise de courant mise à la terre. ▯ Réenclenchez le dis...
Page 64 - Soutien Bosch; Avant d'appeler le service de dépannage; Plaque signalétique; Pièces et accessoires
64 Soutien Bosch ® Avant d'appeler le service de dépannage Pour des informations sur le dépannage, se reporter au Manuel d'utilisation et d'entretien. Consulter la “Énoncé de la Garantie Limitée” figurant dans le Manuel d'utilisation et d'entretien. Pour contacter un technicien de dépannage, voir le...
Page 65 - ÉNONCÉ DE LA GARANTIE LIMITÉE; Couverture de la garantie :; Durée de la garantie; Réparation ou remplacement comme
65 ÉNONCÉ DE LA GARANTIE LIMITÉE Couverture de la garantie : La garantie limitée fournie par BSH Home Appliances Ltd. (« BSH ») dans le présent énoncé de garantie limitée s’applique seulement aux Bosch appareil (« Produit ») vendu au premier acheteur, en autant que le produit ait été acheté : ▯ pour...
Page 67 - Contenido
67 Contenido Manual de instrucciones Definiciones de seguridad .......................................... 68INSTRUCCIONES DE SEGURIDAD IMPORTANTES . 69 9 PRECAUCIONES PARA EVITAR UNA POSIBLE EXPOSICIÓN A UNA EXCESIVA CANTIDAD DE ENERGÍA DE MICROONDAS ......................................... 69INSTR...
Page 69 - INSTRUCCIONES DE SEGURIDAD IMPORTANTES; LEER TODAS LAS INSTRUCCIONES ANTES DE UTILIZAR EL APARATO
CONSERVE ESTAS INSTRUCCIONES. 69 9 INSTRUCCIONES DE SEGURIDAD IMPORTANTES LEER TODAS LAS INSTRUCCIONES ANTES DE UTILIZAR EL APARATO I N S T R U C C I O N E S D E S E G U R I D A D I M P O R T A N T E S L E E R T O D A S L A S I N S T R U C C I O N E S A N T E S D E U T I L I Z A R E L A P A R A T O ...
Page 70 - CONSERVE ESTAS INSTRUCCIONES.; INSTRUCCIONES PARA LA; Interferencia con la TV/radio
9 INSTRUCCIONES DE SEGURIDAD IMPORTANTES LEER TODAS LAS INSTRUCCIONES ANTES DE UTILIZAR EL APARATO 70 CONSERVE ESTAS INSTRUCCIONES. Para reducir el riesgo de incendio en la cavidad del horno: ▯ No cocine los alimentos excesivamente. Preste especial atención al aparato cuando coloque adentro papel, p...
Page 71 - Uso previsto; Seguridad al cocinar
CONSERVE ESTAS INSTRUCCIONES. 71 9 INSTRUCCIONES DE SEGURIDAD IMPORTANTES LEER TODAS LAS INSTRUCCIONES ANTES DE UTILIZAR EL APARATO Uso previsto Este electrodoméstico ha sido diseñado para uso doméstico normal únicamente. No está aprobado para uso en exteriores. Consulte la Declaración de Garantía l...
Page 72 - En caso de incendio; Artículos de cocina
9 INSTRUCCIONES DE SEGURIDAD IMPORTANTES LEER TODAS LAS INSTRUCCIONES ANTES DE UTILIZAR EL APARATO 72 CONSERVE ESTAS INSTRUCCIONES. ▯ No cubrir las rejillas ni ninguna otra parte del horno con papel de aluminio. Esto causará el sobrecalentamiento del horno. ▯ No utilice productos de papel cuando el ...
Page 74 - Causas para los daños; Protección del medio ambiente; Consejos para ahorrar energía
74 Causas para los daños AVISOS: ▯ El metal —p. ej., una cuchara en una copa— debe mantenerse alejado, como mínimo, 1 pulg. (25 mm) de las paredes del horno y del interior de la puerta. Las chispas podrían provocar daños irreparables en el cristal del interior de la puerta. ▯ Agua en el interior del...
Page 75 - Conozca el equipo; Componentes
75 Conozca el equipo Componentes Ventilaciones del horno Las ventilaciones del horno se ubican alrededor de los lados de la cavidad del horno. Es posible que salga aire tibio de las aberturas de ventilación superiores y inferiores de la cavidad, antes, durante y después de la cocción. Es normal que ...
Page 76 - Panel de control
76 Panel de control Teclas digitales Puede activar una función pulsando brevemente la tecla digital correspondiente. Cada vez que pulse una tecla, sonará un bip breve. Un bip prolongado le indicará que ha ingresado un valor inválido. Elementos del display El display le brinda información sobre los v...
Page 77 - Accesorios
77 Accesorios hr/min (h/min) Valor del temporizador de cocina en horas/minutos min/sec (min/s) Tiempo de cocción programado en minutos/segundos preheating (precalenta- miento) El aparato se está precalentando sensing (sensor activo) El aparato tiene el sensor activo timer (temporizador) El temporiza...
Page 78 - Antes de usar el horno por primera vez; Programación del reloj; Calentamiento del aparato
78 Para colocar la bandeja giratoria Coloque la bandeja giratoria con los rodillos “ A ”, sobre la pieza de arrastre “ B ” al centro del fondo de la cavidad del horno, tal como lo muestra la figura.La bandeja giratoria debe estar asentado justo sobre la pieza de arrastre. Nota: Utilizar el aparato s...
Page 79 - Microondas; Guía de utensilios para microondas
79 Limpieza de accesorios Antes de utilizar accesorios por primera vez, límpielos minuciosamente con agua jabonosa caliente y un repasador suave. Aplicación de la etiqueta de programas Seleccionar el idioma deseado de las etiquetas de programas incluidas. Aplicarlo en el lado de la cavidad del horno...
Page 81 - Convección
81 Abertura de la puerta del aparato durante el funcionamiento La abertura de la puerta del aparato durante el funcionamiento interrumpirá el modo actual. Debe cerrar la puerta del aparato y, luego, pulsar Start/Enter (Comenzar/Intro) para reanudar el funcionamiento. +30 sec (+30s) Utilice la tecla ...
Page 82 - Asar con calor directo; Programación del modo Broil
82 Consejos sobre utensilios de cocina para Convection (Convección) ▯ Charolas de metal: Recomendadas para todos los tipos de productos horneados, especialmente cuando es importante dorar.Las charolas de metal oscuras o con acabado opaco son las mejores para panes y pays debido a que absorben calor ...
Page 83 - Programas automáticos
83 Nota: Siempre use una asadera al cocinar en modo Broil (Asar) (consulte los accesorios opcionales). Abertura de la puerta del aparato durante el funcionamiento La abertura de la puerta del aparato durante el funcionamiento interrumpirá el modo actual. Al cerrar la puerta del aparato, se reanudará...
Page 86 - Pizza
86 Frozen Foods (Alimentos congelados) Utilice la función Frozen Foods (Alimentos congelados) para preparar alimentos congelados de preparación rápida, como nuggets de pollo, papas fritas, palitos de pescado, utilizando calor inferior y la función Convection (Convección).Coloque el alimento que dese...
Page 88 - Cocción por sensor
88 Cocción por sensor Puede seleccionar dos modos de cocción por sensor. La cocción por sensor le permite cocinar muchos de sus alimentos favoritos sin seleccionar tiempos de cocción ni niveles de potencia. El horno microondas determina automáticamente el tiempo de cocción requerido para cada alimen...
Page 92 - Temporizador de cocina; Programación del temporizador de la; Bloqueo de panel
92 Temporizador de cocina El temporizador de cocina se puede usar cuando el aparato se apaga o mientras un modo de cocción está activo. Puede programar el valor del temporizador de la cocina en horas y minutos. El último minuto del tiempo programada hará la cuenta regresiva en segundos. Programación...
Page 93 - Valores básicos; Modificación de los valores básicos; Cuadros de cocción; Asar a la parrilla
93 Valores básicos El electrodoméstico tiene varios valores básicos. Puede ajustar estos valores según el modo en el que cocina habitualmente. Modificación de los valores básicos El aparato debe estar apagado. Ejemplo: Cambie el idioma del display a francés. 1. Pulse Settings (Valores). El display m...
Page 96 - Limpieza y mantenimiento; Guía de limpieza
96 Limpieza y mantenimiento 9 ADVERTENCIA Asegúrese de que todo el aparato se haya enfriado y de que la grasa se haya solidificado antes de intentar limpiar cualquier parte del aparato. Guía de limpieza ▯ Para un mejor rendimiento y por motivos de seguridad, mantenga limpios el interior y el exterio...
Page 97 - Resolución de problemas
97 Resolución de problemas Antes de llamar al servicio a clientes, tenga en cuenta las sugerencias y las instrucciones que aparecen a continuación: Problema Sugerencia No funciona ni el display del microondas ni el horno. ▯ Conectar correctamente el enchufe en la toma de corriente con conexión a tie...
Page 98 - Soporte de Bosch; Antes de llamar al servicio; Placa de datos; Piezas y accesorios
98 Soporte de Bosch ® Antes de llamar al servicio Para obtener información sobre resolución de problemas, consulte el Manual de uso y cuidado. Consulte la “Declaración de Garantía Limitada del Producto” en el Manual de uso y cuidado. Para consultar a un representante de servicio técnico, remítase a ...
Page 99 - DECLARACIÓN DE GARANTÍA LIMITADA DEL PRODUCTO; Cobertura de esta garantía y a quiénes se; Duración de la garantía; Reparación/reemplazo como único
99 DECLARACIÓN DE GARANTÍA LIMITADA DEL PRODUCTO Cobertura de esta garantía y a quiénes se aplica La garantía limitada otorgada por BSH Home Appliances Corporation (“BSH“) en esta Declaración de Garantía Limitada del Producto se aplica únicamente al electrodoméstico Bosch (“Producto“) vendido a uste...