Black & Decker BFSR18B - User Manual
Black & Decker BFSR18B Fan – User Manual, read for free online in PDF format. We hope this helps you resolve any issues you may have. If you have further questions, please contact us through the contact form.
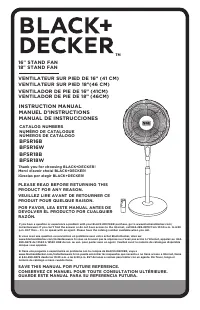


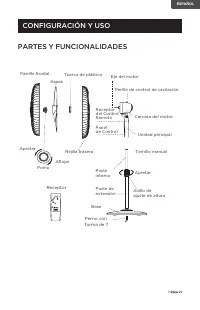


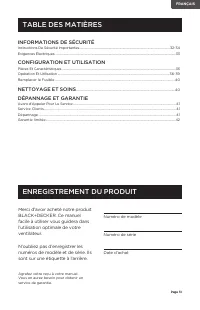


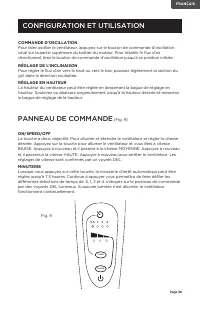

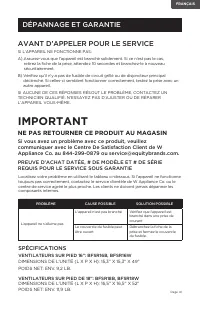


Table of Contents:
- Page 3 – PRODUCT REGISTRATION; SAFETY INFORMATION
- Page 4 – IMPORTANT SAFETY INSTRUCTIONS; CAUTION
- Page 5 – any solid state speed control devices.; SAVE THESE INSTRUCTIONS; HOUSEHOLD USE ONLY
- Page 7 – Remote
- Page 8 – ASSEMBLY OF BASE & COLUMN UNIT; Loosen
- Page 9 – GRILL & FAN BLADE ASSEMBLY
- Page 10 – OPERATION INSTRUCTIONS
- Page 11 – CONTROL PANEL
- Page 12 – REPLACING THE FUSE
- Page 13 – TROUBLESHOOTING & WARRANTY; IMPORTANT; DO NOT RETURN THIS PRODUCT TO THE STORE; SPECIFICATIONS
- Page 17 – Número de modelo; REGISTRO DEL PRODUCTO; INFORMACIÓN DE SEGURIDAD
- Page 18 – PELIGRO; ADVERTENCIA
- Page 19 – No coloque el cable bajo ningún tipo de alfombrado.No cubra el; GUARDE ESTAS INSTRUCCIONES; ÚNICAMENTE USO DOMÉSTICO
- Page 21 – PARTES Y FUNCIONALIDADES
- Page 22 – CONFIGURACIÓN Y USO
- Page 23 – ENSAMBLAJE DE LA REJILLA Y LAS ASPAS; Acople; INSTALACIÓN DE LAS PILAS DEL CONTROL REMOTO
- Page 25 – PANEL DE CONTROL
- Page 26 – LIMPIEZA Y MANTENIMIENTO
- Page 27 – ESPECIFICACIONES; SOLUCIÓN DE PROBLEMAS Y GARANTÍA; IMPORTANTE; NO DEVUELVA ESTE PRODUCTO A LA TIENDA
- Page 31 – ENREGISTREMENT DU PRODUIT; INFORMATIONS DE SÉCURITÉ
- Page 32 – CONSIGNES DE SÉCURITÉ; ATTENTION; AVERTISSEMENT
- Page 33 – des carpettes, des tapis de couloir ou des revêtements similaires.; SAUVEGARDER CES INSTRUCTIONS; USAGE DOMESTIQUE SEULEMENT
- Page 35 – PIÈCES & CARACTÉRISTIQUES
- Page 36 – CONFIGURATION ET UTILISATION
- Page 39 – PANNEAU DE COMMANDE
- Page 40 – NETTOYAGE ET ENTRETIEN
- Page 41 – DÉPANNAGE ET GARANTIE; NE PAS RETOURNER CE PRODUIT AU MAGASIN; SPÉCIFICATIONS; VENTILATEURS SUR PIED 16”: BFSR16B, BFSR16W
- Page 44 – Printed in China
INSTRUCTION MANUAL
MANUEL D’INSTRUCTIONS
MANUAL DE INSTRUCCIONES
16
”
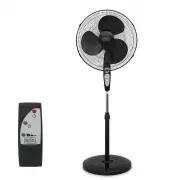
STAND FAN
18
”
STAND FAN
VENTILATEUR SUR PIED DE 16” (41 CM)
VENTILATEUR SUR PIED 18”(46 CM)
VENTILADOR DE PIE DE 16” (41CM)
VENTILADOR DE PIE DE 18” (46CM)
Thank you for choosing BLACK+DECKER!
Merci d’avoir choisi BLACK+DECKER!
¡Gracias por elegir BLACK+DECKER!
PLEASE READ BEFORE RETURNING THIS
PRODUCT FOR ANY REASON.
VEUILLEZ LIRE AVANT DE RETOURNER CE
PRODUIT POUR QUELQUE RAISON.
POR FAVOR, LEA ESTE MANUAL ANTES DE
DEVOLVER EL PRODUCTO POR CUALQUIER
RAZÓN.
If you have a question or experience a problem with your BLACK+DECKER purchase, go to www.blackanddecker.com/
instantanswers If you can’t find the answer or do not have access to the Internet, call 844-299-0879 from 10:30 a.m. to 6:30
p.m. EST Mon. - Fri. to speak with an agent. Please have the catalog number available when you call.
Si vous avez une question ou rencontrez un problème avec votre achat Black+Decker, allez sur
www.blackanddecker.com/instantanswers Si vous ne trouvez pas la réponse ou n’avez pas accès à l’Internet, appelez au 844-
299-0879 de 10h30 à 18h30 HNE du lun. au ven. pour parler avec un agent. Veuillez avoir le numéro de catalogue disponible
lorsque vous appelez.
Si tiene una pregunta o experimenta un problema con tu compra de BLACK+DECKER, vaya a
www.blackanddecker.com/instantanswers Si no puede encontrar las respuestas que necesita o no tiene acceso a Internet, llame
al 844-299-0879 desde las 10:30 a.m. a las 6:30 p.m. EST de lunes a viernes para hablar con un agente. Por favor, tenga el
número de catálogo a mano cuando llame.
SAVE THIS MANUAL FOR FUTURE REFERENCE.
CONSERVEZ CE MANUEL POUR TOUTE CONSULTATION ULTÉRIEURE.
GUARDE ESTE MANUAL PARA SU REFERENCIA FUTURA.
CATALOG NUMBERS
NUMÉRO DE CATALOGUE
NÚMEROS DE CATÁLOGO
BFSR16B
BFSR16W
BFSR18B
BFSR18W
"Loading the manual" means you need to wait until the file loads and becomes available for online reading. Some manuals are very large, and the time they take to appear depends on your internet speed.
Summary
Page 3 ENGLISH Thank you for purchasing our BLACK+DECKER product. This easy-to-use manual will guide you in getting the best use of your fan. Remember to record the model and serial numbers. They are on a label on the rear. Staple your receipt to your manual. You will need it to obtain warranty serv...
Page 4 ENGLISH SAFETY INFORMATION IMPORTANT SAFETY INSTRUCTIONS 1. READ ALL INSTRUCTIONS BEFORE USE2. Never insert fingers, pencils, or any other object through the grill when fan is running 3. Disconnect fan when moving from one location to another.4. Disconnect fan when not in use and before clean...
Page 5 ENGLISH SAFETY INFORMATION 13. To reduce the risk of fire or electric shock, DO NOT use this fan with any solid state speed control devices. 14. Do not use outdoors.15. Ensure that the fan is switched off from the supply mains before removing the grille. SAVE THESE INSTRUCTIONS HOUSEHOLD USE ...