Page 2 - Throughout this user manual the following symbols are used:
Please read this user manual first! Dear Customer, Thank you for purchasing this Beko product. We hope that you get the best results from your product which has been manufactured with high quality and state-of-the-art technology. Therefore, please read this entire user manual and all other accompany...
Page 3 - TABLE OF CONTENTS
3/EN TABLE OF CONTENTS 1 Important instructions and warnings for safety and environment 4 General safety ....................................................... 4 Electrical safety ..................................................... 4 Product safety ...................................................
Page 4 - General safety
4/EN 1 Important instructions and warnings for safety and environment This section contains safety instructions that will help protect from risk of personal injury or property damage. Failure to follow these instructions shall void any warranty. General safety • The appliance is not intended for use...
Page 5 - Product safety
5/EN maintenance, cleaning and repairing procedures. • If the power connection cable for the product is damaged, it must be replaced by the manufacturer, its service agent or similarly qualified persons in order to avoid a hazard. • The appliance must be installed so that it can be completely discon...
Page 7 - Disposing of the old product; Compliance with RoHS Directive:; Package information
7/EN children. Please dispose of all parts of the packaging according to environmental standards. • Electrical products are dangerous to children. Keep children away from the product when it is operating and do not allow them to play with the product. • Do not place any items above the appliance tha...
Page 8 - General information; Overview; Technical specifications; Burners
8/EN 2 General information Overview 1 Induction cooking plate 2 Assembly clamp 3 Vitroceramic surface 4 Base cover 5 Induction cooking plate Technical specifications Voltage / frequency 1N ~ 220-240 V/ 2N ~ 380-415 V ~ 50 Hz Total power consumption max. 7200 W Fuse 32 A / 16 A x 2 Cable type / secti...
Page 9 - Installation; Before installation; Remove packaging materials and transport locks.
9/EN 3 Installation Product must be installed by a qualified person in accordance with the regulations in force. The manufacturer shall not be held responsible for damages arising from procedures carried out by unauthorized persons which may also void the warranty. Preparation of location and electr...
Page 10 - Installation and connection; Electrical connection; Connecting the power cable
10/EN Installation and connection • The product must be installed in accordance with all local electrical regulations. Do not install the hob on places with sharp edges or corners. There is the risk of breaking for glass ceramic surface! Electrical connection Connect the product to a grounded outlet...
Page 12 - Final check
12/EN 1 Hob 2 Installation clamp 3 Counter When installing the hob onto a cabinet, a shelf must be installed in order to separate the cabinet from the hob as illustrated in the above figure. This is not required when installing onto a built-under oven. For example, if it is possible to touch the bot...
Page 13 - Preparation; Tips for saving energy; Defrost frozen dishes before cooking them.; Initial use; First cleaning of the appliance; cloth or sponge and dry with a cloth.; Initial heating
13/EN 4 Preparation Tips for saving energy The following information will help you to use your appliance in an ecological way, and to save energy: • Defrost frozen dishes before cooking them. • Use pots/pans with cover for cooking. If there is no cover, energy consumption may increase 4 times. • Sel...
Page 14 - How to use the hob; General information about cooking; Never; When oil catches fire,; Saucepan selection
14/EN 5 How to use the hob General information about cooking Never fill the pan with oil more than one third of it. Do not leave the hob unattended when heating oil. Overheated oils bring risk of fire. Never attempt to extinguish a possible fire with water! When oil catches fire, cover it with a fir...
Page 15 - Selecting cooking zone suitable to the vessel; Automatically fits to the saucepan.; Using pots on the wide surface cooking zone; Using the hobs
15/EN Do not put metal items such as forks, knives or saucepan covers onto your hob since they can get heated. Never use aluminium foil for cooking. Never place food items wrapped with aluminium foil onto the cooking zone. If there is an oven under your hob and if it is running, sensors of the hob c...
Page 16 - Control panel; Specifications
16/EN Control panel Specifications Light indicating that the relevant key is functioning On / Off key Keylock key Timer Activation / Deactivation key High power setting (Booster) key Automatic cooking key Stop key Minus key Plus key Cooking zone combination/separation key Graphics and figures are fo...
Page 17 - Residual heat indicator
17/EN When the time is over, an audible alarm will sound. Touch any key on the control panel to silence the audible alarm. If "H " or "h" is on after the cooking zone has been switched off, it means that the cooking zone is still hot. Do not touch the cooking zones.. Residual heat in...
Page 19 - permanently
19/EN Key Lock You can activate the key lock in order to prevent the functions from being changed by mistake while the hob is operating. Activating the key lock 1. Touch and hold the " " key for a long time while any of the cooking zones is active. Only one signal sound will be heard first. ...
Page 22 - Maintenance and care; Glass ceramic surfaces
22/EN 6 Maintenance and care General information Service life of the product will extend and the possibility of problems will decrease if the product is cleaned at regular intervals. DANGER: Disconnect the product from mains supply before starting maintenance and cleaning works. There is the risk of...
Page 23 - Troubleshooting; Check fuses in the fuse box. If necessary, replace or
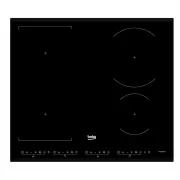
23/EN 7 Troubleshooting Water drops occur during cooking. • The vapour that arises during cooking can condense and form water droplets when it hits cold surfaces of the product. >>> This is not a fault. Product emits metal noises while heating and cooling. • When the metal parts are heated,...