Page 2 - Important Safety Information; ELECTRICAL SAFETY
ii Important Safety Information Improper handling can cause serious damage to the Avallon wine refrigerator and/or injury to the user. This wine refrigerator is designed for domestic indoor use only. Do not use the unit for industrial or commercial use. Any other use may invalidate the warranty. Ple...
Page 3 - GENERAL SAFETY
iii Note: Flammable Refrigerant Used! When handling, moving, and using the refrigerator, make sure to avoid either damaging the refrigerant tubing, or increasing the risk of a leak. Disposal: This appliance may not be treated as regular household waste, it should be taken to the appropriate waste co...
Page 4 - Table of Contents
iv Table of Contents Important Safety Information ..................................................................................................................................................ii Table of Contents ......................................................................................
Page 6 - Introduction
Introduction Thank you for purchasing your Avallon wine refrigerator. Avallon is dedicated to developing products that will enhance your lifestyle with superior quality and distinctive features. Please visit www.avallon.com for more information on your product and other Avallon products. This manual...
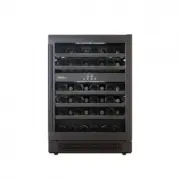
Page 7 - Parts Identification; Full View
Page 8 - Back View; Carbon Filter
3 Back View Carbon Filter A built-in carbon filter protects your wines by acting as a natural barrier against harmful odors. Internal Fan This is an air-cooled unit equipped with an internal fan that maintains a consistent internal temperature. Note: The carbon filter should be replaced every 3- 6 m...
Page 9 - Installing Your Wine Refrigerator; TYPES OF INSTALLATION:; Freestanding Installation
4 Installing Your Wine Refrigerator The wine refrigerator should be installed in accordance with local electrical code requirements. It should also be placed in a location that is strong enough to support its total weight, keeping in mind that it will weigh substantially more when fully loaded than ...
Page 10 - Installation Clearance Requirements:
5 Installation Clearance Requirements: When installing the wine refrigerator under a counter, follow the recommended spacing dimensions shown. • To ensure proper service access and ventilation, allow between 1 - 2 inches of clearance at the back as shown in the diagram. • The installation should all...
Page 11 - RECOMMENDED GROUNDING METHOD:; Installing Your Door Handle and Shelves; INSTALLING THE DOOR HANDLE:
6 RECOMMENDED GROUNDING METHOD: For your personal safety, this appliance must be grounded. It is equipped with a power supply cord having a 3-prong grounding plug. To minimize possible shock hazard, the cord must be plugged into a mating 3-pronged wall socket, and grounded in accordance with the Nat...
Page 12 - INSTALLING THE SHELVES:; REMOVING THE SHELVES:
7 INSTALLING THE SHELVES: 1. Open the door completely. 2. Push the shelf tracks affixed to the walls of the inner cabinet to the rear of the unit so that the tracks are fully seated inside the refrigerator compartment. 3. Line up the rails affixed to the shelf with the corresponding wine refrigerato...
Page 13 - Reversing Your Door Swing
8 Reversing Your Door Swing REVERSING THE DOOR: A. Open the door to a 90 degree angle, take out the 2 screws from the lower door axis (1), remove the door (2) and the axis plate from the door. B. Take out the 3 hinge screws from the top right hinge (3) and remove it. C. Unscrew the 2 screws at the b...
Page 14 - Operation; INSTALLATION CHECK-LIST BEFORE OPERATION:; USING YOUR CONTROL PANEL:; Power Button; Upper Zone Temperature
9 Operation INSTALLATION CHECK-LIST BEFORE OPERATION: 1. Have all packing materials and tape been removed from the interior and exterior of the wine refrigerator? 2. Have the installation instructions been followed, including connecting the machine to electricity? 3. Has proper grounding been instal...
Page 15 - Interior Light; Internal Light; Constant Mode
10 Warning: Allow at least 24 hours for your wine refrigerator to run before storing your wines and to allow the temperature to acclimate. Whether your wine refrigerator can reach the actual set temperature depends on the ambient environmental conditions. Interior Light Press this button to cycle th...
Page 16 - Defrosting
11 Holding the light button for three seconds will turn the lights completely off or back on. If you power the lights off they will remain off, even when the door is open. Hold the light button for three seconds again to turn the lights back on. Defrosting The refrigerator will automatically defrost...
Page 17 - Normal Sounds; Temperature Alarm; Door Ajar Alarm
12 Normal Sounds Your new wine refrigerator may make sounds that are not familiar to you. Most of the new sounds are normal. Hard surfaces like the floor or walls can make the sounds seem louder than they actually are. The following describes the kinds of sounds that might be new to you and what may...
Page 18 - Cleaning and Maintenance; INTERIOR CLEANING:; Preparing Your Wine Refrigerator for Storage
13 Cleaning and Maintenance Periodic cleaning and proper maintenance will ensure efficiency, top performance, and long life. INTERIOR CLEANING: 1. Disconnect power to the unit. 2. Open the door and remove the contents and shelves. 3. Wait until the unit defrosts. 4. With a clean cloth, wipe down the...
Page 19 - Troubleshooting; ISSUE
14 Troubleshooting ISSUE POSSIBLE CAUSE SOLUTION The wine refrigerator turns on and off frequently. The room temperature is higher than the recommended ambient environment. Run the refrigerator at the appropriate ambient temperature. The door is being opened often. Minimize the number of times the d...
Page 21 - Specifications
16 Specifications DESCRIPTION OF PRODUCT Dual Zone Built-In Wine Refrigerator MODEL AWC241DBLSS VOLTAGE / FREQUENCY AC 115 / 60 Hz AMPERAGE 1.5 A INPUT POWER 120 W COLOR Black Cabinet with Black Stainless Steel Door STORAGE CAPACITY 46 Bottles * REFRIGERANT R600a, 1.4 oz. TEMPERATURE RANGE Upper Zon...
Page 22 - Avallon Product Warranty
17 Avallon Product Warranty Warranty Period Avallon will be responsible for: Consumer will be responsible for: 1st year All costs for repairing or replacing parts and/or unit which proves to be defective. All transportation costs in the first 90 days. All transportation costs after 90 days. Limited ...