Avallon AIMG151PSSIRH - User Manual
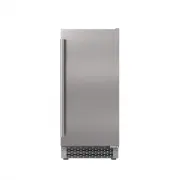
The installation manual for an Avallon ice maker covers essential setup procedures, including safety requirements like proper grounding and electrical compliance to prevent hazards. Key topics include clearance specifications (e.g., 2" back, level surface), plumbing connections with water pressure checks, and drainage configurations (gravity or pump-based). The guide also emphasizes licensed plumber involvement for complex installations and outlines critical steps such as leveling the unit, securing the door handle, and verifying pre-operation setup before initial use.


Table of Contents:
- Page 1 – Installation Procedures and Safety Warnings
- Page 2 – Clearance and Electrical Specifications
- Page 3 – Electrical Safety and Grounding
- Page 4 – Leveling and Door Hardware Installation
- Page 5 – Water Supply and Drain Line Connections
- Page 6 – Installation Checklist and Operation Guidelines
- Page 7 – Storage, Moving, and Operational Sounds
9
!
Warning:
Do not remove any safety, warning, or product information labels from your ice maker.
Installation
The ice maker should be installed by a licensed plumber in accordance with local electrical and plumbing code
requirements. The ice maker should also be placed in a location that is strong enough to support its total
weight.
Before you plug the ice maker into a power supply, be sure to let it stand upright for at least 24 hours
to allow the compressor’s oils to settle.
Unpacking the Ice Maker
Warning:
Use two or more people to move and install the ice maker. Failure to do so can result
in back or other injury. Carefully remove the packaging materials. Remove any shipping tape and
glue from your ice maker before use. Do not use sharp instruments, rubbing alcohol, flammable
fluids, or abrasive cleaners to remove tape or glue. These products can damage the surface of
your ice maker.
!
Warning:
DO NOT install the ice maker behind a closed cabinet door.
!
This ice maker has been designed for freestanding or built-in installation. In each case, there must be adequate
ventilation and access for service. Install the unit in a location where the ambient temperature is above 50°F and
below 100°F.
Freestanding Installation:
A freestanding installation will allow you to install the ice maker in almost any place you desire. You must follow
the stated instructions for electrical requirements and leveling the ice maker.
Built-in Installation:
A built-in installation will allow you to install the ice maker under a counter as long as the required clearance
space around the ice maker is provided. It is necessary to allow adequate ventilation space around the unit,
including at the back of the unit.
The following additional items must be observed:
1.
Place the ice maker in front of the installation location. Adjust the feet and level the unit so it sits properly
on the floor or on a platform depending on your installation requirements.
2.
The water supply line must be plumbed before connecting it to the ice maker. Install the drain line into your
drain.
3.
Turn on the main water supply and tap. Check for water leaks at all connections.
4.
If the electrical outlet for the ice maker is behind the cabinet, plug in the ice maker.
5. Push the ice maker into position.
Types of Installation
"Loading the manual" means you need to wait until the file loads and becomes available for online reading. Some manuals are very large, and the time they take to appear depends on your internet speed.
Was this manual helpful?
About this manual
- Brand
- Avallon
- Model
- AIMG151PSSIRH
- Document type
- User Manual
- Category
- Ice Maker
- Language(s)
- English
- Pages
- 7
- File size
- 382.5 KB
- Format
Summary
Requirements for licensed plumbers, unpacking safety warnings, installation methods for freestanding and built-in units, ambient temperature limits, leveling, plumbing connections, and precautions against installing behind closed cabinets.
Required clearance measurements for side, top, and door swing views, requirements for a firm level surface, and specifications for the electrical supply (115 VAC, 60 Hz).
Requirements for electrical safety, grounding instructions, use of grounded 3-prong outlets, proper circuit setup, and adherence to electrical codes to prevent shock hazards.