atomi smart AT1635 - User Manual
atomi smart AT1635 Heater – User Manual, read for free online in PDF format. We hope this helps you resolve any issues you may have. If you have further questions, please contact us through the contact form.


1
2
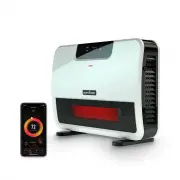
Get the app
Download the Atomi Smart app
from the App Store or Google Play.
Register
Follow the on-screen instructions and register an account.
v2.11/21
Atomi Smart
GET
Register
4
Add your Atomi Smart device
Press “Add Device” or the “+” sign and
select “Connect Device” on the popup that appears
Add Device
5
WiFi
Password
Continue
Select the right network
Enter your home WiFi name and
password, then press “Continue”
Make sure you’re connected to a 2.4GHz WiFi network
(Atomi Smart can’t connect to 5GHz networks).
If the popup does not appear, close the app and try again.
Still nothing? Read the “Troubleshooting” section on this user guide.
If not flashing, press and hold the Power button for 10s to reset.
Make sure to allow access to Location (Android),
Bluetooth and Local Network (iOS).
Let’s get started!
Smart WiFi
Infrared Heater
Quick Start Guide
TO AVOID THE RISK OF AN ELECTRICAL SHOCK, always make sure that the
Smart Heater is unplugged from the electrical outlet before relocating,
servicing, or cleaning it.
CAUTION: To prevent an electric shock, match wide blade of plug to wide
outlet slot and fully insert.
When using electrical appliances, basic safety precautions should always be
followed to reduce the risk of fire, electric shock, and/or injury to people,
including the following:
1.
READ ALL INSTRUCTIONS BEFORE USING.
2. The Smart Heater is hot when in use. To avoid burns, do not let bare skin
touch the hot surfaces. Use the back handle of the heater when moving.
Keep combustible materials such as furniture, pillows, bedding, papers,
clothes, and curtains at least three feet (0.9 m) away from the front of the
heater and keep them away from the sides.
3. Extreme caution is necessary when the heater is being used by or near
children and whenever the heater is left operating and unattended.
4. Do not operate if the cord or plug has been damaged, if the heater
malfunctions, or if it has been dropped or damaged in any manner.
5. Do not use outdoors.
6. The Smart Heater is not intended for use in bathrooms, laundry areas, nor
similar indoor locations. Never place the heater where it may fall into a
bathtub or water container.
7. Do not run the cord under carpeting. Do not cover the cord under throw
rugs, runners, or similar coverings. Do not route the cord under furniture or
appliances. Arrange the cord away from high-traffic areas where it could
be tripped over.
8. To disconnect the Smart Heater, turn controls to “Off”, then remove the
plug from the outlet.
9. Connect to standard outlets only.
10. Do not insert or allow foreign objects to enter any ventilation or exhaust as
this may result in an electric shock or fire. It may also damage the Smart
Heater.
11. To prevent possible fire, do not block air intakes or exhaust in any manner.
Do not use on soft surfaces like a bed where openings may be blocked.
POLARIZED PLUG
This Smart Heater has a polarized plug (one blade is
wider than the other).
As a safety feature to reduce the risk of electrical
shock, this plug is intended to fit in a polarized outlet
only one way. If the plug does not fully insert into the
outlet, try reversing plug.
IMPORTANT SAFEGUARDS
12. The Smart Heater has hot and arcing or sparking parts inside. Do not use
it in areas where gasoline, paint, or flammable liquids are used or stored.
13. Use this Smart Heater only as described in this user manual. Any other
use not recommended by the manufacturer may cause fire, electric
shock, or injury to people.
14. Always plug the Smart Heater directly into a wall outlet/receptacle. Never
use it with an extension cord or relocatable power tap (outlet/power strip).
NOTE:
This appliance is for
HOUSEHOLD USE ONLY
.
ELECTRIC POWER
If the electric circuit is overloaded by other appliances, your Smart Heater
and/or appliances may not operate properly. The Smart Heater should be
operated on a separate electrical circuit from other operating appliances.
Before you begin
1. Remove tie from the power cord and unravel the cord. Keep the plastic
wrapping away from children.
2. Install the Smart WiFi Infrared Heater on the wall or place it on the floor
with the included feet.
3. Know your Wi-Fi network and password.
4. Make sure that you are operating on:
• iPhone
®
8 or higher and iOS
®
8 or higher.
Any previous iPhone
®
or iOS
®
may experience slower connections.
• Android™ 4.1x or higher.
5. Make sure that you’re connected to a 2.4GHz Wi-Fi network (Atomi Smart
app can’t connect to 5GHz networks).
3
Plug in your Atomi Smart device
Use the switch on the back to turn it on
and confirm that the WiFi indicator is flashing.
List of main parts
Control Buttons
Control
Buttons
Heat
Output
Intake
Vent
(both sides)
Power
Switch
Solid
Base
Installation
Smart WiFi
Infrared Heater
Wall Installation
1. Use the included level to ensure you
mark the guide holes correctly.
2. Drill holes for included anchors.
Insert included anchors and screws.
3. Hang the heater onto the screws.
Timer
ECO
High
Low
F
Timer
Set timer to run from 1-12
hours. When using this
setting, heater will power
off after the selected hours.
Mode
Press to change from LOW and HIGH.
Wi-Fi
Button
LED Display
Temperature Control
Set desired room temperature.
Temperature will blink while
adjusting. The heater may take
up to five seconds to respond.
ON/OFF
After power off,
the fan will
continue
to work for
60s and
then stop.
"Loading the manual" means you need to wait until the file loads and becomes available for online reading. Some manuals are very large, and the time they take to appear depends on your internet speed.