Asko CC4525S - User Manual
Asko CC4525S Range Hood – User Manual, read for free online in PDF format. We hope this helps you resolve any issues you may have. If you have further questions, please contact us through the contact form.


Table of Contents:
- Page 2 – EN
- Page 3 – CONTENT
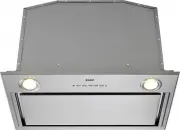
- Page 4 – Description; Introduction; Declaration of conformity; Read the separate safety instructions before; YOUR CANOPY HOOD
- Page 5 – USE; Controls; Switching the fan on and off; Switch the lighting on and off; Grease filter indication
- Page 6 – Carbon filter indicator
- Page 7 – Cleaning; Do not use; Cooker hood; MAINTENANCE
- Page 8 – Grease filters; Removing the grease filters; Lighting; Changing the light bulbs
- Page 9 – INSTALLATION; General; Important that you know:
- Page 10 – Electrical connection
- Page 11 – Montage
- Page 12 – TECHNICAL SPECIFICATIONS; button
- Page 13 – APPENDICE; Disposal; Disposal of appliance and packaging
Instructions for use
Cooker hood
CC4525S / 4000
"Loading the manual" means you need to wait until the file loads and becomes available for online reading. Some manuals are very large, and the time they take to appear depends on your internet speed.
Summary
EN Manual EN 3 - EN 13 Pictograms used : Important information Tip
EN 3 CONTENT Your canopy hood Description 4 Introduction 4 Use Controls 5 Maintenance Cleaning 7 Removing the grease filters 8 Replacing the carbon filter 8 Changing the light bulbs 8 Installation General 9 Electrical connection 10 Mounting the canopy hood 11 Technical specifications 12 Appendice Di...
EN 4 Description L Switch lighting on/off T1 Switch on/off + fan speed 1 T2 Switch on fan speed 2/switch on carbon filter indicator T3 Switch on fan speed 3/reset grease filter indicator T4 Switch on intensive setting S1 Filter indicator Introduction This user manual gives you a quick overview of al...