Page 2 - Besuchen Sie uns auf unserer Website, um:; KUNDENDIENST UND -BETREUUNG
INHALT 1. SICHERHEITSHINWEISE . . . . . . . . . . . . . . . . . . . . . . . . . . . . . . . . . . . . . . . . . . . . . . . . . . . . . . 3 2. BEDIENFELD . . . . . . . . . . . . . . . . . . . . . . . . . . . . . . . . . . . . . . . . . . . . . . . . . . . . . . . . . . . . . . . 5 3. ERSTE INBETRIEB...
Page 3 - SICHERHEITSHINWEISE; Sicherheit von Kindern und
1. SICHERHEITSHINWEISE Lesen Sie zu Ihrer Sicherheit und für eineoptimale Nutzung des Geräts vor derMontage und dem ersten Gebrauch dasvorliegende Benutzerhandbuch ein-schließlich der Ratschläge und Warnun-gen aufmerksam durch. Es ist wichtig,dass zur Vermeidung von Fehlern undUnfällen alle Personen...
Page 5 - BEDIENFELD
• Kontrollieren Sie nach dem Auspacken das Gerät auf eventuelle Beschädigun-gen. Nehmen Sie das Gerät nicht inBetrieb, wenn es beschädigt ist. Mel-den Sie die Schäden umgehend demHändler, bei dem Sie es erworben ha-ben. Bewahren Sie in diesem Fall dieVerpackung auf. • Lassen Sie das Gerät mindestens...
Page 6 - Display; Einschalten des Geräts
zum Senken der Temperatur mehrereSekunden gedrückt. Die Änderung lässtsich rückgängig machen. 2.1 Display 5 7 6 2 4 3 1 FROST MATIC COOL MATIC 1 Uhrfunktion 2 COOLMATIC-Funktion 3 Minute Minder-Funktion 4 Kindersicherung 5 Alarmanzeige 6 Temperaturanzeige 7 FROSTMATIC-Funktion 2.2 Einschalten des Ge...
Page 7 - Funktion Kindersicherung; Funktion COOLMATIC; Alarm „Tür offen“
2. Drücken Sie zur Bestätigung die Tas-te OK. 3. Die Anzeige Minute Minder erlischt. Die Zeit kann während des Countdownsgeändert werden, indem Sie die Tastenzur Erhöhung und Verringerung derTemperatur drücken. 2.6 Funktion Kindersicherung Wählen Sie die Kindersicherung, um dieTasten gegen eine unbe...
Page 9 - PRAKTISCHE TIPPS UND HINWEISE; Normale; Energiespartipps
4.4 Verstellbare Ablagen Die Wände des Kühlschranks sind mit ei-ner Reihe von Führungsschienen ausge-stattet, die verschiedene Möglichkeitenfür das Einsetzen der Ablagen bieten. Die Glasablage über der Gemü-seschublade und der Flaschen-halter sollten jedoch nicht ver-stellt werden, um eine korrekteL...
Page 11 - REINIGUNG UND PFLEGE; Regelmäßige Reinigung; Abtauen des Kühlschranks
• Aufgetaute Lebensmittel verderben sehr schnell und eignen sich nicht fürein erneutes Einfrieren. • Das Haltbarkeitsdatum auf der Tief- kühlkostverpackung darf nicht über-schritten werden. 6. REINIGUNG UND PFLEGE VORSICHT! Ziehen Sie bitte vor jeder Reini-gungsarbeit immer den Netzste-cker aus der ...
Page 12 - Stillstandzeiten
6.3 Abtauen des Gefrierschranks Auf den Ablagen des Gefrier-schranks und im Innern des obe-ren Fachs wird sich stets etwasReif bilden. Tauen Sie den Gefrierschrank ab,wenn die Reifschicht eine Stärkevon etwa 3 bis 5 mm erreicht hat. Entfernen Sie den Reif wie nachstehenderläutert: 1. Schalten Sie da...
Page 13 - Schalten Sie das Gerät ein.
7. WAS TUN, WENN … WARNUNG! Ziehen Sie vor der Fehlersucheimmer den Netzstecker aus derSteckdose.Eine Fehlersuche, die von der inder vorliegenden Gebrauchsan-weisung beschriebenen Fehler-suche abweicht, darf nur von ei-nem qualifizierten Elektriker odereiner Fachkraft durchgeführt wer-den. Während d...
Page 14 - Reinigen Sie den Ablauf.
Problem Mögliche Ursache Abhilfe Wasser fließt an derRückwand des Kühl-schranks herunter. Beim automatischen Ab-tauen fließt das abgetau-te Wasser an der Rück-wand des Geräts herun-ter. Das ist normal. Wasser fließt in denKühlschrank. Der Wasserablauf ist ver-stopft. Reinigen Sie den Ablauf. Die ein...
Page 15 - Warnanzeige; Austauschen der Lampe; MONTAGE; Aufstellung
Problem Mögliche Ursache Abhilfe DEMO erscheint aufdem Display. Das Gerät befindet sichim Demo-Modus. (dEMo) Halten Sie die OK-Tasteca. 10 Sekunden lang ge-drückt, bis ein langer Sig-nalton zu hören ist und dasDisplay für kurze Zeit aus-geschaltet wird. Danacharbeitet das Gerät wiedernormal. 7.1 War...
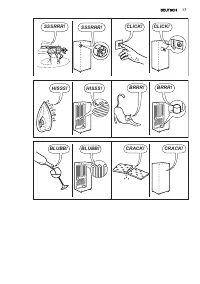
Page 16 - Umgebungstemperatur; SN; Elektrischer Anschluss; GERÄUSCHE; BRRR; SSSRR; OK
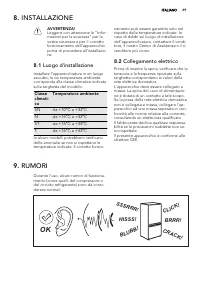
Klima-klasse Umgebungstemperatur SN +10 °C bis +32 °C N +16 °C bis +32 °C ST +16 °C bis +38 °C T +16 °C bis +43 °C Bei einigen Modellen können Funktions-störungen auftreten, wenn sie außerhalbdieses Temperaturbereichs betriebenwerden. Der ordnungsgemäße Betriebwird nur innerhalb des angegebenenTempe...
Page 18 - TECHNISCHE DATEN; Höhe; UMWELTTIPPS; Wohin mit den Altgeräten?
10. TECHNISCHE DATEN Abmessungen der Ein-baunische Höhe 873 mm Breite 560 mm Tiefe 549 mm Spannung 230 V Frequenz 50 Hz Die technischen Informationen befindensich auf dem Typenschild innen links imGerät sowie auf der Energieplakette. 11. UMWELTTIPPS Recyceln Sie Materialien mit demSymbol . Entsorgen...
Page 19 - Visitez notre site Internet pour :
SOMMAIRE 1. INSTRUCTIONS DE SÉCURITÉ . . . . . . . . . . . . . . . . . . . . . . . . . . . . . . . . . . . . . . . . . . . . . . . . 20 2. BANDEAU DE COMMANDE . . . . . . . . . . . . . . . . . . . . . . . . . . . . . . . . . . . . . . . . . . . . . . . . . 22 3. PREMIÈRE UTILISATION . . . . . . . . ...
Page 20 - INSTRUCTIONS DE SÉCURITÉ; Sécurité des enfants et; AVERTISSEMENT
1. INSTRUCTIONS DE SÉCURITÉ Pour votre sécurité et garantir une utili-sation correcte de l'appareil, lisez atten-tivement cette notice, y compris les con-seils et avertissements, avant d'installeret d'utiliser l'appareil pour la premièrefois. Pour éviter toute erreur ou accident,veillez à ce que tou...
Page 21 - Utilisation quotidienne
Si le circuit frigorifique est endomma-gé :– évitez les flammes vives et toute au- tre source d'allumage – aérez soigneusement la pièce où se trouve l'appareil • Ne modifiez pas les spécifications de l'appareil. Si le câble d'alimentationest endommagé, il peut causer uncourt circuit, un incendie et/...
Page 22 - BANDEAU DE COMMANDE
• Déballez l'appareil et vérifiez qu'il n'est pas endommagé. Ne branchezpas l'appareil s'il est endommagé. Si-gnalez immédiatement au revendeurde l'appareil les dommages constatés.Dans ce cas, gardez l'emballage. • Il est conseillé d'attendre au moins quatre heures avant de brancher l'ap-pareil pour...
Page 23 - Affichage; Mise en fonctionnement
secondes. Ce changement est réver-sible. 2.1 Affichage 5 7 6 2 4 3 1 FROST MATIC COOL MATIC 1 Fonction Minuteur 2 Fonction COOLMATIC 3 Fonction Minute Minder 4 Fonction Sécurité enfants 5 Voyant d'alarme 6 Voyant du thermostat 7 Fonction FROSTMATIC 2.2 Mise en fonctionnement Pour mettre l'appareil m...
Page 24 - Fonction Sécurité enfants; Fonction COOLMATIC
1. Appuyez sur la touche Mode jusqu'àce que le voyant Minute Minder cli-gnote. 2. Appuyez sur la touche OK pour con-firmer. 3. Le voyant Minute Minder s'éteint. Il est possible de modifier l'heure à toutmoment et avant la fin du décompte enappuyant sur la touche de réglage pourobtenir plus de froid ...
Page 26 - CONSEILS UTILES; Bruits de fonctionnement
4.4 Étagères amovibles Les parois du réfrigérateur sont équi-pées d'une série de glissières afin queles clayettes puissent être positionnéescomme vous le souhaitez. Pour permettre une bonne circu-lation de l'air, n'enlevez pas laclayette en verre au-dessus dubac à légumes ni le comparti-ment à boute...
Page 28 - ENTRETIEN ET NETTOYAGE; ATTENTION; Nettoyage périodique
• prévoyez un temps réduit au minimum pour le transport des denrées du ma-gasin d'alimentation à votre domicile ; • évitez d'ouvrir trop souvent la porte du congélateur et ne la laissez ouverteque le temps nécessaire ; • une fois décongelés, les aliments se détériorent rapidement et ne peuventpas êt...
Page 29 - débranchez l'appareil; EN CAS D'ANOMALIE DE FONCTIONNEMENT
Dégivrez le congélateur lorsquel'épaisseur de la couche de givreest d'environ 3-5 mm. Pour enlever le givre, suivez les instruc-tions ci-dessous : 1. Mettez l'appareil à l'arrêt. 2. Sortez les denrées congelées, enve-loppez celles-ci dans plusieurs feuil-les de papier journal et conservez-les dans u...
Page 32 - Signal d'avertissement; Remplacement de; INSTALLATION; Positionnement; Température ambiante
7.1 Signal d'avertissement Les signaux d'avertissement du systèmede commande et de signalisation del'appareil apparaissent sur l'affichage vi-suel.Le système émettra un signal si :• une erreur de fonctionnement de l'ap- pareil s'est produite. Dans le cas où lesystème électronique de l'appareil nepeu...
Page 33 - Branchement électrique; BRUITS
après-vente ou le centre de maintenan-ce le plus proche. 8.2 Branchement électrique Contrôlez, avant de brancher l'appareil,si la tension et la fréquence indiquéessur la plaque signalétique correspon-dent à celles de votre réseau.L'appareil doit être relié à la terre. La fi-che du câble d'alimentati...
Page 34 - CARACTÉRISTIQUES TECHNIQUES; Hauteur; EN MATIÈRE DE PROTECTION DE L'ENVIRONNEMENT
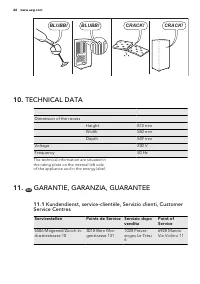
BRRR! BRRR! HISSS! HISSS! BLUBB! BLUBB! CRACK! CRACK! 10. CARACTÉRISTIQUES TECHNIQUES Dimensions de la niched'encastrement Hauteur 873 mm Largeur 560 mm Profondeur 549 mm Tension 230 V Fréquence 50 Hz Les caractéristiques techniques figurentsur la plaque signalétique située sur le côté gauche à l'in...
Page 36 - Visitate il nostro sito web per:; SERVIZIO CLIENTI E MANUTENZIONE
INDICE 1. ISTRUZIONI DI SICUREZZA . . . . . . . . . . . . . . . . . . . . . . . . . . . . . . . . . . . . . . . . . . . . . . . . . . . 37 2. PANNELLO DEI COMANDI . . . . . . . . . . . . . . . . . . . . . . . . . . . . . . . . . . . . . . . . . . . . . . . . . . 39 3. PRIMO UTILIZZO . . . . . . . . ...
Page 37 - ISTRUZIONI DI SICUREZZA; Sicurezza dei bambini e
1. ISTRUZIONI DI SICUREZZA Per garantire un impiego corretto e sicu-ro dell'apparecchio, prima dell'installa-zione e del primo utilizzo leggere con at-tenzione il libretto istruzioni, inclusi isuggerimenti e le avvertenze. Per evitareerrori e incidenti, è importante garantireche tutte le persone che...
Page 39 - PANNELLO DEI COMANDI
• Attorno all'apparecchio vi deve essere un'adeguata circolazione dell'aria, al-trimenti si può surriscaldare. Per otte-nere una ventilazione sufficiente se-guire le istruzioni di installazione. • Se possibile il retro dell'apparecchio dovrebbe essere posizionato controuna parete per evitare di tocc...
Page 41 - Funzione COOLMATIC; Funzione FROSTMATIC; Allarme porta aperta; PRIMO UTILIZZO
Viene visualizzato l'indicatore Sicu-rezza Bambini. Per disattivare la funzione: 1. Premere il tasto Mode fino a quandol'indicatore Sicurezza Bambini nonlampeggia. 2. Premere il tasto OK per confermare. 3. L'indicatore Sicurezza Bambini sispegne. 2.7 Funzione COOLMATIC Se occorre inserire una grande...
Page 42 - UTILIZZO QUOTIDIANO
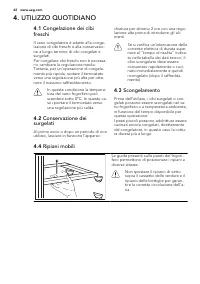
4. UTILIZZO QUOTIDIANO 4.1 Congelazione dei cibi freschi Il vano congelatore è adatto alla conge-lazione di cibi freschi e alla conservazio-ne a lungo termine di cibi congelati esurgelati.Per congelare cibi freschi non è necessa-rio cambiare la regolazione media.Tuttavia, per un'operazione di congel...
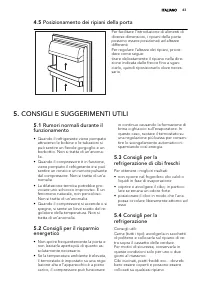
Page 43 - CONSIGLI E SUGGERIMENTI UTILI
4.5 Posizionamento dei ripiani della porta Per facilitare l'introduzione di alimenti didiverse dimensioni, i ripiani della portapossono essere posizionati ad altezzedifferenti.Per regolare l'altezza dei ripiani, proce-dere come segue:tirare delicatamente il ripiano nella dire-zione indicata dalle fr...
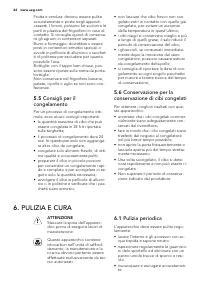
Page 44 - PULIZIA E CURA; ATTENZIONE; Pulizia periodica
Frutta e verdura: devono essere puliteaccuratamente e poste negli appositicassetti. I limoni, possono far scolorire leparti in plastica del frigorifero in caso dicontatto. Si consiglia quindi di conserva-re gli agrumi in contenitori separati.Burro e formaggio: dovrebbero essereposti in contenitori e...
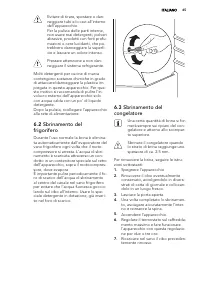
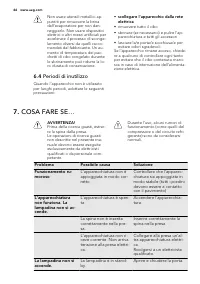
Page 46 - Periodi di inutilizzo; COSA FARE SE...; Problema; Aprire e chiudere la porta.
Non usare utensili metallici ap-puntiti per rimuovere la brinadall'evaporatore per non dan-neggiarlo. Non usare dispositivielettrici o altri mezzi artificiali peraccelerare il processo di sconge-lamento diversi da quelli racco-mandati dal fabbricante. Un au-mento di temperatura dei pac-chetti di cib...
Page 47 - La lampadina è difettosa.
Problema Possibile causa Soluzione La lampadina è difettosa. Vedere "Sostituzione dellalampadina". Il compressore rima-ne sempre in funzio-ne. La temperatura non è re-golata correttamente. Impostare una temperatu-ra superiore. La porta non è chiusa cor-rettamente. Vedere "Chiusura dellap...
Page 48 - Segnale di allarme; Sostituzione della
Problema Possibile causa Soluzione La temperatura nelvano frigorifero ètroppo alta. L'aria fredda non circolacorrettamente all'internodell'apparecchiatura. Adottare le misure neces-sarie per garantire una cor-retta circolazione dell'ariafredda. La temperatura nelvano congelatore ètroppo alta. I surg...
Page 49 - INSTALLAZIONE; Luogo d'installazione; Temperatura ambiente; Collegamento elettrico; RUMORI
8. INSTALLAZIONE AVVERTENZA! Leggere con attenzione le "Infor-mazioni per la sicurezza" per lavostra sicurezza e per il correttofunzionamento dell'apparecchioprima di procedere all'installazio-ne. 8.1 Luogo d'installazione Installare l'apparecchiatura in un luogoasciutto, la cui temperatura ...
Page 51 - DATI TECNICI; CONSIDERAZIONI AMBIENTALI
10. DATI TECNICI Nicchia di incasso Altezza 873 mm Larghezza 560 mm Profondità 549 mm Tensione 230 V Frequenza 50 Hz I dati tecnici sono riportati sulla targhet-ta del modello, applicata sul lato sinistro interno dell'apparecchiatura, e sull'eti-chetta dei valori energetici. 11. CONSIDERAZIONI AMBIE...
Page 52 - Visit our website for:; CUSTOMER CARE AND SERVICE
CONTENTS 1. SAFETY INSTRUCTIONS . . . . . . . . . . . . . . . . . . . . . . . . . . . . . . . . . . . . . . . . . . . . . . . . . . . . . 53 2. CONTROL PANEL . . . . . . . . . . . . . . . . . . . . . . . . . . . . . . . . . . . . . . . . . . . . . . . . . . . . . . . . . . 55 3. FIRST USE . . . . . ...
Page 53 - SAFETY INSTRUCTIONS; Children and vulnerable
1. SAFETY INSTRUCTIONS In the interest of your safety and to en-sure the correct use, before installingand first using the appliance, read thisuser manual carefully, including its hintsand warnings. To avoid unnecessary mis-takes and accidents, it is important toensure that all people using the appl...
Page 55 - CONTROL PANEL
• The appliance must not be located close to radiators or cookers. • Make sure that the mains plug is ac- cessible after the installation of the ap-pliance. • Connect to potable water supply only (If a water connection is foreseen). 1.6 Service • Any electrical work required to do the servicing of t...
Page 57 - FROSTMATIC function; Door open alarm; FIRST USE; Cleaning the interior; DAILY USE; Freezing fresh food
To switch on the function: 1. Press the Mode button until the cor-responding icon appears.The COOLMATIC indicator flashes. 2. Press the OK button to confirm.The COOLMATIC indicator isshown. The COOLMATIC function shuts off au-tomatically after approximately 6 hours.To switch off the function before ...
Page 59 - HELPFUL HINTS AND TIPS
5. HELPFUL HINTS AND TIPS 5.1 Normal Operating Sounds • You may hear a faint gurgling and a bubbling sound when the refrigerantis pumped through the coils or tubing.This is correct. • When the compressor is on, the refrig- erant is being pumped around andyou will hear a whirring sound and apulsating...
Page 60 - CARE AND CLEANING; Periodic cleaning
partment, can possibly cause the skinto be freeze burnt; • it is advisable to show the freezing in date on each individual pack to enableyou to keep tab of the storage time. 5.6 Hints for storage of frozen food To obtain the best performance fromthis appliance, you should:• make sure that the commer...
Page 61 - Defrosting the freezer; Periods of non-operation; WHAT TO DO IF...
6.3 Defrosting the freezer A certain amount of frost will al-ways form on the freezer shelvesand around the top compart-ment. Defrost the freezer when thefrost layer reaches a thickness ofabout 3-5 mm. To remove the frost, do these steps: 1. Switch off the appliance. 2. Remove any stored food, wrap ...
Page 62 - Switch on the appliance.
Problem Possible cause Solution The appliance isnoisy The appliance is not sup-ported properly Check if the appliancestands stable (all the fourfeet should be on thefloor) The appliance doesnot operate. Thelamp does not oper-ate. The appliance is switchedoff. Switch on the appliance. The mains plug ...
Page 63 - Set a higher temperature.; Warning signal
Problem Possible cause Solution The temperature inthe appliance is toolow. The temperature regula-tor is not set correctly. Set a higher temperature. The temperature inthe appliance is toohigh. The temperature regula-tor is not set correctly. Set a lower temperature. The door is not closedcorrectly....
Page 64 - Positioning; Ambient temperature; Electrical connection
7.2 Replacing the lamp The appliance is equipped with a long-life LED interior light. Only service is allowed to replace thelighting device. Contact your ServiceCenter. 7.3 Closing the door 1. Clean the door gaskets. 2. If necessary, adjust the door. Referto "Installation". 3. If necessary, ...
Page 65 - NOISES
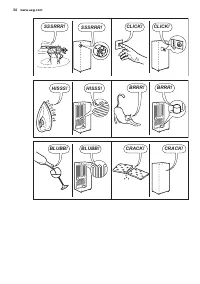
9. NOISES There are some sounds during normalrunning (compressor, refrigerant circula-tion). BRRR ! HISSS! CLICK! BLUBB! CRACK! SSSRR R! OK CLICK! CLICK! SSSRRR! SSSRRR! BRRR! BRRR! HISSS! HISSS! ENGLISH 65
Page 66 - TECHNICAL DATA; Service Centres; Servicestellen
BLUBB! BLUBB! CRACK! CRACK! 10. TECHNICAL DATA Dimension of the recess Height 873 mm Width 560 mm Depth 549 mm Voltage 230 V Frequency 50 Hz The technical information are situated inthe rating plate on the internal left sideof the appliance and in the energy label. 11. CH GARANTIE, GARANZIA, GUARANT...
Page 67 - Garantie; Garanzia; Warranty; ENVIRONMENT CONCERNS
Servicestellen Points de Service Servizio dopo vendita Point ofService 9000 St. Gallen Zürcher-strasse 204e 4052 Basel St. Jakob-Turm Birsstrasse 320B 6020 Emmenbrücke See-talstrasse 11 7000 Chur Comercial-strasse 19 Ersatzteilverkauf/Points de vente derechange/Vendita pezzi di ricambio/spare parts ...